background image


Page 2 of 6 


W

ARNING


Turn appliance OFF and allow to cool before installing or servicing.  DO NOT connect 

110-120 VAC wiring to the millivolt gas control valve.  The remote operator must be installed 

exactly as outlined in these instructions.  Read all instructions completely before attempting 

installation.  Follow instructions carefully during installation.  Any modification of 

components will void the warranty and may cause a fire hazard.


Transmitter:


Installing Batteries

:                                                                                                                                                

The remote transmitter uses two (2) “AAA” batteries.  To install batteries:                                                                                                                         

1.


Press down the battery door and remove the battery door. 

2.


Install uses two (2) “AAA” batteries  as indicated on transmitter. 

3.


Close the battery door by snapping in place. 

4.


The batteries should be replaced when the low battery indicator display in LCD. 

5.


When both batteries are installed, the transmitter will initialize for 1 seconds and then is ready for use. 


LEARNING TRANSMITTER TO RECEIVER 

1.


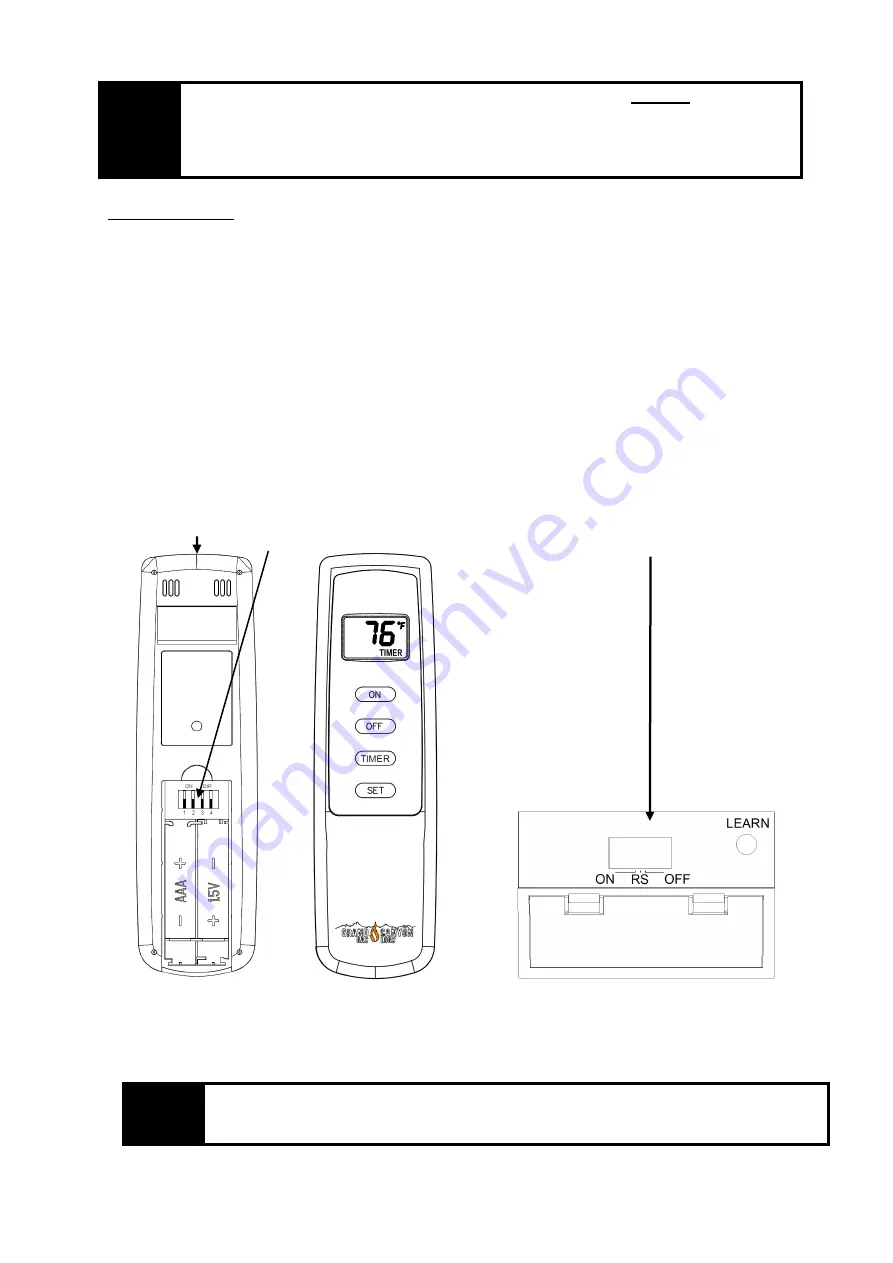
The transmitter privacy (DIP) Switches are preset at the factory.  Setting the 4 bits DIP Switches on 

transmitter to select a security code.  

2.


 Put the receiver slide switch to “

RS”

 location. Using a small screwdriver or end of a paper clip gently press 

and hold the 

‘LEARN ‘

button on the receiver to accept the transmitter security code upon initial use, when you 

release the 

LEARN

 button the receiver will emit an audible 3 “beep” sounds 

3.


 After the receiver emits 3 “beep” sounds. Press the transmitter “ON “or “OFF” button and release at once. 

The receiver will emit several beeps indicating that the transmitter’s code has been accepted into the receiver.  

4.


 If you are unsuccessful in matching the security code on the first attempt repeat step 1-3 


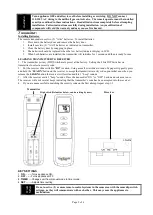
             Transmitter                                                                                               

                                      Dip Switch (Default as below, can be setting by user)                      

Receiver 


KEY SETTINGS


1. 

ON 

- - ------

Turns appliance ON.


2. 

OFF 

- -----Turns appliance OFF.


3. TIMER 

- --Changes unit from manual mode to timer mode.


4. 

SET 

- ------Adjusts timer setting.


WA

R

NI

NG


Do not use two (2) or more remote-control systems in the same area with the same dip switch 

settings, as they will communicate with each other.  This may cause the appliances to 

malfunction.


Содержание GCRK

Страница 1: ...sitive temperature monitoring components in the transmitter it is necessary to allow the transmitter to stabilize to room temperature before accurate room temperature are displayed If the transmitter is activated from a severe cold condition allow 15 minutes for accurate temperature reading to appear on the LCD WARNING Important Safety Information Read this manual thoroughly prior to installing pr...

Страница 2: ...ansmitter privacy DIP Switches are preset at the factory Setting the 4 bits DIP Switches on transmitter to select a security code 2 Put the receiver slide switch to RS location Using a small screwdriver or end of a paper clip gently press and hold the LEARN button on the receiver to accept the transmitter security code upon initial use when you release the LEARN button the receiver will emit an au...

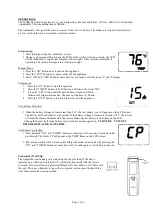
Страница 3: ...setting time is 180 min 4 Press the OFF button to turn OFF the timer and the appliance Low battery detection 1 When the battery voltage of remote less than 2 2V the low battery icon will appear on the LCD screen The battery will be checked every3 minute If the battery voltage of remote is less than 1 8V the remote will send the flame off command to the receiver and only low battery icon display on...

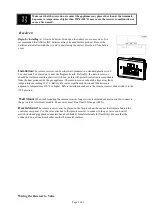
Страница 4: ...otect its electronic components from the heat produced by the gas appliance The remote receiver should be kept away from temperatures exceeding 130º F Battery life is also significantly shortened if batteries are exposed to temperatures 130ºF or higher Before installation make sure the remote receiver slide switch is in the OFF position Wall Mount When wall mounting the remote receiver longer wire...

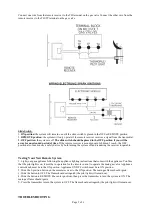
Страница 5: ...oth turning the system off and rendering the receiver inoperable Testing Your New Remote System 1 Light your gas appliance following the appliance lighting instructions that come with the appliance Confirm that the pilot light is on it must be in operation for the remote control to operate the main gas valve Appliance control knob must be in the ON position Appliance ON OFF switch must be in ON po...

Страница 6: ...ransmitter does not match receiver 1 Make sure the transmitter is matched to the receiver 2 Transmitter measures temperature exceeding 99 degrees and shows HI on LCD display 2 Move transmitter to a cooler place and wait until temperature drops below 99 degrees 3 Distance between the transmitter and receiver is more than 30 feet 3 Make sure the operating distance is less than 30 feet Receiver canno...

Отзывы: