


50.04.504 / 1.0
Copyright by GOVI GmbH 2021. The reproduction of this document or any part thereof is prohibited. We reserve the right to make technical changes during the course of further developments.
OPERATION MANUAL - Trailer Refrigeration Unit
arktik 1600N • 1600 N/T • 2000N • 2500N • 2000P • 2500 N/K • 2000 P/K
17
Page
6. Installation
6.1
Conditions for Installation
1.
Read this manual carefully in order to understand how to properly
perform the installation.
2.
Verify that the trailer refrigeration unit is delivered according to your
order, is in good condition and has no visible damages.
3.
Check that all necessary tools and all additionally required parts are
not missing and that are in good operating condition.
4.
Verify that the installation site of the trailer refrigeration unit provides
a flat surface without unevenness, which may cause vibrations.
5.
Check that the front wall of the trailer refrigeration unit is able to
adequately support its weight.
6.
Make sure that the loading crane or lifting device, and the complete
lifting cables are of sufficient size to support the weight of the trailer
refrigeration units. Look at
section 3 Technical Data
for information
about the weight.
7.
Note that the power supply of the trailer refrigeration unit cannot be
connected before the installation of the unit and its accessories has
been completed.
8.
Provide protection to the trailerʼs walls and/or internal parts to
prevent damage by swarf and alike during the installation process.
6.2
Additional Parts and Equipment
Because of the wide variety of installation options available, the
trailer refrigeration unit is not shipped with all parts needed for every
possible installation situation. The installer needs to make sure that the
following parts are available.
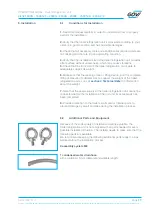
We recommend keeping the following additional parts ready in a box
before starting the installation process:
2 assembly eyelets M8
1 condensed water drain hose
with an internal 15-mm diameter and suitable length.