background image

TAIYO ELECTRIC IND.CO.,LTD.

2

TAIYO ELECTRIC IND.CO.,LTD.

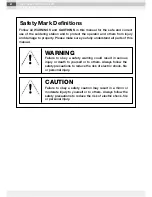
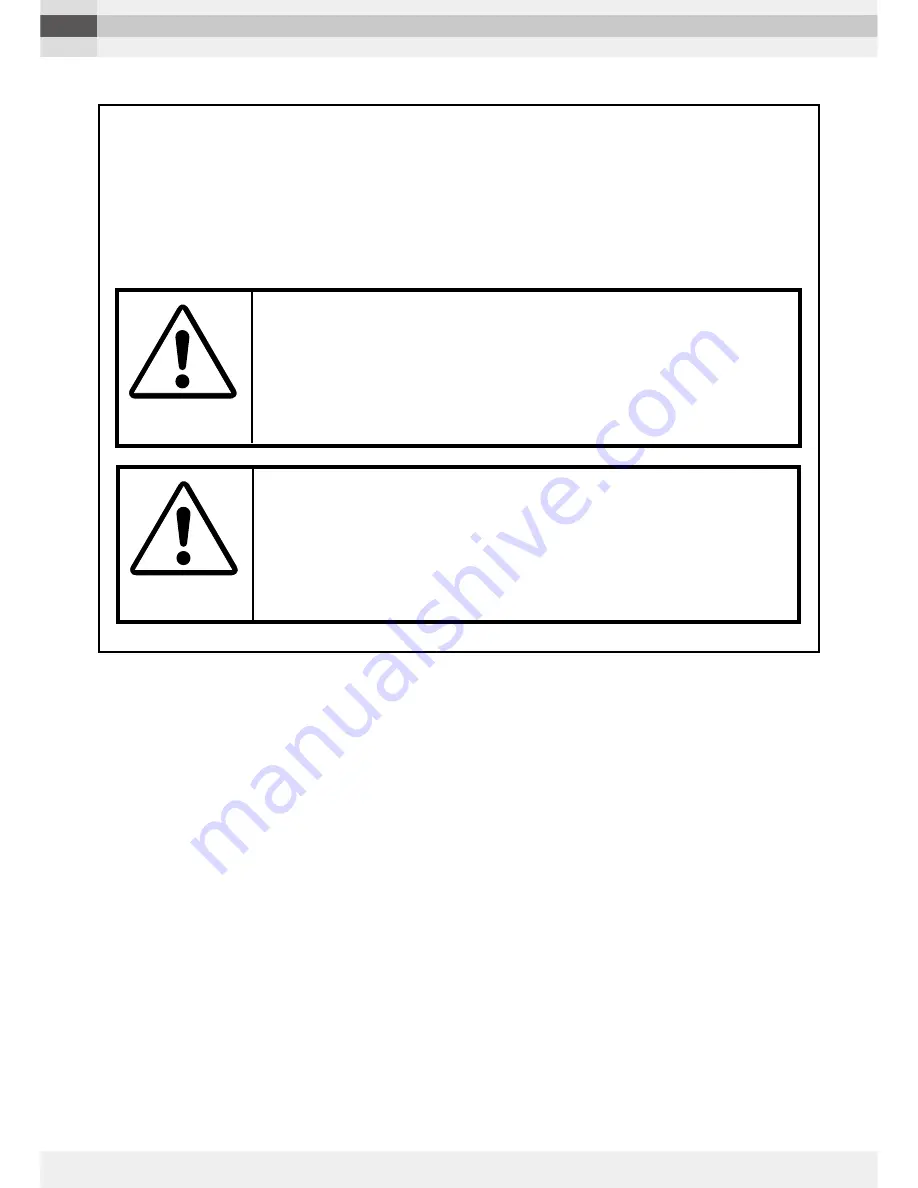
WARNING

Failure to obey a safety warning could result in serious 
injury or death to yourself or to others. Always follow the 
safety precautions to reduce the risk of electric shock, fire 
or personal injury.

CAUTION

Failure to obey a safety caution may result in a minor or 
moderate injury to yourself or to others. Always follow the 
safety precautions to reduce the risk of electric shock, fire 
or personal injury.

Safety Mark Definitions

Follow all WARNINGS and 

CAUTIONS

 in this manual for the safe and correct 

use of the soldering station and to protect the operator and others from injury 
and damage to property. Please make sure you fully understand all parts of this 
manual.

Содержание RX-822AS

Страница 1: ...ns in this manual and use the soldering station properly and only for what it is intended you will enjoy years of safe reliable service Thank you again for buying a goot soldering station WARNING Befo...

Страница 2: ...obey a safety caution may result in a minor or moderate injury to yourself or to others Always follow the safety precautions to reduce the risk of electric shock fire or personal injury Safety Mark D...

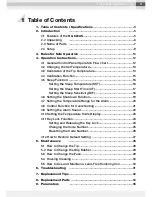
Страница 3: ...T 17 Setting the Sleep Sensitivity DIF 18 4 6 Setting the Shutdown Function 19 4 7 Setting the Temperature Range for the Alarm 20 4 8 Control Function for Overshooting 21 4 9 Setting the Alarm Sound 2...

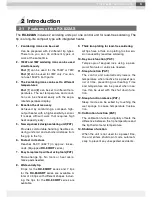
Страница 4: ...174mm with RX 85HRT 5D w o cord bushing RX 80GAS Soldering unit 2 side 158mm with RX 80HRT B w o cord bushing Weight Control Unit Approx 4 9kg w o cord RX 85GAS Soldering unit 1 side Approx 39g with R...

Страница 5: ...pads needed 8 Wide variety tip 9 tips for the RX 85HRT series and 7 tips for the RX 85HSRT series are available A total of 43 tips with different shapes includ ing the tips for the RX 80HRT series are...

Страница 6: ...ms listed below are included and that the soldering station functions properly before throwing away the packaging 2 2 Unpacking RX 822AS INSTRUCTION MANUAL KEY LO CK RX 822 HE AT SL EE P 1 TE MP C A S...

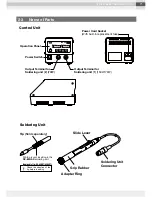
Страница 7: ...ng unit 2 72W Output Terminal for Soldering unit 1 150W 72W Applicable Tip RX 85HRT 85HSRT Tip Sold separately Rib to prevent inserting in the RX 80GAS soldering unit Check the direction of the tip be...

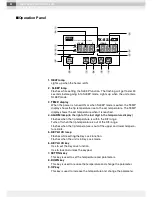
Страница 8: ...hen it is reached 4 ALARM lamp to the right of the last digit in the temperature display Flashes when the tip temperature is within the DIF range Turns off when the tip temperature is out of the DIF r...

Страница 9: ...dering unit RX 80GAS 72W Soldering unit RX 85GAS RX 80GAS 150W 72W RX 80HRT Series Sold separately 72W integrated heater RX 85HRT RX 85HSRT Series Sold separately 150W high power integrated heater Out...

Страница 10: ...the soldering station should be stored in a dry and locked place Keep out of the reach of children 5 USE FOR THE RIGHT JOB This soldering station is an electrical tool used to solder parts and melt s...

Страница 11: ...with the soldering station If this stand is not used the plastic parts adapter ring and or soldering unit housing of the soldering iron unit could become damaged Position the soldering iron stand on a...

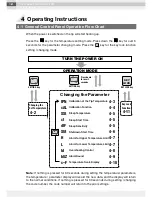
Страница 12: ...K key KEY LOCK tPN Calibration of the Tip Temperature 4 3 cAL Calibration Function 4 4 SSt Sleep Temperature 4 5 ct Sleep Start Time 4 5 dIF Sleep Sensitivity 4 5 SUt Shutdown Start Time 4 6 H Alarm f...

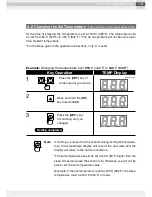
Страница 13: ...Key Operation TEMP Display Press the SET key of soldering unit you changed Note If nothing is pressed for 30 seconds during setting the tempera ture the temperature display will record the new data a...

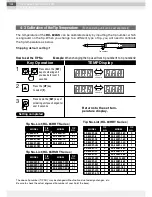
Страница 14: ...T 1C 4 RX 80HRT 2C 4 RX 80HRT 3C 2 RX 80HRT 3BC 1 RX 80HRT 4C 1 RX 80HRT BM 1 RX 80HRT 2CD 4 RX 80HRT 3CD 2 RX 80HRT 4 7C 1 MODEL TIP NO RX 85HRT B L2 RX 85HRT 2BC L1 RX 85HRT 3BC L1 RX 85HRT 5BC L1 R...

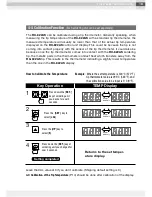
Страница 15: ...or The RX 822AS can be calibrated using a tip thermometer Generally speaking when measuring the tip temperature of the RX 822AS with a standard tip thermometer the measured temperature will usually be...

Страница 16: ...will alternate between SLP and the temperature To use sleep function manually during operation for soldering unit 1 press down the UP key for over 1 second and for soldering unit 2 press down the DOW...

Страница 17: ...e sleep function will be turned off and the SLEEP lamp will turn off 1 4 Press down the SET key of soldering unit you changed for over 3 seconds Press down the SET key of soldering unit you desire for...

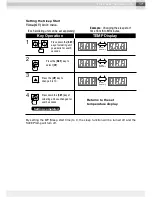
Страница 18: ...value DIF is set too low there is a possibility that the sleep function will not be activated even after passing the set sleep start time If this happens increase the sleep sensitive value 1 4 Press...

Страница 19: ...F Sensitivity When using together with Sleep function Shutdown Function SUT Power OFF Soldering tip temperatrue Set temperature Power ON Time Operation DIF DIF Sensitivity Shutdown start time Key Oper...

Страница 20: ...alternately Displays alternately Displays alternately Displays alternately Upper Temperature Limit Lower Temperature Limit Lower Temperature Limit This function warns the operator with an alarm when...

Страница 21: ...HSRT but Overshoot can be con trolled by setting the parameters 4 8 Control function for overshooting Each soldering unit can be set separately 4 Press down the SET key of soldering unit you changed f...

Страница 22: ...Display Press down the SET key for over 3 seconds 4 9 Setting the Alarm Sound 3 Press the DOWN key to select big biG small SmL or off oFF 1 Press down either of the SET keys for over 3 seconds 2 1 or...

Страница 23: ...ipping Default Setting Celsius C The temperature can be displayed in either Celsius or in Fahrenheit 4 10 Setting the Temperature Scale Display Key Operation TEMP Display Displays alternately Returns...

Страница 24: ...r from 001 to 999 When the code number is set correctly the number will flash 5 times If an incorrect code number is input the display will show NG and return to the initial display 4 11 Key Lock Func...

Страница 25: ...pres ent code number Press the KEY LOCK key Changing the Code Number 2 Press down the KEY LOCK key for over 3 seconds 4 Press the KEY LOCK key 5 Input the desired new code number using the UP DOWN key...

Страница 26: ...change the settings Therefore this manual should be given to authorized person nel only Resetting the Code Number 1 4 Press the KEY LOCK key Key Operation TEMP Display 3 Input 471 using the UP DOWN ke...

Страница 27: ...e shown above the code num ber cannot be reset When you want to delete the code numbers please follow the procedure Resetting the Code Number 4 12 How to Restore Default Settings 1 Key Operation TEMP...

Страница 28: ...changing to a different type of tip be sure to input the Tip No Refer to page 14 Since the heater is integrated into the tip replacement of only the heater or the tip is not possible Slide Lever A KE...

Страница 29: ...How to Change the Grip Rubber 1 Place a slotted screwdriver in the slot to pull out the fuse box 2 Press both sides of the fuse box to remove it A spare fuse is stored on the other side of the fuse b...

Страница 30: ...of solder is necessary The tin surface of a lead free soldering iron oxidizes easily Coating it with solder reduces oxidation levels Oxidation starts as soon as the tool is plugged in and begins to h...

Страница 31: ...llowing checklist Will not switch ON Check that the power cord is plugged in Check that the fuse is not blown The soldering iron tip will not heat up Check that the heater is not damaged Error message...

Страница 32: ...11 5 2 4 0 8 Slim type 6 11 5 3 2 0 8 Slim type 45 5 11 5 2 Slim type 45 11 5 6 3 45 14 4 5 2 5 Slim type Slim type RX 85HRT series 150W Applicable Soldering Unit RX 85GAS CAUTION RX 85HRT replacement...

Страница 33: ...T 5 4D RX 80HRT 3 2D 2 11 5 1 2 2 3 2 RX 80HRT 4C RX 80HRT 3C RX 80HRT 2 3BC RX 80HRT SB RX 80HRT 0 5C RX 80HRT 4 7C RX 80HRT 2 4D RX 80HRT 2CD 13 30 RX 80HRT LBJ 4 7 10 5 2 RX 80HRT 4 5KH 5 5 10 2 5...

Страница 34: ...port 1 and 2 72W 2 Soldering Iron Stand ST 21 3 Soldering Iron Stand Sponge ST 53SP Replacement sponge for ST 21 4 Soldering Iron Stand Cleaner ST 40BW Replacement Brass shaving for ST 21 2pcs set Fou...

Страница 35: ...Number tPn 0 4 L1 L3 1 Temperature Calibration cAL 50 50 0 Sleep Set Temp SSt 0 Pt 50 200 Sleep Timer ct 0 00 999 Minute 5 Sleep Sensitivity diF 0 0 20 0 2 0 Shutdown Start time SUt 0 999 Minute 60 U...

Страница 36: ...DERING EQUIPMENT AND ACCESSORIES TAIYO ELECTRIC IND CO LTD Customer service Contact your nearest distributor goot is a registered trademark of TAIYO ELECTRIC IND CO LTD Printed in Japan A1240RX00 OCTO...

Отзывы: