background image

 Chapter 3 Taking still images or videos

23

A

djusting the camer

a se

ttings using the menus

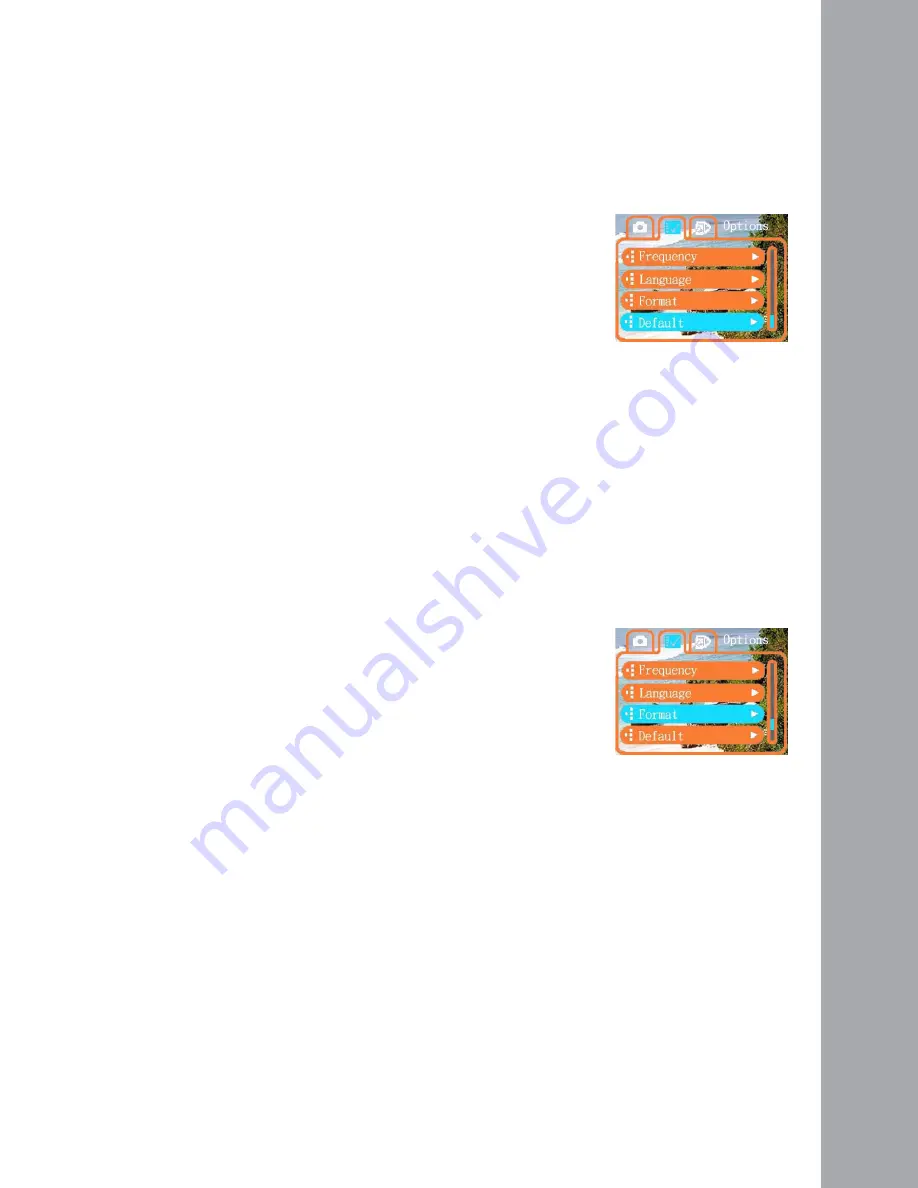
Restoring defaults

Use the setup menu to restore the camera settings to their default 
values as follows:

1. Turn on the camera and switch to picture mode.
2. Press 

Menu

.

3. Move the 5-way button left or right to 

navigate to the 

Options

 menu.

4. Move the 5-way button up or down to 

highlight the 

Default

 submenu.

5. Move the 5-way button right to open 

the

Default

 submenu.

6. Move the 5-way button up or down to 

select 

Confirm

 to reset the camera or 

Cancel

 to cancel the operation.

7. Press 

OK

 when finished.

Formatting the memory

Use the following procedure to format the camera’s memory:

1. Turn on the camera and switch to picture mode.
2. Press 

Menu

.

3. Move the 5-way button left or right to 

navigate to the 

Options

 menu.

4. Move the 5-way button up or down to 

highlight the 

Format

 submenu.

5. Move the 5-way button right to open 

the

Format

 submenu.

6. Move the 5-way button up or down to 

select 

Confirm

 to format the memory 

or

Cancel

 to cancel the operation.

7. Press 

OK

 when finished.

The camera memory is formatted and all the 
files including the protected files are deleted.

Warning: Formatting memory will cause all files stored in memory to be erased. 

Make sure you have backed up any files you want to keep.

Содержание G-SHOT 3027

Страница 1: ... mode 11 Taking pictures 11 Adjusting the camera settings using the camera buttons 12 Using the digital zoom 12 Using the flash 12 Using the self timer 13 Taking sequences 13 Changing the focus setting 14 Recording videos 14 Adjusting the camera settings using the menus 15 Using the scene settings 15 Setting the resolution 16 Setting the white balance 16 Setting the quality 18 Setting the EV adjus...

Страница 2: ... the slideshow function 29 Setting the starting point 29 Setting the slideshow interval 30 Setting the direction 30 Repeating the slideshow 31 Starting the slideshow 31 Ordering prints 32 Using DPOF 32 Connecting to a PC Installing the software 33 Changing the USB setting 34 Connecting the USB cable 34 Appendix Specifications 35 Error Messages 36 ...

Страница 3: ...al camera can also record movies and has an 4x digital zoom Features Compact stylish design Digital zoom 4 3 1 megapixel CMOS 2074 1540 pixels IMPORTANT For Best results always use Duracell M3 AAA batteries Video capture resolution of 640 x 480 or 320 x 240 Convenient 1 5 inch LCD Supports SD card media Built in 16 MB memory Self timer mode Continuous shooting mode USB 2 0 port full speed ...

Страница 4: ...hing is missing or damaged contact your dealer immediately Retain the packaging in case you need to ship the digital camera in the future Digital camera Hand strap Quick start guide User manual on CD AAA batteries 2 USB cable CD ROM including drivers and software Camera overview Familiarize yourself with the controls of the digital camera with the illustrations below Front view ...

Страница 5: ...LED LCD Menu button Zoom buttons 5 way button LCD button Mode button Flash button Focus button Right Left USB port Hand strap eyelet Chapter 1 Introduction 3 Camera overview Rear View Side Views ...

Страница 6: ...Shutter button Power button Tripod mount Battery com partment SD card compartment Camera overview User Manual 4 Top View Bottom View ...

Страница 7: ...e long loop of the hand strap through the short loop 3 Pull the long loop tight Inserting the batteries 1 Slide the battery cover on the underside of the camera in the direction of the arrow 2 Open the cover 3 Insert the batteries into the compartment observing correct polarity 4 Close the cover and snap it into place in the direction of the arrow ...

Страница 8: ...erting and removing an SD card 1 Insert the SD card into the slot with the label facing the same direction as the front of the camera until it clicks into place Note SD cards can only be inserted facing one direction If the card does not enter the slot easily do not force it Make sure the card is facing the correct direction 1 To remove the SD card push it in until it clicks 2 Pull the SD out totu...

Страница 9: ...through the on screen menus The LCD displays icons to indicate camera settings Changing LCD settings The LCD starts in normal setting In Picture or Video mode Press the LCD button once to turn on the framing grid Press the LCD button again to turn off the icons Press the LCD button again to turn off the LCD Press the LCD button again turn the LCD on and display the icons In Playback mode Press the...

Страница 10: ...lity Flash icon Picture mode icon White balance setting Zoom Focus bracket Current file number Battery status icon Resolution Playback mode icon File type DPOF icon Total file number Using the LCD display User Manual 8 Understanding the LCD icons Each mode has different icons to indicate settings Picture mode Playback mode ...

Страница 11: ...Video mode icon Zoom Video resolution Video length EV adjust setting Battery status icon White balance setting Chapter 2 Getting Started 9 Using the LCD display Video mode ...

Страница 12: ......

Страница 13: ...se the third mode Playback mode to view pictures and videos Use the Mode switch to change modes Move the switch to the left to select Picture mode Move the switch to the center to select Playback mode Move the switch to the right to select Video mode Taking pictures 1 Turn the camera on Make sure the camera is in Picture mode 2 Frame the picture using the LCD 3 Press the Shutter button Mode switch...

Страница 14: ...take enlarge the subject without moving closer 1 Turn the camera on Make sure the camera is in Picture or Video mode 2 Frame the picture using the LCD 3 Press the Zoom in button to increase the zoom and take a close up picture of the subject with more detail Press the Zoom out button to decrease the zoom and take a wider pic ture with less detail 4 Press the Shutter button to take the picture Usin...

Страница 15: ...e self timer with a two sec ond delay The icon appears Press the Right arrow again to set the delay to 10 seconds The icon appears 5 Press the Shutter button The counter begins counting down on the LCD The LED on the front of the camera flashes once a second to count down Note To cancel the self timer press the Right button until no icon is displayed Taking sequences You can take sequences of pict...

Страница 16: ...ng videos User Manual 14 Changing the focus setting You can change the focus setting of the digital camera for different conditions Change the setting using the Focus switch Recording videos 1 Turn the camera on Make sure the camera is in Video mode 2 Frame the picture using the LCD 3 Press the Shutter button The video begins to record 4 Press the Shutter button when you have finished to stop reco...

Страница 17: ...s menu item to specify a setting according to the light environment in which you are taking pictures To set the scene do the following 1 Turn on the camera and switch to picture mode 2 Press Menu 3 Move the 5 way button left or right to navigate to the Capture menu 4 Move the 5 way button up or down to highlight the Scene submenu 5 Move the 5 way button right to open the Scene menu 6 Move the 5 wa...

Страница 18: ...button right to open the Resolution submenu 6 Move the 5 way button up or down to select from the scene options Picture mode VGA 1 3M 3 1M Video mode CIF VGA 7 Press OK when finished Setting the white balance The white balance enables you to change the preset white balance setting to suit the lighting conditions in which the picture is taken 1 Turn on the camera and switch to picture mode 2 Press ...

Страница 19: ...3 Taking still images or videos 17 Adjusting the camera settings using the menus 6 Move the 5 way button up or down to select from the options Auto Daylight Cloudy Tungsten Fluorescent 7 Press OK when finished ...

Страница 20: ...ress Menu 3 Move the 5 way button left or right to navigate to the Capture menu Video menu in Video mode 4 Move the 5 way button up or down to highlight the Image quality submenu in the picture mode or Video Quality submenu in the video mode 5 Move the 5 way button up or down to select from the quality options Picture mode Basic 1 16 Better 1 12 Best 1 8 6 Press OK when finished ...

Страница 21: ...er speed for producing optimum quality pictures Setting a higher EV compen sation value will over expose a shot while setting a lower value will under expose a shot Exposure can be adjusted from 2 0 to 2 0 The value is shown on the LCD display To change the EV compen sation value do the following 1 Turn on the camera and switch to picture mode 2 Press Menu 3 Move the 5 way button left or right to ...

Страница 22: ...ove the 5 way button left or right to navigate to the Capture menu 4 Move the 5 way button up or down to highlight the ISO submenu 5 Move the 5 way button right to open the ISO submenu 6 Move the 5 way button up or down to select from the ISO options Auto 100 Setting the USB options Use this option to specify whether the camera is used for storage or as a web camera when connected to the PC Refer ...

Страница 23: ...tion where you are using the camera UK 50Hz This prevents lights flickering when taking pictures or video 1 Turn on the camera and switch to picture mode 2 Press Menu 3 Move the 5 way button left or right to navigate to the Options menu 4 Move the 5 way button up or down to highlight the Frequency submenu 5 Move the 5 way button right to open the Frequency submenu 6 Move the 5 way button up or dow...

Страница 24: ...ton left or right to navigate to the Options menu 4 Move the 5 way button up or down to highlight the Language submenu 5 Move the 5 way button right to open the Language submenu 6 Move the 5 way button up or down to select from one of the following options English German French Italian Spanish Dutch Czech Polish Russian Traditional Chinese Simplified Chinese 7 Press OK when finished Bulgarian Port...

Страница 25: ...cancel the operation 7 Press OK when finished Formatting the memory Use the following procedure to format the camera s memory 1 Turn on the camera and switch to picture mode 2 Press Menu 3 Move the 5 way button left or right to navigate to the Options menu 4 Move the 5 way button up or down to highlight the Format submenu 5 Move the 5 way button right to open the Format submenu 6 Move the 5 way bu...

Страница 26: ......

Страница 27: ...r movie clips Move the Mode switch to center to switch to playback mode The LCD screen displays the most recent image If the most recent file is a video clip it displays the first frame of the movie clip on the screen Mode switch ...

Страница 28: ... playback mode you can easily delete any pictures or video clips that you are not satisfied with before transferring them to the PC To delete unwanted files do the following 1 In playback mode use the 5 way button to browse to the image or video clip that you want to erase 2 Move the 5 way button down to display the Erase menu 3 Using the 5 way button select one of the following options All erases...

Страница 29: ...e image or video clip that you want to protect 2 Move the 5 way button up to display the Protect menu 3 Using the 5 way button select one of the following options Current All Cancel 4 Press OK to confirm the operation The selected files are protected If the selected file is previously protected the Unprotect menu is displayed when you move the 5 way button up Remove the lock if required in a manne...

Страница 30: ...t the Resize submenu 5 Move the 5 way button right to open the Resize submenu 6 Move the 5 way button up or down to select from the resize options VGA 1 3M 2 0M or 3 1M 7 Press OK when finished Rotating images To rotate an image do the following 1 In playback mode use the 5 way button to browse to the image that you want to rotate 2 Press Menu 3 Move the 5 way button left or right to navigate to t...

Страница 31: ...he first frame of the video clips are displayed during the slide show Refer to the following sections to set up a slide show Setting the starting point To specify the starting point of the slide show do the following 1 Press Menu 2 Move the 5 way button left or right to navigate to the Slide menu 3 Move the 5 way button up or down to highlight the Show submenu 4 Move the 5 way button right to open...

Страница 32: ...enu 5 Move the 5 way button up or down to select one of the following options for the interval 1 sec 3 sec 5 sec 6 Press OK when finished Setting the direction To specify the order in which the slide show displays the images do the following 1 Press Menu 2 Move the 5 way button left or right to navigate to the Slide menu 3 Move the 5 way button up or down to highlight the Direction submenu 4 Move ...

Страница 33: ...n the Repeat submenu 5 Move the 5 way button up or down to select Yes to repeat the slideshow or No to display the slide show only once 6 Press OK when finished Starting the slideshow After setting up the slide show you are now ready to start the slide show To start the slide show do the following 1 Press Menu 2 Move the 5 way button left or right to navigate to the Slide menu 3 Move the 5 way but...

Страница 34: ... image 1 In playback mode use the 5 way button to browse to the desired image 2 Press Menu 3 Move the 5 way button left or right to navigate to the Print menu 4 Move the 5 way button up or down to highlight the DPOF submenu 5 Move the 5 way button right to open the DPOF submenu 6 Use the 5 way button to select Cur rent to set the DPOF information for the current image or Reset to clear the DPOF in...

Страница 35: ... ware driver required to use the camera as a web camera and to transfer data from it It also contains various software applications to help you view and edit your digital photos and videos To install the software do the following 1 Insert the CD into your PC s CD drive The CD menu is displayed 2 Select one of the following options Digital Camera Driver Ulead Photo Explorer 8 0SE Ulead Video Studio...

Страница 36: ...left or right to navigate to the Options menu 3 Move the 5 way button up or down to highlight the USB submenu 4 Move the 5 way button right to open the USB submenu 5 Move the 5 way button up or down to select one of the following options Storage PC camera 6 Press OK when finished Connecting the USB cable To connect the camera to the PC do the following 1 Turn on the camera 2 Connect the digital ca...

Страница 37: ...n 3 megapixels 2074 1540 pixels Shutter speed 1 6 1 1000 second Zoom 4 digital zoom LCD 1 5 inch TFT Internal memory 16 MB SDRAM Supported media Secure Digital card Format Image Video JPEG EXIF 2 1 DPOF AVI CIF Connections USB 2 0 Power 2 AAA batteries Weight 85 g ...

Страница 38: ...require formatting Format the card Insert another card Picture Error The picture cannot be viewed with the camera View the image on a computer If the picture cannot be viewed the file may be damaged No picture No files exist in the memory or on the card Take pictures or video Insert another card Card Setup The card is not formatted Format the card Battery Empty Battery does not have sufficient cha...

Отзывы: