background image


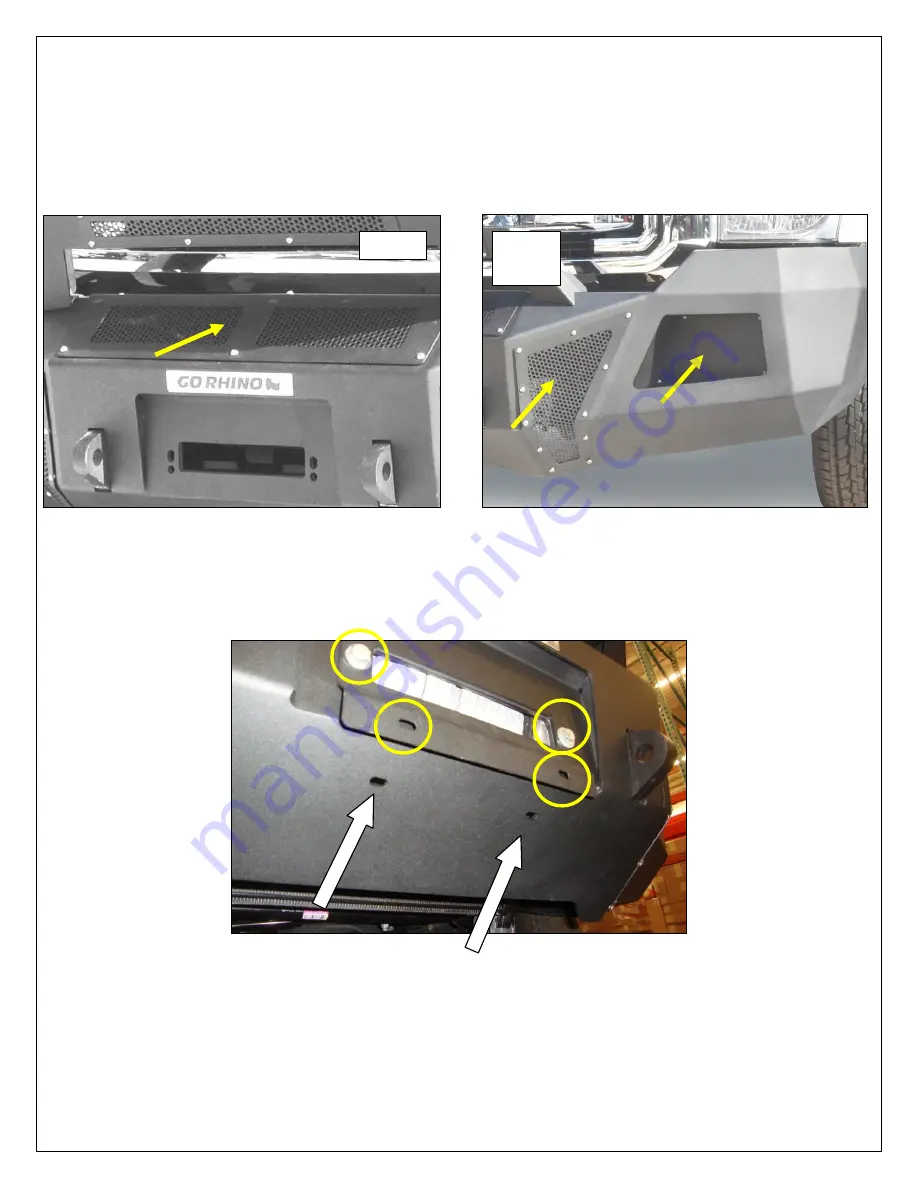
Step-8 

Install the winch cover and driver and passenger side front vent covers to the bumper using the 

supplied ¼” x ¾” button head bolts, (Photo 9). 

Step-9 

Install the flush mount light pods to the bumper 

using (4) ¼” x ¾” button head bolts and (4) ¼” 

nylon lock nuts, (Photo 10). 


If your state law requires a front license plate, attach the license plate bracket to the holes in the face of the 
bumper, using the supplied 3/8” bolts, washers and nuts, and the license plate to the (2) obround holes in the 
license plate bracket using the supplied ¼” bolts and nuts.  


If installing a winch, attach the license plate directly to the (2) obround holes in the lower face of the bumper shell 
using 

the supplied ¼” bolts and nuts.


Remember to check and retighten all factory and supplied nuts and bolts 

periodically. 


 #9  

 #10 

Driver 

Side 

Содержание 24371T

Страница 1: ... Lock Nut 24 2 3 8 x 1 Hex Bolt 26 Ft Lbs Required for Installation Sold Separately 25 2 3 8 Lock Washer 26 2 3 8 Flat Washer 12 1 24273TW Mounting Plate Winch Tray 27 2 3 8 Hex Nut Installation Instructions BR10 Front Bumper Replacement Part 24371T 2011 2015 Ford F 250 F 350 Super Duty 2 4WD Do not attempt to install this product on any vehicle other than the one listed above DAKAR PRO Brackets P...

Страница 2: ...ote If the vehicle has these options or equipment Fog Lights Unplug the fog light wiring harness and remove the plastic fastener securing the wiring harness to the bumper Photo 2 Engine Block Heater Remove the plastic fastener securing the power cord to the bumper Step 2 Remove the bolts 2 per side securing the bumper support brackets to the bumper and loosed the bolts 2 per side securing the supp...

Страница 3: ...cket on top of the frame bracket align the holes and secure the auxiliary bracket and frame bracket to the top of the frame using 3 7 16 x 2 hex bolts 6 7 16 flat washers 3 7 16 lock washers and 3 7 16 hex nuts Secure the frame bracket and auxiliary bracket to the sides of the frame using 4 x 1 hex bolts 8 flat washers 4 lock washers and 4 hex nuts Photo 3 4 Leave the nuts and bolts loose for fina...

Страница 4: ...tray using 3 x 1 1 2 hex bolts 3 lock washers and 3 flat washers Photo 6 Leave the bolts loose for final adjustment Step 5 Align the holes and attach each of the factory bumper support brackets to the replacement bumper support brackets using 2 3 8 x 1 1 4 hex bolts 2 3 8 flat washers 2 3 8 lock washers and 2 3 8 hex nuts Photo 7 Step 6 With assistance adjust and hold the replacement bumper shell ...

Страница 5: ... license plate attach the license plate bracket to the holes in the face of the bumper using the supplied 3 8 bolts washers and nuts and the license plate to the 2 obround holes in the license plate bracket using the supplied bolts and nuts If installing a winch attach the license plate directly to the 2 obround holes in the lower face of the bumper shell using the supplied bolts and nuts Remember...

Отзывы: