background image

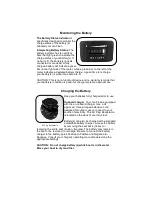
The Battery Status Indicator


is 

specifically designed to monitor the 
charge status of the battery(s) 
onboard your Go

-

Float.


Interpreting Battery Status. 

The 

battery indicator has ten vertical 
bars that light green to indicate the 
charge status of your battery(s). If 
no bar is lit, the battery(s) are dis-
connected or are dead. A fully 
charged battery will indicate a green 
bar on the right side of the meter, while a green bar on the left of the 
meter indicates a depleted battery charge. A good time to recharge 
your battery(s) is when three bars are lit.


CAUTION:


This is not a fool

-

proof device and no warranty is made that 

your battery(s) condition is good. All charge levels are approximate.


Monitoring the Battery


Keep your batteries fully charged prior to use. 


Onboard charger.

 Your Go

-

Float is equipped 

with the an onboard charger. Use a UL 
approved, three

-

pronged extension cord 

designed for outdoor use to connect to your 
source of electricity. The AC Plug Receptacle 
is located on the deck of your Go

-

Float.


Battery(s) can also be charged with a standard 
automobile battery charger. Access the battery 

by removing the seat back (Vortex) or 

removing the entire seat (Fusion, Impulse). The battery may remain in 
the boat or be removed to recharge. Be sure to connect the battery 
charger to the battery poles Positive

-

to

-

Positive and Negative

-

to

-

Negative. Consult your charger’s operating manual to determine the 
appropriate settings.


CAUTION:  Do not charge battery(s) while boat is in the water. 
Move your boat to dry land first.


Charging the Battery


AC Plug Receptacle 

Содержание Sun Lounger Fusion

Страница 1: ...ic Boats Electric Boats Electric Boats Electric Boats Sun Lounger Series Sun Lounger Series Sun Lounger Series Sun Lounger Series 2014 Owners Manual 2014 Owners Manual 2014 Owners Manual 2014 Owners M...

Страница 2: ...e operating your boat This manual will assist you in operation safe use and care of your Go Float By taking a few moments to familiarize yourself with the functions of your Go Float you can help make...

Страница 3: ...ng to the Stereo 8 Monitoring the Battery Life 9 Charging the Battery 9 Boarding Safely 10 Storage and Maintenance Beaching 10 Storing On End 10 Motor Maintenance 10 Propeller changing 11 Safety Troub...

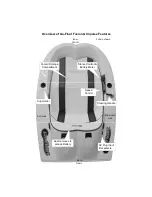
Страница 4: ...Impulse Features Cup Holder Cooler Storage Compartment Stereo Control Battery Meter Steering Handle AC Plug Input Receptacle Bow front Starboard side Port side Stern rear Seat removes to access Batter...

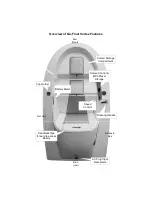
Страница 5: ...res Cup Holder Cooler Storage Compartment Steering Handle AC Plug Input Receptacle Bow front Starboard side Port side Stern rear Seat Back flips forward to access Battery Speed Control Battery Meter S...

Страница 6: ...tion With the tie downs unlatched lift the seat tray out Inside the equipment compartment you will find red and black connect ors coming from both the power buss bar and from the battery s Hook one co...

Страница 7: ...around other boats for docking and beaching Each higher number increases speed with 5 being the highest speed REVERSE 1 is a slow speed good for navigating around other boats and for docking REVERSE 2...

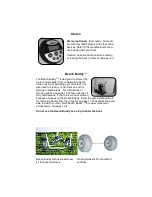
Страница 8: ...cause of weeds on the Beach Buddy follow the same procedure as for removing weeds from the propeller on page 11 Wheel Kits are avail able to add to your Go Float Beach BuddyTM for easier movement acro...

Страница 9: ...pproximate Monitoring the Battery Keep your batteries fully charged prior to use Onboard charger Your Go Float is equipped with the an onboard charger Use a UL approved three pronged extension cord de...

Страница 10: ...Float to a solid fixture such as a rafter This will prevent your Go Float from accidently falling over Do not store upright outdoors the wind may blow the boat over Upright storage is not recommended...

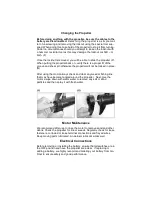
Страница 11: ...re the cables to the battery are disconnected Detaching the propeller is a simple mat ter of unscrewing and removing the locknut using the special tool sup plied When doing this take hold of the prope...

Страница 12: ...attempting to remove weeds by hand Motor noise or vibration 1 Check propeller for weeds or fishing line 2 Check to see propeller is secure and not damaged Personal Flotation Device We recommend that...

Отзывы: