background image

G-Net system DASH CAM 


USER MANUAL

Read user manual carefully in order to protect

the user’s safety and ensure the accurate use of the product

2CH Wi-Fi Smart DAS

H CAM

 U

ser

 Manual

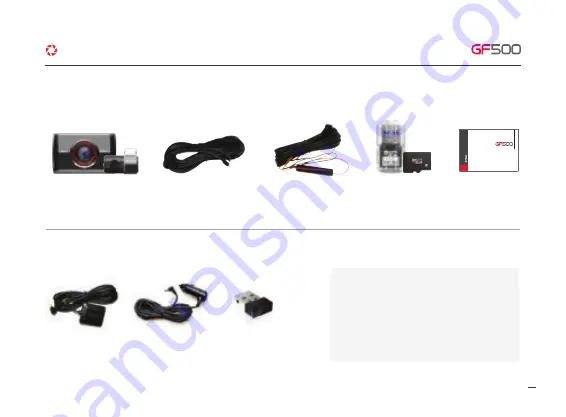
2. COMPONENT

04

Optional product is sold separately

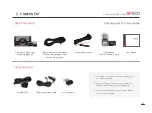
Front cam / Rear cam

(Including bracket)

Rear cam connection cable

(Connecting between Front

cam and Rear cam)

Direct power cable

USB Reader

Micro SD Memory card

User Manual

·Optional Product

External GPS

Cigar jack power Cable

Wi-Fi dongle

·Basic Components

※The image of components may be different from 
   the real components.

※Specifications and Components are subject to 
   change without notice for improving quality. 

※Highly recommend using Gnet Genuine Memory
   card that Gnet supplied.

G-Net system DASH CAM 

Содержание GF500

Страница 1: ...G Net system DASH CAM USER MANUAL Read user manual carefully in order to protect the user s safety and ensure the accurate use of the product 2CH Wi Fi Smart DASH CAM User Manual ...
Страница 2: ...ON FOR SAFE USE CAUTION FOR MEMORY CARD 1 PRODUCT FEATURES 2 COMPONENT 3 NAME OF EACH PART 4 SPECIFICATION 5 INSTALLATION BEFORE USE BASIC FUNCTION 01 02 03 04 05 06 07 09 29 6 HOW TO USE 7 MEMORY CARD VIDEO FOLDER PC VIEWER FUNCTION 30 32 8 PC VIEWER INSTALLATION 9 PC VIEWER FUNCTION CONTENTS G Net system DASH CAM ...
Страница 3: ...ely to happen In case that parking car outside for long period We highly recommend that pull off power cable from power terminal of Dash cam Avoid high temperature and high humidity which exceed Dash cam specification Periodically check Dash cam operation Before driving periodically check Rear cam operation through Live function on LCD If Rear cam is defective Voice guide goes off once And then Re...

Страница 4: ...ard If memory card has different data which isn t related data for Dash cam The Dash cam automatically erase different data for keeping video data stable Do not use memory card for different purpose Don t need to format Memory card periodically However recommend formatting memory card over 1time every month for maintenance Recommend you format or check memory card through SD formatter program www ...

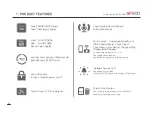
Страница 5: ...ed Sony EXMOR CMOS Sensor Super Clear Image Quality Front Full HD 1080p Rear Full HD 1080p Decent Video Quality Keep Video safe In case of sudden power cut off Touch Screen LCD for simple use Auto Recovery System of Memory card Auto Recovery for DATA error SONY EXMOR SENSOR Intelligent Security LED Depending on recording type Security LED shows different type of light flicker Format Free Function ...

Страница 6: ...acket Rear cam connection cable Connecting between Front cam and Rear cam Direct power cable USB Reader Micro SD Memory card User Manual Optional Product External GPS Cigar jack power Cable Wi Fi dongle Basic Components The image of components may be different from the real components Specifications and Components are subject to change without notice for improving quality Highly recommend using Gn...

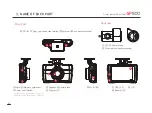
Страница 7: ...a lens Security LED 1 2 3 LED Camera lens Front cam connection terminal Rear cam connection terminal External GPS connection terminal DC IN Wi Fi USB Put Power Bottom for 3seconds Power off After Power off Put Power bottom Power on GPS LED Record LED LCD 4 5 3 1 6 10 11 12 2 7 8 9 G Net system DASH CAM ...

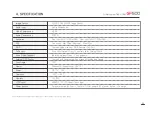
Страница 8: ...uilt in Microphone H 264 ADPCM Front cam Full HD 1920x1080 Rear cam Full HD 1920x1080 Front cam Max 30fps Rear cam Max 30fps Communication with your iOS Android 3m 5m 3Axis Acceleration 3D x y z Event record by External Shock Inform operational Status Voice guidance Synched with Google map Keep track of location and Speed 160 Windows10 Support over OSX 10 7 DC 12V 24V 25 80 10 95 480X320 IPS LCD P...

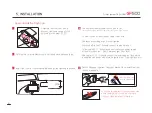
Страница 9: ...y of fuse in fusebox ex Boot Emergeny light Door lock Red cable ACC It should connect to power supply of fuse which is supplied with power when turn on ignition ex Cigar light fuse etc How to connect direct power cable 3way wire 1 4 2 3 Detach Adhesive type from Rear cam bracket then install Rear cam to back windshield 5 How to install the Dash cam Caution In case that Rear cam connection cable co...

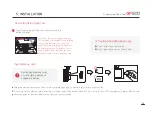
Страница 10: ...tart recording comes Dash cam starts recording Insert Memory card Before use memory card you should be aware of caution as below Caution of installing Dash cam Do not install Dash cam outside Do not place Dash cam on Driver s View How to install the Dash cam Caution few car navigations may face GPS reception of interruption When installing Power cable and Rear cam connection cable Recommend instal...

Страница 11: ...s connected with GPS unit Press the power button on the side power off button on the LCD screen or plug out the power cable After pressing the WIFI button on the LCD screen voice guidance Standby mode for registration will be heard Standby mode for registration will be released if no connection is made within two minutes If connected with the GPS unit the blue GPS LED will blink and lit Inspect th...

Страница 12: ...ome out If don t have Wi Fi connection for 2min Wi Fi registration mode would be automatically released If install Wi Fi dongle Shut down System 1 4 5 6 3 2 1 2 3 4 Wi Fi 5 6 How to use LCD SETUP If don t install Wi Fi dongle G Net system DASH CAM Standby mode is not meaning to turn off the camera So there is likely to be charged if Neglect the device over 1hour The screen is changed to right pict...

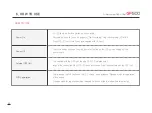
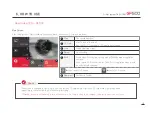
Страница 13: ... arrow it moves to the next video list page or previous video list page 4 When touch play list Dash cam shows you the recorded video as left picture 5 Playback bar Back to a list of recorded video files Play Pause When touch the play button recorded video list is shown 1 1 Video play 1 3 2 4 1 3 4 2 How to use LCD SETUP Change video view Front Rear G Net system DASH CAM ...

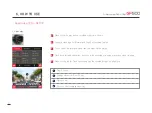
Страница 14: ... keep touching where you want Then it shows Enlarged screen After playing video touch anywhere except on function icon Function icon would disappear 1 The enlarged video would back to normal size of video when back to video list by Keeping touching or touching back icon 3 Keep touching specific part where you want it would enlarge 2 G Net system DASH CAM ...

Страница 15: ...ching Front Rear button at Setup screen The default resolution of GF500 is 1080P Front and 1080P Rear 2 SETUP Changed setting will be saved when it returns to the main by touching or buttons When the Setting Front Rear Parking on off Languages and Memory ratio format through Smartphone are changed the system will be rebooted to save setting G Net system DASH CAM ...
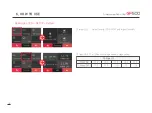
Страница 16: ...e reversed to left and right 6 HOW TO USE How to use LCD SETUP Recording Not apply that Normal fps is bigger than Event fps If adjust above figure you would watch pop up message When you touch or button as the FPS of Front and Rear are same Night Vision If it is on the brightness of Dash cam at night will be bright G Net system DASH CAM ...

Страница 17: ...2 Advanced setting At this setting the sensitivity of LDWS and the sensitivity of FCWS can be adjusted as 3 steps LOW MIDDLE HIGH Also LDWS function which can be set 50km 60km 70km will make alarm When car speed is over than its setting 3 After GPS reception is correctly working ADAS function can be set 15 6 HOW TO USE How to use LCD SETUP ADAS G Net system DASH CAM ...

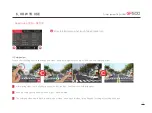
Страница 18: ...1 FVSA The alarm that the front car is departing When the stopped front car departs away of 2 meters the alarm from Dash cam will showing with Icon in screen 2 FCWS The alarm that the driver approaches very close to Front car When the driver is very closed to front car and the distance is very short the alarm makes sound with Icon in LCD 3 16 6 HOW TO USE ADAS function G Net system DASH CAM The ic...

Страница 19: ... time when you touch Date Time button at Time zone setting 1 The arrow will show up with one screen touch you can set the Date Time as you touch the arrow Able to set reboot ON OFF when you touch Reboot button you can set the specific time of reboot G Net system DASH CAM ...

Страница 20: ...movement and recording time as touch Event button Set ON OFF of EVENT with one time touch recording time is able to set after the arrow is shown on the screen as touch the arrow 2 Able to set motion detection and LBP when you touch System button at screen setting Also User can check sensing LBP Memory LCD setting and Version information in system setting 3 G Net system DASH CAM ...

Страница 21: ...USE How to use LCD SETUP System Impact LED Adjust Security LED ON OFF and Impact Sensitivity Adjust ON OFF of LBP and set Voltage value at Voltage setting Voltage V n 12 4 12 7 12 9 13 1 13 3 G Net system DASH CAM ...

Страница 22: ...tting all recorded videos in SD card will be deleted Memory Adjust storage ratio of Event and Normal recording FORMAT The format function will be activated when you touch Format button And then the system will be rebooted once the format is done G Net system DASH CAM ...

Страница 23: ...21 6 HOW TO USE How to use LCD SETUP System TAMPER CHECK The inspection will start after touching TAMPER CHECK button And the system will be rebooted when you button in the screen G Net system DASH CAM ...

Страница 24: ...te in original Memory card is deleted So checking the videos in the Memory card first and then able to test the tamper Check How to check result of Tamper check Insert Memory card Reader after taking out the Memory card from Device And open the Config folder 1 Open the Tamper txt file in the Config folder 2 log txt system cfg version ini Tamper txt You can check the log record when the file is ope...

Страница 25: ...f option After setting of Time Off the LCD will be automatically off according to what user set CALIBRATION Adjust calibration of touch screen according to the guide by touching cross which is showing on the screen Always On Timer Always On Live If the settings are done the screen will be changed to what user set after 1min without any operation G Net system DASH CAM ...

Страница 26: ...video which is playing on screen the Front and Rear screen will be switched 2 The Back button will disappear after 5 sec without touch or operation If users touch the screen the back button will appear and can return to the main 3 3 LIVE VIDEO How to use LCD Live 24 G Net system DASH CAM ...

Страница 27: ...n recording Security LED will quickly blink Motion recording will be automatically changed to parking mode When Acc voltage is released after setting parking mode Parking mode will be activated in 10 seconds 3 wired connection When Acc voltage inputs Normal recording will be activated 3 wired connection With No movement for 10 minutes or if the voltage drops 0 5 1 0V Parking mode will be activated...

Страница 28: ... to protect the battery of car Video is not being entered Stand by mode for the registration is released Stand by mode for the registration Program file is corrupt and can t be installed On installing the program Do not turn off the power Video of the Front camera is not being entered GPS connected Recording does not have enough available Please check overwriting setting Users connected User acces...

Страница 29: ...ding start Voice guide Wi Fi connected Wi Fi turned off This Wi Fi Module is not supported Records in parking mode Impact event has occurred during parking Driving mode to start recording Safe driving Impact event has occurred during parking Driving mode to start recording Safe driving Rear camera is connected Rear camera is disconnected Rear camera is invalid Video of the Rear view camera is not ...

Страница 30: ... Fi button to register a smart phone Reboot because of the damaged memory card Please replace the memory card if this occurrence continues On formatting the memory card Please wait No Memory card Memory card is damaged and cannot be recorded Setting changed and reboot Shut down the voice guidance Voice guidance starts Shut down the system Restart the system to protect the battery of car Data verif...

Страница 31: ... viewer 3 Do not remove and format the file Need to backup the file to PC Log txt It records device s statement as log file Version ini Saving version information of device Recording files are located File list numbers are different depend on SD card s capacity depend on SD card s capacity Event data Impact Parking Movement are located Locating update file in this folder the updating will start Co...

Страница 32: ...er control menu 6 Connect power to the product after inserting Memory card 2 Depends on the capacity the recording time will be different Take 3 5 minutes to initialize and create the file system when first use All LED flicker while initializing There will be REC on when it starts recording after finishing so do not turn off the power 3 Insert the Memory card to PC 4 Double click the Viewer exe fi...

Страница 33: ...ow appears if there is internet condition as picture shown If there is no internet connection Gnet viewer program will be executed directly 8 Press Execute a viewer button to start viewer program 9 When the installation is completed the program runs automatically and Gnet icon will be created on your computer 10 8 PC VIEWER INSTALLATION G Net system DASH CAM ...

Страница 34: ...Normal Play Pause Repeat event Recording File list G Sensor Acceleration Graph Playback speed Volume GPS reception Available only when installed GPS Google MAP Only available when there is GPS connection Color Black and White Mode Menu 1 3 2 4 5 6 7 8 9 10 1 2 3 4 5 6 7 8 9 10 9 PC VIEWER FUNCTION G Net system DASH CAM Step Reverse Step 1 Frame Play ...

Страница 35: ...eck the G sensor data of X axis direction Y axis left and right Z axis height How to check the G sensor data G sensor data zoom in Position of recording view Data and graph G sensor data 1 2 9 PC VIEWER FUNCTION Menu G Net system DASH CAM ...

Страница 36: ...t might cause some damage to Wi Fi module It provides Android and iOS platform Please search GNET on Google play store or Apple App store Real time recording and playback via Wi Fi can be able to be delayed depending on specification of Smart device Do not handle the products while driving it causes some serious accident Please operate the product in safe place after parked Precaution before conne...

Страница 37: ...o to terminate the application or select Yes to go product registration page 2 It is searching and displaying registered product 3 Before select the registered products please keep the standby mode by touching the Wi Fi button Please connect with Smartphone when main screen or turn off the LCD for stabilization 11 WI FI CONNECTION FUNCTION How to connect Android 35 G Net system DASH CAM ...

Страница 38: ...ce appears please press Wi Fi button to activate registration mode again 5 Registration process is finished as shown from left image Register Dash cam name it can be set when you need several product connections 6 2 minutes for registration standby mode If finished standby mode there will be voice guidance Stand by mode for the registration released It remembers the smart device in case of re regi...

Страница 39: ...shed setup Real time recording shows if click Connect icon after registration Move to registration page if click Add icon Menu icon will appear the bottom of screen if touch the screen lightly during real time streaming Delete registered product if click Delete icon 1 2 3 4 1 2 3 4 11 WI FI CONNECTION FUNCTION How to connect Android 37 ...

Страница 40: ...lect GNET_BB_GI500_XXXXX in the list 3 Write qwertyuiop in the password box and tough the Join button 4 Press the Wi Fi registration button of product to activate register standby mode Voice guidance Stand by mode for the registration 5 Maintenance time of register standby mode is 2 minutes After that Voice guidance announce Stand by mode for the registration is released How to connect iOS 38 G Ne...

Страница 41: ...Gnet application 6 If register standby mode is not activated or unlocked you can see the message If so please kindly touch the Wi Fi user register button to be activated 7 11 WI FI CONNECTION FUNCTION How to connect iOS G Net system DASH CAM 39 ...

Страница 42: ...2 3 4 1 2 3 4 If you touch the help button you can check the Wi Fi setting help page Setup the product via smart phone easily if touch the Settings icon It will be rebooting when save button after finished setup Playback recorded video in the list Select to playback recording what you want to confirm 11 WI FI CONNECTION FUNCTION How to connect iOS 40 G Net system DASH CAM ...

Страница 43: ...era 1 year Micro SD Memory card Accessory 3 months This product is manufactured through a process of strict quality confirm and inspection In normal use product will be repaired for free of charge if it is not consumer s fault The service fee might be charged if warranty repair instructions applicable Vendor Tel Period of free guarantee Model GF500 Warranty Repair Asking where you bought ...

Страница 44: ...2CH Wi Fi Smart DASH CAM User Manual www gnetsystem com 6F Lotte IT Castle II Gasan Digital 2ro 98 Geumcheon gu Seoul Korea ...

Отзывы: