background image

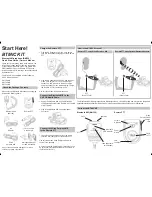
Mounting the cradle

The mounting bracket can be oriented with the arms 
extending either forward or backwards to adjust the 
position of the front panel with reference to the mounting 
point

Fitting the radio

Fit radio into cradle and tighten gimbal knobs.

Once the orientation of your radio is confirmed, you can 
fit the GME model label. Simply remove the backing tape 
and press into the recess on the front panel.

Fitting the microphone

The microphone uses an 8 pin plug and socket. 

To fit the microphone:

1.  Position the microphone plug so the plastic tab faces 

downwards, and press the plug into the socket until  
it ‘clicks’.

2.   Gently slide the rubber boat towards the hole 

surrounding the socket until it is flush with the front 
panel.

Plastic tab

Label

PA G E   2 0  

I N S T R U C T I O N   M A N UA L  

T X 3 3 4 5

46397-2_TX3345_InsMan.indd   20

11/09/13   12:04 PM

Содержание TX3345

Страница 1: ...Printed in CMYK throughout with gloss Aq Varnish I N S T R U C T I O N M A N U A L 5 watt super compact UHF CB remote LCD mic 46397 2_TX3345_InsMan indd 1 11 09 13 12 04 PM...

Страница 2: ...1 Programming Scan Channels 11 OPEN SCAN MODE 12 GROUP SCAN MODE 12 Auto Skip 13 Quick Channel Select 13 Using two Group Scan or two Open Scan Modes 13 SELECTIVE CALLING 13 SelCall Indentification Num...

Страница 3: ...eech may sound quiet simply adjust your radio volume for best performance There can be interference from a nearby transmitting radio if it is using a channel adjacent to the channel you are listening...

Страница 4: ...channels with both Group and Open scan functions available Priority Channel A user programmable Priority Channel feature allows your working or local repeater Channel to be instantly recalled at the...

Страница 5: ...n labelled in red NOTE If the secondary key is not pressed within 10 seconds the MENU F key selection will time out VOLUME KEY Press the key to increase the volume and the key to decrease the volume N...

Страница 6: ...L ALPHA key again A high beep will be heard and the receiver will become quiet NOTE If an incoming signal is very weak and is close to the minimum Squelch level it may become broken or chopped by the...

Страница 7: ...ING The Liquid Crystal Display and keys are backlit for easy viewing at night The backlight remains on while the radio is switched on The backlighting brightness colour and saturation are all fully ad...

Страница 8: ...ected channel will flash followed by a high beep as the channel is stored To recall a Priority Channel Briefly press the MENU F key then briefly press the LVL PRI key The radio will switch straight to...

Страница 9: ...lch are Squelch quieting systems that allow several groups of users to share the same channel without disturbing each other There are three optional tone sets available comprising 38 50 or 104 codes C...

Страница 10: ...ENU F key until the radio beeps or wait for it to time out ENABLING CTCSS DCS ON A CHANNEL Once a CTCSS or DCS tone has been selected it can be enabled on individual channels 1 Press the or keys to se...

Страница 11: ...S Your TX3345 is supplied with all 80 UHF CB channels programmed into the Open Scan memory Any channels not needed can be removed if required The Group Scan memory is empty by default and you will nee...

Страница 12: ...preferred Priority Channel Scanning in the Group Scan Mode When scanning the radio scans all the channels programmed into the Group Scan memory with the Priority Channel being scanned after every fou...

Страница 13: ...scan group memory will be displayed During this time F will remain on the display to confirm you are still in Quick Select mode To exit this mode press the MENU F key again or wait 10 seconds for the...

Страница 14: ...rt you to the call You can then converse normally on the channel To use the Quiet mode refer to the Quiet mode section further below Note that activating the Quiet mode is not mandatory for SelCall op...

Страница 15: ...d number in the flashing digit position 5 Briefly press the LVL PRI key again to select the next digit position 6 Repeat steps 4 and 5 to enter all 5 digits as required 7 Now press and hold the LVL PR...

Страница 16: ...s stored Repeat the steps above to add ALPHA labels to other SelCall Idents currently stored in memory To exit the mode briefly press the CALL button or simply wait 10 seconds and the Call function wi...

Страница 17: ...QUIET mode If a normal signal is received on an Open channel one that is not tagged with Q the signal will be heard in the usual way If a normal signal is received on a Quiet channel the icon will be...

Страница 18: ...s as an A when displayed in the radio When this group code is received it substitutes for all other numbers in that position As long as the first 4 digits of the SelCall you are sending match those of...

Страница 19: ...r air conditioners Screw the LCD Controller Microphone s clip to a firm surface Fit the TX3345 into the cradle and tighten the gimbal knobs Place the LCD Control ler Microphone in its mounting clip Fi...

Страница 20: ...the GME model label Simply remove the backing tape and press into the recess on the front panel Fitting the microphone The microphone uses an 8 pin plug and socket To fit the microphone 1 Position the...

Страница 21: ...box at a point that has 13 8 volts continuously available the battery side of the ignition switch via the 2 amp fuse Radio turns OFF with the ignition switch Connect the radio s negative black lead to...

Страница 22: ...uble Once the high voltage warning has been triggered and you have fixed the source of the problem you will need to switch the TX3345 OFF then ON again to reset it The power source must not exceed 25...

Страница 23: ...79 7 23 22 141 3 40 199 5 7 6 82 5 24 23 146 2 41 32 203 5 8 7 85 4 25 24 151 4 42 206 5 9 8 88 5 26 25 156 7 43 33 210 7 10 9 91 5 27 159 8 44 34 218 1 11 10 94 8 28 26 162 2 45 35 225 7 12 11 97 4...

Страница 24: ...356 79 466 97 703 8 047 26 145 44 252 62 364 80 503 98 712 9 051 27 152 45 255 63 365 81 506 99 723 10 053 28 155 46 261 64 371 82 516 100 731 11 054 29 156 47 263 65 411 83 523 101 732 12 065 30 162...

Страница 25: ...71 477 1875 12 476 700 32 477 200 52 476 7125 72 477 2125 13 476 725 33 477 225 53 476 7375 73 477 2375 14 476 750 34 477 250 54 476 7625 74 477 2625 15 476 775 35 477 275 55 476 7875 75 477 2875 16 4...

Страница 26: ...s 70 dBc Transmit Frequency Response 6 dB per octave 300 Hz to 3 kHz 1 3 dB Audio Signal to Noise 45 dB Current Consumption 1 5 amps with 50 Ohms termination Receiver Circuit Type Double conversion Su...

Страница 27: ...e supplying of the services again ii the cost of having the services supplied again 2 4 For repairs outside the warranty period we warrant our repairs to be free from defects in materials and workmans...

Страница 28: ...f Standard Communications Pty Ltd Head Office PO Box 96 Winston Hills NSW 2153 Australia New Zealand PO Box 58 446 Botany Auckland 2163 09 274 0955 All other international enquiries email export gme n...

Отзывы: