background image

Black plate (51,1)

Cadillac SRX Navigation System - 2011

Infotainment System

51

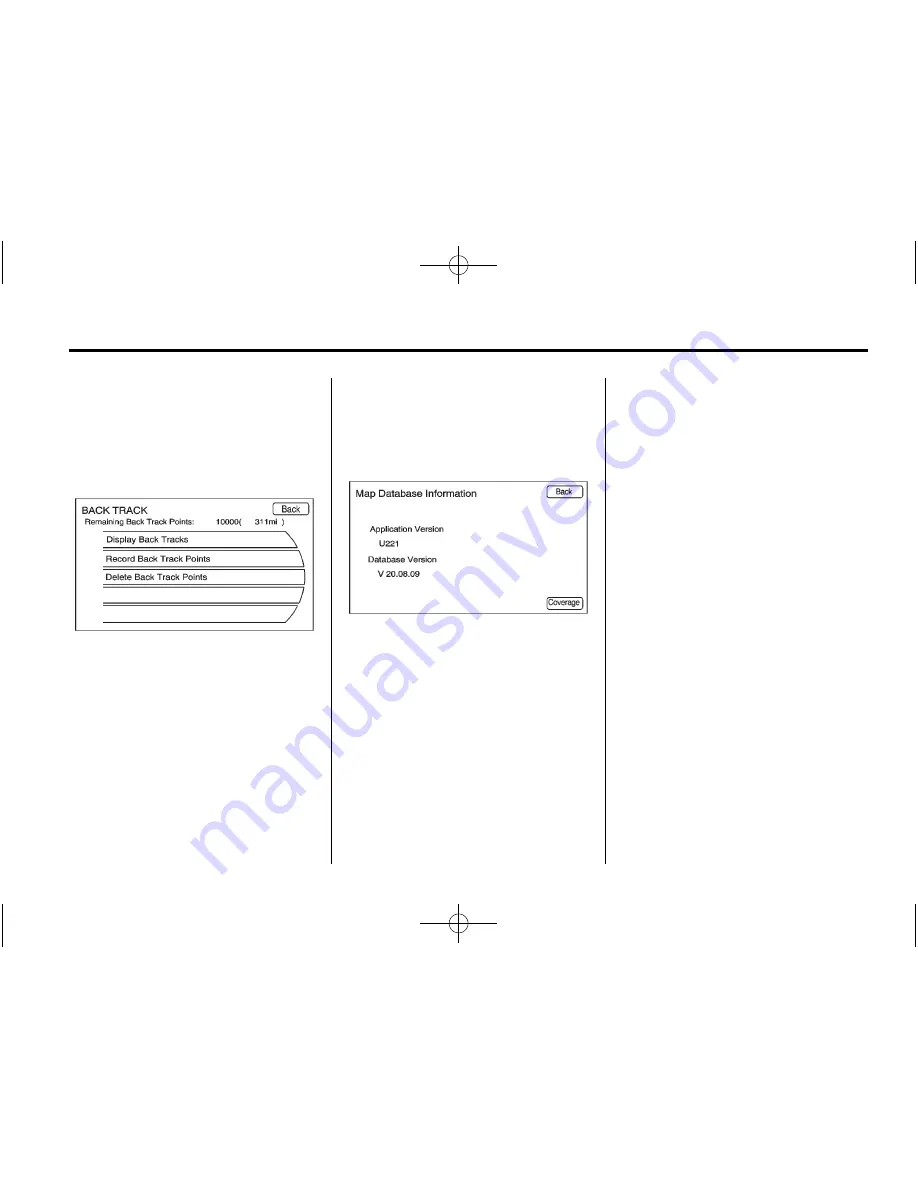
Back Track

Press BACK TRACK to turn on,
off, or delete the recording and
displaying of the traveled path.

Display Back Tracks:

When

active, the traveled path displays.

Record Back Track Points:

When

active, the traveled path is recorded.

Delete Back Track Points:

Deletes the recorded path.

Map Database Information

Displays map database version
information.

Press the Coverage button to
view the major metropolitan
coverage area.

Low Fuel Warning:

When

selected, a popup screen displays
gas station icons on the map or lists
the five nearest gas stations.

Back Track Mode:

When selected,

the back track feature is on. See

Back Track

in this section.

Weather Warning (if equipped):

When selected, a popup screen
displays weather warnings.

Show 3-D Landmark:

When

selected, 3-D landmarks display on
the map screen.

Maps

This section includes basic
information needed to know about
the map database.

Map Coverage

The navigation maps are stored on
the hard drive.

For more information on map
coverage, see

Navigation Settings

earlier in this section.

Содержание GPS Receiver

Страница 1: ...liary Devices 39 Rear Seat Infotainment 40 Rear Seat Entertainment RSE System 40 Navigation 47 Using the Navigation System 47 Maps 51 Navigation Symbols 54 Destination 59 Configure Menu 71 Global Positioning System GPS 80 Vehicle Positioning 80 Problems with Route Guidance 81 If the System Needs Service 82 Ordering Map DVDs 82 Database Coverage Explanations 82 Voice Recognition 82 Phone 91 Bluetoo...

Страница 2: ...Black plate 2 1 Cadillac SRX Navigation System 2011 ...

Страница 3: ...of the features found on your vehicle For vehicles first sold in Canada substitute the name General Motors of Canada Limited for Cadillac wherever it appears in this manual Keep this manual with the owner manual in the vehicle so it will be there if it is needed If the vehicle is sold leave this manual in the vehicle Canadian Vehicle Owners Propriétaires des Véhicules Canadiens A French language c...

Страница 4: ...he speakers Set up the navigation features before beginning to drive such as entering an address or a preset destination For vehicles with phone capability set up phone numbers in advance so they can be called with the press of a single button or a single voice command WARNING Taking your eyes off the road too long or too often while using the navigation system could cause a crash resulting in inj...

Страница 5: ...at the intersection Because the system uses limited information always evaluate whether following the system s directions is safe and legal for the current conditions When the navigation system is turned on a screen might appear with the information below Read and acknowledge the information it contains If the Caution screen appears press the OK screen button If the NAV or DEST control buttons are...

Страница 6: ...n System Overview A VOL O Volume Power B TUNE INFO C NAV m n Navigation Screen D FAV Favorite E l SEEK F g SEEK G Y Eject H RADIO BAND AM FM and XM if equipped I CD AUX HDD Source J NAV Navigation K DEST Destination L MENU SELECT M BACK 0 N RPT Repeat O CONFIG Configure P k Play Pause ...

Страница 7: ...w Setup Menu Press the CONFIG control button to display the Setup menu The Setup menu is used for changing the screens for the audio navigation display phone vehicle configuration and time features Turn the MENU SELECT knob to scroll through the available setup features Once the desired feature displays press the MENU SELECT knob or press the desired feature on the screen to display more options w...

Страница 8: ... on 2 If viewing a map screen press the source screen button press the RADIO BAND control button or press the FAV favorite control button 3 Select the band 4 Seek or tune to the desired station to select it 5 Press and hold one of the preset screen buttons for more than one and a half seconds 6 Repeat the steps for each preset To change the number of preset pages see AM FM Radio on page 11 Enterin...

Страница 9: ...st The chosen route preference highlights See Navigation Settings under Configure Menu on page 71 9 Press the Start Guidance screen button and the route is calculated See Address Entry under Destination on page 59 Entering a Point of Interest POI To set a destination by entering a Point of Interest POI 1 Press O to turn the system on 2 A caution could appear Press the OK screen button to proceed 3...

Страница 10: ...ed Preset Destinations next in this section to select it as a destination See Adding or Changing Preset Destinations under Destination on page 59 Using the Stored Preset Destinations These destinations are available for selection while driving 1 Press O to turn the system on 2 A caution could appear Press the OK screen button to proceed 3 Press the DEST control button 4 Press one of the available ...

Страница 11: ...tch the glass When cleaning the glass use only a soft cloth and do not spray cleaner directly on the system Do not apply spray cleaner directly to the system the cleaner could affect the mechanical parts Do not wipe the panel with a hard cloth or use a volatile liquid such as thinner or alcohol it could scratch the surface or erase the characters on the buttons Radio AM FM Radio Playing the Radio ...

Страница 12: ...til the desired source is selected HDD Hard Drive Device Press the CD AUX HDD control button until the HDD source is selected AUX Auxiliary Press the CD AUX HDD control button until the aux source is selected If the audio system is on and a map screen is being viewed audio information displays at the top of the map screens Press the audio display screen button to display the current audio source s...

Страница 13: ...l Mid Midrange Press the Mid or to change the level Bass Press the Bass or to change the level Adjusting the Speakers To adjust the speaker balance using the SOUND menu Press and hold the left arrow button for more sound from the left speakers or the right arrow button for more sound from the right speakers The middle position balances the sound between the left and right speakers To adjust the sp...

Страница 14: ...ces DSP can be used while listening to the audio system To view the DSP options press the DSP Settings screen button on the Sound Menu The following touch sensitive buttons are located at the bottom of the screen Stereo This setting provides the best overall sound quality for all seating positions 5 1 Surround The infotainment system used in combination with the Bose surround sound system includes...

Страница 15: ... adjust the volume to minimize the effects of unwanted background noise that can result from changing road surfaces driving speeds or open windows This feature works best at lower volume settings where background noise is typically louder than the sound system volume Number of Favorite Pages Change the number of mixed band preset pages when using FAV Press 1 6 to select the number of preset lists ...

Страница 16: ...press AM FM or XM if equipped to select the desired band 2 Tune to the station 3 Press the FAV control button to scroll to the list 4 Press and hold one of the preset buttons for more than two seconds The station frequency appears on the preset button at the bottom of the display 5 Repeat the steps for each preset in each page To recall a preset station from a FAV page 1 Press the FAV control butt...

Страница 17: ... from these stations and only works when the information is available In rare cases a radio station could broadcast incorrect information that causes the radio features to work improperly If this happens contact the radio station The RDS system is always on When information is broadcast from the current FM station the station name or call letters display on the audio screen RDS can provide a progr...

Страница 18: ...he ignition on insert a CD DVD into the slot label side up The player pulls it in and begins playing While playing the navigation system is available The vehicle must be in P Park for video to display The DVD player is only compatible with DVDs of the appropriate region code that is printed on the jacket of most DVDs The system is capable of playing Most audio CDs CD R CD RW MP3 or unprotected WMA...

Страница 19: ...f the disc is damaged or improperly loaded there is an error and the disc ejects The disc automatically plays once loaded Press Y to eject a disc from the CD DVD player If the disc is not removed within a short period of time it automatically is pulled back into the player Playing a CD DVD A disc must be loaded to select the source When a disc is loaded the DISC icon displays There are two ways to...

Страница 20: ...rough a track Release this button to return to playing speed Elapsed time displays TUNE Knob Turn to the right or left to go to the next or previous track MENU SELECT Turn the knob to display the track list Select the track from the list The system plays the selected track and returns to the CD screen Shuffle This icon displays when Shuffle mode is on See CD Menu in this section CD Menu Press the ...

Страница 21: ... page Only the highlighted functions are available for use Some menu options are only available when the disc is not playing DVD Options Full Screen Select to hide the DVD options and display the full video image Press anywhere on the navigation system screen or press the FAV CD AUX HDD or BACK control buttons to re display the source screen buttons over the video image Cursor Press to access the ...

Страница 22: ...1 Select to play the tracks randomly rather than in sequence 2 Select again to play sequential This button is available for DVD audio discs Top Menu Select to display the first menu of the DVD Availability of this feature is dependent on the DVD Menu Select to display the menu for the part of the DVD that is currently playing Availability of this feature is dependent on the DVD and is not availabl...

Страница 23: ... road is very rough Try the disc again when the road is smoother The disc is dirty scratched wet or upside down The air is very humid Try the disc again later There could have been a problem while burning the disc The label might be caught in the CD DVD player If the CD or DVD is not playing correctly for any other reason try a known good CD or DVD If any error continues contact your dealer MP3 Pl...

Страница 24: ...s button to return to playing speed Elapsed time displays g Seek Down REV 1 Press to seek to the beginning of the current or previous track If the track has played for less than five seconds it goes to the previous track If longer than five seconds the current track restarts 2 Press again to continue moving back through the disc 3 Press and hold this button to reverse quickly through playback 4 Re...

Страница 25: ...t name to view a list of all songs by the artist There might be a delay before the list displays Select the desired song from the list and it begins to play Albums Select to view the albums on the disc Select the album to view a list of all songs on the album There might be a delay before the list displays Select a song from the list and it begins to play Genres Select to view the genres on the di...

Страница 26: ...mmed playlists which were created by WinAmp or MusicMatch however there is no editing capability These playlists are treated as special folders containing compressed audio song files Hard Drive Device HDD With a Hard Drive Device HDD songs can be recorded The type of format supported by the HDD are MP3 MP3 Pro with spectral brand replication WMA Audible com M4A Songs can be recorded from a CD play...

Страница 27: ...5 Select the song name to record A progress bar displays Recording from a USB Device to the Hard Drive To copy all tracks from the USB device 1 Connect a USB device or press the CD AUX HDD control button until the disc screen displays the USB screen 2 Press the REC control button 3 A confirmation displays 4 Select All Songs to copy all tracks A progress bar displays To record selected tracks 1 Con...

Страница 28: ...r touch sensitive buttons k Play Pause Press to start pause or resume play of the current media source l Seek Up FWD 1 Press to seek to the next track 2 Press and hold to advance quickly through playback 3 Release this button to return to playing speed Elapsed time displays g Seek Down REV 1 Press to seek to the beginning of the current or previous track If the track has been playing for less than...

Страница 29: ...ist This feature is only available with songs recorded to the HDD from Audio CDs not MP3s and other compressed audio When recording CDs to the HDD there might be delays to build the list until all the files are compressed Playlist 1 Select to view the playlists on the hard drive 2 Select a playlist to view a list of all songs in the playlist 3 Select a song from the list Once selected Playlist Mod...

Страница 30: ...Press the FAV control button until the correct FAV category appears Press and hold a preset button on the bottom of the screen Playing HDD Favorites Favorites can be played two different ways 1 Press the FAV control button until the appropriate FAV HDD category displays Press a preset button at the bottom of the HDD screen 2 Select FAV from the HDD Music Menu Favorite Artist Album and Genre are in...

Страница 31: ... to the next track 2 Press and hold to advance quickly through playback 3 Release the button to return to playing speed Elapsed time displays g Seek Down REV 1 Press to seek to the beginning of the current or previous track If the track has been playing for less than five seconds the previous track plays If playing longer than five seconds the current track restarts 2 Press and hold to reverse qui...

Страница 32: ...lays Artist 1 Select to view the artists stored on the USB 2 Select an artist to view a list of all songs by the artist 3 Select a song from the list Once selected Artist Mode displays Album 1 Select to view the albums stored on the USB 2 Select an album to view a list of all songs on the album 3 Select a song from the list Once selected Album Mode displays All Songs 1 Select to view a list of all...

Страница 33: ...ct and control an iPod connect one end of the standard iPod USB cable to the iPod s dock connector Connect the other end to the USB port in the center concole iPod music information displays on the radio s display and begins playing through the vehicle s audio system The iPod battery recharges automatically while the ignition is on or in the accessory position When the ignition is turned off while...

Страница 34: ...to view the artists that have been stored on the iPod 2 Select an artist name to view a list of all songs by the artist 3 Select the desired song from the list Once a song has been selected Artist Mode appears on the iPod main screen to show that music is being played from a specific artist Album 1 Select this button to view the albums that have been stored on the iPod 2 Select an album name to vi...

Страница 35: ...Select the desired song from the list Once a song has been selected Audio Book Mode appears on the iPod main screen Podcasts appear with the general music They do not have their own category Like the other music files they are searchable by title artist album Eject iPod Select this button to remove the iPod If the iPod is disconnected without selecting this button the files on the iPod could be co...

Страница 36: ...ific audio book to record can be selected by pressing the Select Book screen button After the files have been recorded eject the CD USB external media Playing Audio Book Content After activating and transferring audible com files to the system play the files by 1 Press the CD AUX HDD control button until the HDD source is selected 2 Enter the HDD Menu the HDD Music Menu displays Scroll down to the...

Страница 37: ...lac SRX Navigation System 2011 Infotainment System 37 3 The Audio Book screen displays a list of the available audio books for playback Select a book 4 Then select a chapter to start playback 5 The audio book begins playback ...

Страница 38: ... the Audio Book menu options To change the audio book currently playing 1 Press the MENU SELECT control knob or press the HDD Menu screen button to enter that screen menu The HDD Music Menu displays Scroll down to the Audio Book option 2 The Audio Book screen displays a list of the available audio books for playback Select a book 3 Select a chapter to start playback ...

Страница 39: ... chapter with the checkmark located at the right Auxiliary Devices The vehicle has an auxiliary input jack located in the center console Possible auxiliary audio sources include Laptop computer MP3 player Tape player This jack is not an audio output Do not plug headphones into the auxiliary input jack Drivers are encouraged to set up any auxiliary device while the vehicle is in P Park Connect a 3 ...

Страница 40: ...ntrol button once then press the AUX source screen button Rear Seat Infotainment Rear Seat Entertainment RSE System The vehicle might have rear seat displays for viewing movies and videos in the rear seat This feature can be controlled through the navigation radio screen A DVD can play in the navigation radio or from an auxiliary video source To use the rear seat displays 1 Insert a DVD into the n...

Страница 41: ...ton channel 1 2 switch and a volume control Turn the headphones off when not in use Push the On Off button to turn on the headphones A light on the headphones comes on If the light does not come on check the batteries Intermittent sound or static can also indicate weak batteries See Battery Replacement later in this section for more information Infrared transmitters are on the top of the left seat...

Страница 42: ...the pads can be replaced separately from the headphone set To purchase replacemnet ear pads call 1 888 293 3332 then prompt zero 0 or contact your dealer Battery Replacement To change the batteries 1 Loosen the screw to the battery door located on the left side of the headphones 2 Slide the battery door open 3 Replace the two AAA batteries 4 Replace the battery door and tighten the screw Remove th...

Страница 43: ...creen to the DVD player 4 Press the AUX button a fourth time to change the source of both video screens to the DVD player How to Change the RSE Video Screen Settings The screen display mode brightness and language can be changed from the setup menu using the remote control To change a setting 1 Press z 2 Use n q p o and r to select the settings 3 Press z again to exit the setup menu Audio Output A...

Страница 44: ...ontain an infrared receiver for the remote control They are located at the top of each console Notice Avoid directly touching the video screen as damage may occur See Cleaning the Video Screen later in this section for more information Video Screen Input Jack Each video screen is equipped with a video input jack to allow video cables to be connected from an auxiliary device such as a camcorder or ...

Страница 45: ...ry DVD Use the navigation arrows to move the cursor After making a selection press the enter button This button only operates when using a DVD n q p o Menu Navigation Arrows Use the arrow buttons to navigate through a menu r Enter Press to select the highlighted choice in any menu z Display Menu Press to adjust the brightness screen display mode and display the language menu q Return Press to exit...

Страница 46: ...h subtitle options when a DVD is playing AUX Auxiliary Press to switch the video display between the DVD player and an auxiliary source d Camera Press to change the camera angle on DVDs that have this feature when the DVD is playing Clear If Available Press this button within three seconds after inputting a numeric selection to clear all numeric inputs 10 Double Digit Entries If Available Press th...

Страница 47: ...nd down In the up position all touch screen buttons can be viewed and used In the down position a portion of the screen displays the current audio source and temperature l SEEK 1 Press to seek the next track 2 Press and hold to fast forward through a track 3 Release the button to return to playing speed See CD DVD Player on page 18 and MP3 on page 23 for more information g SEEK 1 Press to seek to ...

Страница 48: ...tures for radio navigation display vehicle phone and time See Configure Menu on page 71 for more information k Play Pause Press to start pause or resume playback See CD DVD Player on page 18 MP3 on page 23 and Hard Drive Device HDD on page 26 for more information DEL Delect Select to delete a song or an entire list from the hard drive REC Record Press to record from a CD Player or a mass media sto...

Страница 49: ...r a space between characters or the words of a name q Backspace The backspace screen button is used to delete an incorrect character that has been selected To make name selection easier the system highlights only characters that are available after the previously entered one If a name does not display after entry try entering it differently The map database may not contain all information Navigati...

Страница 50: ...the Guidance Volume screen button to preview the selected sound level Voice Guidance Enable or disable voice guidance A checkmark indicates on Confirmation Feedback Turns the speech confirmation feedback on or off A checkmark indicates on Route Preference Press Route Preference to change route options when a route is calculated A checkmark indicates on Avoid Freeway Major roads are avoided Avoid T...

Страница 51: ...ton to view the major metropolitan coverage area Low Fuel Warning When selected a popup screen displays gas station icons on the map or lists the five nearest gas stations Back Track Mode When selected the back track feature is on See Back Track in this section Weather Warning if equipped When selected a popup screen displays weather warnings Show 3 D Landmark When selected 3 D landmarks display o...

Страница 52: ...n button 6 If the correct code is entered the system starts updating and the status bar displays 7 Press X after the map database update is completed If the application update file is included in the disc the application update is also done Handling the DVD Map Disc Handle the disc very carefully to avoid contamination or flaws Signals might not read out properly Use a soft cloth if the disc gets ...

Страница 53: ...eration and Displays in the index of the vehicle s owner manual Scroll Features To scroll within the map press anywhere on the map screen and the scroll symbol displays Tap the map to center that location on the screen Hold a finger in any direction outside of the scroll symbol and the map will continue to scroll in that direction until finger is removed Scroll speed increases when touching closer...

Страница 54: ...vehicle on the map The destination symbol marks the final destination after a route has been planned The waypoint symbol marks a set waypoint and is numbered depending on how many have been set A waypoint is a stopover destination point added to the planned route The estimated time and distance to the destination are displayed If waypoints have been added to the current route each waypoint destina...

Страница 55: ...is heading up Heading up view displays the direction the vehicle is traveling at the top of the map screen The shaded triangle indicates North Select this screen symbol to change the view to North up or 3 D Press this screen symbol to change to 3 D mode The 3 D symbol is the same as the Heading up symbol but the map is in 3 D The No GPS symbol appears when there is no Global Positioning System GPS...

Страница 56: ...splays is either as an Urgent maneuver or a Non Urgent maneuver Urgent Maneuver An Urgent Maneuver is displayed when the next maneuver is less than or equal to 0 8 km 0 5 mi away on a residential road or is less than or equal to 1 5 km 2 miles away on freeway Driving on the Highway Driving on the Residential Road Non Urgent Maneuver A non urgent maneuver is when your distance to the next maneuver ...

Страница 57: ...left side See Navigation Symbols on page 54 to learn how to change the map view to North up Head up or 3 D view When this symbol is selected the distance and time remaining from the current vehicle position to the first waypoint displays This menu displays if the symbol and waypoints are entered Select the main map view to display the distance and time remaining from the current vehicle position t...

Страница 58: ...OI icons 1 Select the POI icon to edit The POI icon is replaced by another icon that is selected from the next menu 2 Select the new POI icon 3 The new icon is on the Show POI Icons menu List Displays a list of available POIs Clear Clears all selected POI on the Show POI Icons menu Nearby Displays up to 200 or the selected POI s within a 32 km 20 mi of the current vehicle position The POIs can be ...

Страница 59: ...lected to plan a route by entering destinations Address Entry Set a route by entering the state province name city name street name and house number State Province Enter a state province name City Enter a city name Street Name Enter a street name House Enter a valid address number Cross Street Name Enter a street name that intersects with the selected street A checkmark displays on the right side ...

Страница 60: ...e and the route is calculated Entering the Street name first 1 Press the DEST control button 2 If necessary enter the state province name The last state province name is automatically recalled 3 Select the street name field Enter the street name Do not enter directional information or street type Use the space screen button between street and city names Use the backspace q screen button to delete ...

Страница 61: ...there is a match counter with a number of available POI names Press the List button to view the list 4 Select the POI name from the list 5 Press the Go screen button on the confirmation screen if the information is correct 6 Select the route preference for fastest shortest or easiest 7 Press the Start Guidance screen button and start the route Entering a POI by City Name 1 Press the DEST control b...

Страница 62: ...ted 7 Select the route preference for fastest shortest or easiest 8 Press the Start Guidance screen button and start the route Previous Destination Select a destination from a list of previous destinations Up to 15 points that have been previously entered can be recalled If the list is full the oldest destinations automatically are deleted once the newest destinations are added 1 Press the DEST co...

Страница 63: ...ettings under Configure Menu on page 71 for more information 6 Press the Start Guidance screen button and start the route Pick From Map Select a destination by scrolling on the map 1 Press the DEST control button 2 Press the Pick From Map screen button A map screen with a scroll symbol displays 3 Press the Zoom in out arrow button on the screen and press the map to locate the destination to select...

Страница 64: ...on Set a destination by selecting from one of six previously stored destinations If a destination is not set for one of the screen buttons the button dims and is not available to use See Adding or Changing Preset Destinations later in this section for information on how to add a preset destination 1 Press the DEST control button 2 Press one of the available Preset Destination screen buttons The sc...

Страница 65: ...ngs under Configure Menu on page 71 for more information Detour To select a detour around the current route select the Route screen then select to detour 2 5 or 10 km 1 3 or 5 miles Press the Whole Route screen button to detour the entire route This is only available while driving on a route Turn List To view the list of maneuvers for the entire route select the Turn List screen button from the Ro...

Страница 66: ...ncel this operation The system calculates and highlights the route and the route can be started Route Preview Preview the entire route in either direction s t Reverse or Forward Skip Press the reverse skip arrow to go to the start point Select the forward skip arrow to go to the final destination u v Fast Reverse or Forward Scroll Press the fast reverse scroll arrow to go to the start point Select...

Страница 67: ... Press the Save screen button and the location is saved 2 Address Entry Enter a destination through the Address Entry menu Press the Save screen button and a menu displays with the Save option located on the bottom of the screen Press the Save option to save this location to the Address Book 3 POI Menu Select a POI Press the Save screen button from the bottom of the information page display 4 Prev...

Страница 68: ...utton 6 Use the numeric keyboard to enter or change the phone number 7 Press the OK screen button to save changes To add a voice tag to an address book entry 1 Press the DEST control button 2 Press the Address Book screen button A list displays the address book entries 3 Select the address book entry to be changed 4 Press the Edit screen button 5 Select Add Voice Tag 6 Speak the name after the bee...

Страница 69: ...ed as a favorite To change the route name add a voice tag or delete a favorite route 1 Press the DEST control button 2 Press the Fav Route screen button 3 Select the route 4 Press the Edit screen button 5 Select from Change Route Name Add Voice Tag or Delete Favorite Route screen buttons To change the route name 1 Select the Change Route Name screen button 2 Using the Keypad enter the name 3 Selec...

Страница 70: ... up or 3 D mode See Navigation Symbols on page 54 for more information Traffic Press to view the Traffic Information screen See Configure Menu on page 71 for more information Save Press to save a location to the Address Book Show POI Press to turn POI on or off Select from a list of six pre programmed POI sub categories Scroll through a list of categories or select nearby and on route options Pres...

Страница 71: ...options XM NavTraffic if equipped The navigation system might have an XM NavTraffic receiver It is a subscription service provided through XM Satellite Radio A service fee is required to receive the XM NavTraffic service Real time traffic information is provided to fully integrate the navigation system to display current traffic conditions for the chosen route A screen displays to indicate that th...

Страница 72: ...l area the Traffic Icon appears in the lower left side of the map The Traffic Icon has three different condition displays These are No icon displays if there is no XM NavTraffic subscription or traffic events A single car icon displays if there are traffic events in the area but none are on route A multiple car icon displays if there are traffic events on the route It could take some time to sort ...

Страница 73: ...ce is a straight line distance and the direction of the event from the vehicle s current position If no arrow appears the distance indicates how far the event is ahead on current route No more than three pages of traffic events may be viewed while the vehicle is moving 3 Select a traffic condition to get more detailed information Select the Options screen button A Traffic Options menu displays Sel...

Страница 74: ...y impaired traffic flow with average speed between 40 km and 73 km 25 and 45 mph Green indicates normal traffic flow with average speed above 73 km 45 mph Traffic flow data arrows display on the map when scaled up to eight miles Closed Road Traffic Delays Incidents and Advisories Select the traffic event ICONS that appear on the map screens Alert for Approaching Traffic Events When On if an approa...

Страница 75: ...eceive information about the traffic event place the crosshairs over the traffic condition icon Traffic events beyond 125 km 75 mi from current position will not be displayed Select INFO to display the type of traffic the street name and a description of the traffic event Traffic Event Display Categories The following are traffic event categories and symbols that can appear on the display q Road C...

Страница 76: ...ious screen Map Displays related traffic events on the map if available More More information is available for the traffic event Avoid Select to avoid the location of an event on the route and calculate a new route The full map screen shows the new route The Avoid button is only available if the event is on the route ahead Traffic Voice Prompts The traffic voice prompts are part of the current nav...

Страница 77: ...lays a possible quicker route is available and an alternate route can be selected to detour around the traffic condition Press Yes and a new route is calculated This option is only available when the multiple car icon appears XM NavTraffic information might not be provided for the alternate route depending on what type of road the vehicle is traveling on Traffic Condition Symbols The following are...

Страница 78: ...urrent position Allow up to 15 minutes for the current weather in the area to display Extended Forecast Select the Menu button by pressing the Enter screen button or press the Menu button on the screen to show the Weather Menu screen From this screen select the Extended Forecast screen button Weather Along the Route If a destination is set while driving along the route there is the option to view ...

Страница 79: ...lay screen button to display the other options Dimming Mode Auto Automatic Automatically adjust the screen background depending on exterior lighting conditions Day The map background brightens Night The map background darkens To change the overall brightness setting for the display use the vehicle interior lighting dimming control Setting the Clock To set the time 1 Press the CONFIG control button...

Страница 80: ...es Department of Defense When the vehicle is not receiving signals from the satellites a symbol appears on the map screen See Navigation Symbols on page 54 This system might not be available or interferences can occur if any of the following is true Signals are obstructed by tall buildings trees large trucks or a tunnel Objects are located on the rear shelf of the vehicle Satellites are being repa...

Страница 81: ...road indicated Route guidance might not be available when using automatic rerouting for the next right or left turn The route might not be changed when using automatic rerouting There is no route guidance when turning at an intersection Plural names of places might be announced occasionally It could take a long time to operate automatic rerouting during high speed driving Automatic rerouting might...

Страница 82: ...e Index of the vehicle s owner manual for more information After receiving the updated disc see Installing the DVD Map Disc and Ejecting the DVD Map Disc under Maps on page 51 for more information Database Coverage Explanations Coverage areas vary with respect to the level of map detail available for any given area Some areas feature greater levels of detail than others If this happens it does not...

Страница 83: ...l button cancels the session 3 Press and release the talk symbol steering wheel control button to restart the voice recognition session Helpful Hints for Speaking Commands When a multiple command is available choose the command that best works for you Words that are in brackets are optional For example the command Radio band FM saying Radio FM or Radio Band FM are both valid commands Words that ar...

Страница 84: ...mmands such as Radio Help Display Help Navigation Help for the user to choose from Radio help Helpful advice about radio commands and some common radio commands which are available Use this command to learn about how to select a band AM or FM and how to change radio stations by speaking frequency numbers CD DVD Disc help Helpful advice about disc commands and some common disc commands which are av...

Страница 85: ...and if equipped For example radio select one fifty one XM Radio help Instructs the system to play back some helpful advice about radio commands and some common radio commands which are available to the user CD DVD Disc Commands The following commands are only available when a CD MP3 or DVD is loaded Radio CD radio DVD radio Disc Instructs the system to go to Disc mode Radio CD select track number ...

Страница 86: ...Is on the map screen Navigation show ATM s navigation hide ATM s Instructs the system to display and hide ATM POIs on the map screen Navigation show hotel s navigation hide hotel s Instructs the system to display and hide hotel POIs on the map screen Navigation show airport s navigation hide airport s Instructs the system to display and hide airport POIs on the map screen Navigation show shop s na...

Страница 87: ...en prompted For example if Cedar Point Amusement is the set destination which has the following address Cedar Point Amusement Park 1 Cedar Point Drive Sandusky OH 44870 Set the Destination by using Voice Recognition 1 Press and release the talk symbol steering wheel control The audio system mutes and a beep is heard 2 Say the command Destination The system replies with Please say city name or chan...

Страница 88: ...ither by pressing the desired choice or by saying the list number of the desired choice 4 The system asks the user to say the city name As shown earlier the radio can display a candidate list with the closest matches to the spoken city name Say the correct city name 5 Reply with the street name including the suffix Blvd Ave Rd etc when prompted The radio might display a candidate list with the clo...

Страница 89: ...d The radio might display a candidate list with the closest matches to the spoken house number Say the house number as single digit 7 Confirm the correct address is displayed then reply with yes or no when prompted 8 This address is now set as the destination Select the Start screen button to begin destination guidance ...

Страница 90: ...instructs the system to connect to OnStar Enter the OnStar voice recognition system See the OnStar owner guide for more information Help CommandsHelp Radio help CD help DVD help Disc help Display help Navigation help Display Commands Display set select day mode Display set select night mode Display set select auto mode Radio Commands radio radio band AM radio radio band FM radio radio band XM Radi...

Страница 91: ...d to waypoint used in conjunction with another command Replace destination used in conjunction with another command Yes used in conjunction with another command No used in conjunction with another command Destination used for Destination VR entry available in English language only Voice Tag Commands Navigation go to Voice Tag OnStar Command if equipped Hands Free Phone Bluetooth Using Voice Recogn...

Страница 92: ...r more information 6 Repeat Steps 1 through 5 to pair additional phones Listing All Paired and Connected Phones The system can list all cell phones paired to it If a paired cell phone is also connected to the vehicle the system responds with is connected after that phone name 1 Press b g For vehicles with a navigation system say Hands Free after the tone 2 Say Bluetooth 3 Say List Deleting a Paire...

Страница 93: ...s Command Usage Store This command will store a phone number or a group of numbers as a name tag Digit Store This command allows a phone number to be stored as a name tag by entering the digits one at a time Delete This command is used to delete individual name tags Delete All Name Tags This command deletes all stored name tags in the Hands Free Calling Directory and the OnStarTurn by Turn Destina...

Страница 94: ...en follow the directions given by the system to save a name tag for this number Using the Delete Command 1 Press b g For vehicles with a navigation system say Hands Free after the tone 2 Say Delete 3 Say the name tag you want to delete Using the Delete All Name Tags Command This command deletes all stored name tags in the Hands Free Calling Directory and the OnStarTurn by Turn Destinations Directo...

Страница 95: ...g Once connected the person called will be heard through the audio speakers Using the Digit Dial Command The digit dial command allows a phone number to be dialed by entering the digits one at a time After each digit is entered the system repeats back the digit it heard followed by a tone If an unwanted number is recognized by the system say Clear at any time to clear the last number To hear all o...

Страница 96: ...ported on the cell phone and enabled by the wireless service carrier Press b g to answer an incoming call when another call is active The original call is placed on hold Press b g again to return to the original call To ignore the incoming call no action is required Press c to disconnect the current call and switch to the call on hold Three Way Calling Three way calling must be supported on the ce...

Страница 97: ...cle 1 Press b g 2 Say Transfer Call To Transfer Audio to the Bluetooth System From a Cell Phone During a call with the audio on the cell phone press b g The audio transfers to the vehicle If the audio does not transfer to the vehicle use the audio transfer feature on the cell phone See your cell phone manufacturers user guide for more information Voice Pass Thru Voice pass thru allows access to th...

Страница 98: ... the System Unless information is deleted out of the in vehicle Bluetooth system it will be retained indefinitely This includes all saved name tags in the phone book and phone pairing information For information on how to delete this information see the previous sections on Deleting a Paired Phone and Deleting Name Tags Pairing a Phone Using the Infotainment System The pairing process can be start...

Страница 99: ...ate the device named Your Vehicle Follow the instructions given on the cell phone or follow the voice prompts to enter the four digit Personal Identification Number PIN that has been provided 4 The system voice prompt requests that you say the name you want used for the phone that is being paired Use a name that best describes the phone The system voice prompt then repeats the name you provided fo...

Страница 100: ...e Phone menu displays Press the MENU SELECT knob to display other phone options 2 Turn the MENU SELECT knob then press it to select the Bluetooth submenu 3 Turn the MENU SELECT knob then press it to select the Device List submenu A list of all previously paired phones will be displayed If there is a currently connected phone a check mark will appear on the right side of the phone name ...

Страница 101: ...e Phone menu displays Press the MENU SELECT knob to display other phone options 2 Turn the MENU SELECT knob then press it to select the Bluetooth submenu 3 Turn the MENU SELECT knob then press it to select the Device List submenu 4 Turn the MENU SELECT knob then press it to select the phone to be deleted Follow the on screen prompts to delete the device from the system ...

Страница 102: ...fferent phone the new phone must be in the vehicle and available to be connected to the Bluetooth system before the process is started 1 Press the CONFIG control button Turn the MENU SELECT knob until the Phone menu displays Press the MENU SELECT knob to display other phone options 2 Turn the MENU SELECT knob then press it to select the Bluetooth submenu 3 Turn the MENU SELECT knob then press it t...

Страница 103: ...pts 5 The Phone menu will be displayed with the name of the phone linked Making a Call Press V located on the faceplate of the infotainment system to access the phone menu Enter Number Use this option to enter a phone number and make a call To do this 1 Turn the MENU SELECT knob then press it to select Enter Number selection A dial pad displays ...

Страница 104: ...n The phone book can be accessed by pressing the Phone Book selection on the Phone Menu screen Turn the MENU SELECT knob to select the person or place to call Press the MENU SELECT knob or press the desired person or place to display the number Press the MENU SELECT knob or press the number to make the call The Phone Book feature also has a search menu that can be accessed by pressing that option ...

Страница 105: ...show a list of incoming calls outgoing calls and missed calls 1 Press the CONFIG control button Turn the MENU SELECT knob until Phone displays Press the MENU SELECT knob or press the Phone screen button to display other options 2 Turn the MENU SELECT knob then press this knob or press on either Incoming Calls Outgoing Calls or Missed Calls Once one of these options have been selected a pop up menu...

Страница 106: ... sounds Accepting a Call Press the appropriate screen button for the Answer option on the screen to answer the call Declining a Call Select the Decline option on the screen Call Waiting Call waiting must be supported on the Bluetooth phone and enabled by the wireless service carrier to work Switching Calls Only Available with Call Waiting This feature allows you to switch between calls making one ...

Страница 107: ...nter Number option on the screen 3 Make another call The first call will be placed on hold while the second call is dialing and connected 4 To make a conference call select the Merge Calls option which will merge both calls into one conference call 5 To add more callers to the conference call repeat Steps 2 through 4 The number of callers who can be added is limited by your wireless service carrie...

Страница 108: ...nob then press this knob or press the Enter Number option and enter the number sequence The DTMF Tones will be generated on the network as you enter each number Trademarks and License Agreements Manufactured under license under U S Patent s 5 451 942 5 956 674 5 974 380 5 978 762 6 487 535 other U S and worldwide patents issued pending DTS and DTS Digital Surround are registered trademarks and the...

Страница 109: ...nologies Fraunhofer IIS and Thompson DivX is a certified product It plays all versions of DivX video including DivX 6 with standard playback of DivX media files DivX DivX Certified and associated logos are trademarks of DivX Inc and are used under license Made for iPod means that an electronic accessory has been designed to connect specifically to iPod and has been certified by the developer to me...

Страница 110: ...is prohibited to copy decompile disassemble reverse engineer hack manipulate or otherwise make available any technology or software incorporated in receivers compatible with the XM Satellite Radio System or that support the XM website the Online Service or any of its content Furthermore the AMBER voice compression software included in this product is protected by intellectual property rights inclu...

Страница 111: ... industry standard in music recognition technology and related content delivery For more information visit www gracenote com Gracenote Database Gracenote Music Recognition Service Music recognition technology and related data are provided by Gracenote Gracenote is the industry standard in music recognition technology and related content delivery For more information visit www gracenote com CD and ...

Страница 112: ...te Software and Gracenote Servers will terminate if you violate these restrictions If your license terminates you agree to cease any and all use of the Gracenote Data the Gracenote Software and Gracenote Servers Gracenote reserves all rights in Gracenote Data the Gracenote Software and the Gracenote Servers including all ownership rights Under no circumstances will Gracenote become liable for any ...

Страница 113: ... for your copy of the spatial map database including location codes and related products collectively the Database used in the navigation system By using the navigation system and the database you accept and agree to be bound by all terms and conditions set forth below 2010 Tele Atlas North America Inc All rights reserved This material is proprietary and the subject of copyright protection and oth...

Страница 114: ...ake reasonable steps to protect the DATABASE from misappropriation or misuse You shall not extract stand alone data from or publish any part of the DATABASE without the prior written consent of TANA and its licensors LIMITATIONS ON USE The DATABASE is restricted for use in the specific system for which it was created Except to the extent explicitly permitted by mandatory laws you may not extract o...

Страница 115: ...TY WAS ADVISED OF THE POSSIBILITY OF SUCH DAMAGES IN NO EVENT WILL THE TOTAL LIABILITY OF DENSO OR TANA OR THEIR LICENSORS OR SUPPLIERS EXCEED THE AMOUNTS PAID BY YOU FOR THE DATABASE WARNINGS The DATABASE comprises facts and information from government and other sources reflecting circumstances in existence before you received the DATABASE which may contain errors and omissions Accordingly the DA...

Страница 116: ...ebanon NH 03766 1445 Phone 603 643 0330 The DATABASE is 1984 2010 by Tele Atlas North America Inc ALL RIGHTS RESERVED For purpose of any public disclosure provision under any federal state or local law it is agreed that the DATABASE is a trade secret and a proprietary commercial product and not subject to disclosure If you are an agency department or other entity of any State government the United...

Страница 117: ...S STATED HEREIN INFOUSA MAKES NO EXPRESS OR IMPLIED WARRANTIES INCLUDING WITHOUT LIMITATION ANY EXPRESS OR IMPLIED WARRANTY OF FITNESS FOR A PARTICULAR PURPOSE OR WARRANTY OF MERCHANTABILITY 5 Limitation of Liability EITHER INFOUSA OR SUPPLIER OF POI DATA SHALL NOT BE LIABLE FOR ANY INDIRECT CONSEQUENTIAL OR INCIDENTAL DAMAGES MADE OR ALLEGED IN CONNECTION WITH YOUR USE OF THE POI DATA END USER LI...

Страница 118: ... OR CONTRACTS ARISING OUT OF YOUR POSSESSION USE OF OR INABILITY TO USE THIS INFORMATION ANY DEFECT IN THE INFORMATION OR THE BREACH OF THESE TERMS OR CONDITIONS WHETHER IN AN ACTION IN CONTRACT OR TORT OR BASED ON A WARRANTY EVEN IF DENSO OR ITS LICENSORS HAVE BEEN ADVISED OF THE POSSIBILITY OF SUCH DAMAGES Some states territories and countries do not allow certain liability exclusions or damages...

Страница 119: ... 83 CD DVD Player 18 CD Eject 28 CD Menu 20 CD DVD Disc Commands 85 Cleaning the Display 11 Clearing the System 98 Conference Calling 107 Configure Menu 71 D Database Coverage Explanations 82 Deleting Personal Information 8 Destination and Guidance Commands 86 Destination Navigation 59 Devices Auxiliary 39 Dimming Mode 79 Display 79 Driving on a Route 56 Dual Tone Multi Frequency DTMF Tones 98 108...

Страница 120: ...inates 64 Listing Stored Numbers 94 Loading and Ejecting Discs 19 M Making a Call 95 103 Map Adjustments 52 Map Coverage 51 Map Scales 53 Maps 51 Menu Configure 71 Menu Screen Button 70 Mixed Band Presets 16 MP3 23 Mute or UnMute a Call 107 Muting a Call 97 N Nav Navigation 71 NAV Navigation Menu 7 Navigation Destination 59 Symbols 54 Using the System 47 Navigation Audio System 13 Navigation Contr...

Страница 121: ... 71 Radio Commands 85 Radio Data System RDS 17 Radio Settings 15 Radios AM FM Radio 11 CD DVD Player 18 Satellite 17 Rear Seat Entertainment System 40 Receiving a Call 96 Recording from a CD to the Hard Drive 27 Recording from a USB Device to the Hard Drive 27 Remote Control 44 Route Preview 66 S Satellite Radio 17 Scroll Features 53 Setting the Clock 79 Setup Menu 7 Shuffle 20 Storing and Deletin...

Страница 122: ...80 Video Screen Input Jack 44 Video Screens 44 Voice Guidance 11 Voice Pass Thru 97 Voice Recognition 82 Voice Recognition Commands 84 Voice Recognition Help 84 Voice Tag Commands 90 X XM Categories 18 XM NavTraffic if equipped 71 XM Satellite Radio Service 17 XM Weather If Equipped 78 ...

Отзывы: