background image

GB

5

better and safer at the rate for which it was designed.

b. Do not use the power tool if the switch does not turn 

it on and off.

 Any power tool that cannot be controlled 

with the switch is dangerous and must be repaired.

c. Disconnect the plug from the power source before 

making any adjustments, changing accessories, or 
storing power tools.

 Such preventive safety measures 

reduce the risk of starting the power tool accidentally.

d. Store idle power tools out of the reach of children and 

do not allow persons unfamiliar with the power tool 
or these instructions to operate the power tool.

 Power 

tools are dangerous in the hands of untrained users.

e. Always unplug your power tool when leaving 

unattended. Such preventative safety measures 
reduce the risk of starting the power tool accidentally 
by untrained users.

f. Maintain power tools. Check for misalignment or 

binding of moving parts, breakage of parts and 
any other condition that may affect the power tools 
operation.

 If damaged, have the power tool repaired 

before use. Many accidents are caused by poorly 
maintained power tools.

g. Keep cutting tools sharp and clean.

 Properly 

maintained cutting tools with sharp cutting edges are  
less likely to bind and are easier to control.

h. Use the power tool, accessories and tool bits etc., 

in accordance with these instructions and in the 
manner intended for the particular type of power 
tool, taking into account the working conditions and 
the work to be performed. 

Use of the power tool for 

operations different from those intended could result in  
a hazardous situation.

5. SERVICE
a. Have your power tool serviced by a qualified repair 

person using only identical replacement parts.


This will ensure that the safety of the power tool is maintained.

Additional safety rules for sanders

WARNINGS. 

Before connecting a tool to a power source 

(mains switch power point receptacle, outlet, etc.) be sure 
that the voltage supply is the same as that specified on the 

nameplate of the tool. A power source with a voltage greater 

than that specified for the tool can result in serious injury to 

the user, as well as damage to the tool. If in doubt, do not 
plug in the tool. Using a power source with a voltage less 
than the nameplate rating is harmful to the motor.

Always remove the plug from the mains socket before 
making any adjustments or maintenance, including 
changing the sanding belt.

•  Fully unwind cable drum extensions to avoid potential 

overheating.

•  When an extension cable is required, you must ensure 

that it has the right ampere rating for your power tool  
and is in safe electrical condition.

•  After long working periods external metal parts and 

accessories could be hot.

•  If possible, always use clamps or a vice to hold your work.

•  Always switch off before you put the sander down.

  Do not force the sander; let the tool do the work at  

a reasonable speed. Overloading will occur if too  
much pressure is applied and the motor slows  
resulting in inefficient sanding and possible damage  
to the sander motor.

•  When sanding wood, always connect the dust bag 


or use a dust extraction system.

•  Before using the sander with metal, always remove 


the dust bag from the outlet as sparks may ignite the  
dust or the bag.

•  Do not continue to use worn, torn or heavily clogged 

sanding belts.

•  Do not touch the moving sanding belt.

•  Ensure that you have removed foreign objects such as nails 

and screws from the work before commencing sanding.

•  Rags, cloths, cord, string and the like should never be left 

around the work area.

PDF Compressor Pro

Содержание BSC900CF

Страница 1: ... BELT SANDER BSC900CF BANDSCHUURMACHINE VAN KOOLSTOFVEZEL PONCEUSE A BANDE EN FIBRE DE CARBONE KOHLEFASER BANDSCHLEIFER fLEVIGATRICE A NASTRO IN FIBRA DI CARBONIO LIJADORA DE CORREA DE FIBRA DE CARBONO PDF Compressor Pro ...

Страница 2: ...ly understand them Guarantee To register your guarantee visit our web site at www gmctools com and enter your details Your details will be included on our mailing list unless indicated otherwise for information on future releases Details provided will not be made available to any third party Purchase Record Date of Purchase Model Serial Number ________________________________ located on motor hous...

Страница 3: ...r 230 240V 50Hz 900W CONFORMS TO THE FOLLOWING DIRECTIVES Directive 2004 108 EC Electromagnetic Compatability Directive 2006 95 EC Low Voltage Directive Directive 2006 42 EC Machinery Directive Directive 2002 95 EC RoHS EN 60745 2 4 2003 A11 2007 EN 60745 1 2009 EN 55014 1 2006 EN 55014 2 1997 A1 2001 EN 61000 3 2 2006 EN 61000 3 3 1995 A1 2001 A2 2005 THE TECHNICAL DOCUMENTATION IS KEPT BY GMC Da...

Страница 4: ...oor use Use of a cord suitable for outdoor use reduces the risk of electric shock f If operating a power tool in a damp location is unavoidable use a residual current device RCD protected supply Use of an RCD reduces the risk of electric shock 3 PERSONAL SAFETY a Stay alert watch what you are doing and use common sense when operating a power tool Do not use a power tool while you are tired or unde...

Страница 5: ... identical replacement parts This will ensure that the safety of the power tool is maintained Additional safety rules for sanders WARNINGS Before connecting a tool to a power source mains switch power point receptacle outlet etc be sure that the voltage supply is the same as that specified on the nameplate of the tool A power source with a voltage greater than that specified for the tool can resul...

Страница 6: ...sed as prescribed it is not possible to eliminate all residual risk factors The following hazards may arise in connection with the tool s construction and design Damage to the lungs if an effective dust mask is not worn Damage to hearing if effective earmuffs are not worn Unpacking Due to modern mass production techniques it is unlikely that your GMC Power Tool is faulty or that a part is missing ...

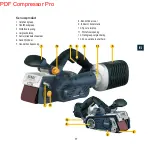
Страница 7: ...anister 4 Lock on button 5 On Off trigger switch 6 Drive roller 7 Belt tension lever 8 Front belt roller 9 Belt rotation indicator 10 Tracking adjustment knob 11 Dust extraction port 12 Handle lock 13 Variable speed control knob 1 5 4 2 3 7 10 12 11 13 6 8 9 PDF Compressor Pro ...

Страница 8: ...n the belt tension lever 7 anti clockwise to re tension the belt Fig F 5 Plug the sander into a power point and with the sander held tight pull the on off trigger switch 5 and allow the belt to rotate for a short period Fig G 6 Whilst the belt is running adjust the tracking knob 10 to align the belt to the centre of the roller 6 Repeat the trigger action and tracking adjustment until the belt is c...

Страница 9: ...r 8 only to sand corners or irregular shapes Fig K 10 Lift the sander off the work before switching off 11 Remember to keep your hands away from the moving belt as it will continue to move for a short time after the machine is switched off 12 Wear safety goggles a dust mask and earmuffs Dust extraction 1 Disconnect the plug from the power supply 2 To remove the dust extraction adaptor and canister...

Страница 10: ...ning 1 Keep the tool s air vents unclogged and clean at all times 2 Remove dust and dirt regularly Cleaning is best done with a soft brush or a rag 3 Re lubricate all moving parts at regular intervals 4 If the body of the sander needs cleaning wipe it with a soft damp cloth A mild detergent can be used but nothing like alcohol petrol or other cleaning agent 5 Never use caustic agents to clean plas...

Страница 11: ...GB 11 PDF Compressor Pro ...

Страница 12: ...ezen en volledig hebben begrepen Garantie Om uw garantie te registreren gaat u naar onze website op www gmctools com en voert u uw gegevens in Uw gegevens worden opgeslagen in onze mailinglist tenzij u anders aangeeft voor informatie over nieuwe producten De ingevulde gegevens worden aan geen enkele derde partij beschikbaar gesteld Aankoopgegevens Datum van aankoop Model Serienummer ______________...

Страница 13: ...chine Van Koolstofvezel Stroom 230 240V 50Hz 900W VOLDOET AAN DE VEREISTEN VAN DE RICHTLIJN Directive 2004 108 EC Electromagnetic Compatability Directive 2006 95 EC Low Voltage Directive Directive 2006 42 EC Machinery Directive Directive 2002 95 EC RoHS EN 60745 2 4 2003 A11 2007 EN 60745 1 2009 EN 55014 1 2006 EN 55014 2 1997 A1 2001 EN 61000 3 2 2006 EN 61000 3 3 1995 A1 2001 A2 2005 DE TECHNISC...

Страница 14: ...de stekker uit het stopcontact te trekken Houd het snoer verwijderd van hitte olie scherpe randen of bewegende delen Door beschadigde of in de knoop geraakte snoeren neemt het risico op een elektrische schok toe e Wanneer u elektrisch gereedschap buiten gebruikt maak dan gebruik van een verlengsnoer dat geschikt is voor gebruik buitenshuis Het gebruik van een snoer dat geschikt is voor gebruik bui...

Страница 15: ... afwijking die de werking van het elektrische gereedschap zou kunnen beïnvloeden Indien het elektrische gereedschap beschadigd is moet u het laten repareren voordat u het weer gebruikt Veel ongelukken worden veroorzaakt door slecht onderhouden elektrisch gereedschap g Houd snijwerktuigen scherp en schoon Goed onderhouden scherp snijdende snijwerktuigen slaan minder snel vast en zijn gemakkelijker ...

Страница 16: ...schoenen Draag een bril Draag gehoorbeschermers Draag een stofmasker Het gereedschap mag alleen gebruikt worden voor het voorgeschreven doel Elk ander doel dan vermeld staat in deze handleiding wordt beschouwd als misbruik De gebruiker en niet de fabrikant is vervolgens aansprakelijk voor eventuele schade of eventueel letsel ten gevolge van dergelijke gevallen van misbruik De fabrikant is niet ver...

Страница 17: ...g 4 Vergrendelknop 5 Aan uit trekkerschakelaar 6 Aandrijfcilinder 7 Hendel bandspanning 8 Bandcilinder voor 9 Indicator bandrotatie 10 Spoor stelknop 11 Stofafvoeropening 12 Handgreepvergrendeling 13 Knop variabele snelheid 1 5 4 2 3 7 10 12 11 13 6 8 9 PDF Compressor Pro ...

Страница 18: ...huif de nieuwe band op zijn plaats waarbij de rotatiepijl aan de binnenkant van de band in dezelfde richting moet wijzen als de pijl op de schuurmachine Afb E 4 Draai de hendel bandspanning 7 linksom om de band weer op spanning te brengen Afb F 5 Steek de stekker in het stopcontact houd de schuurmachine goed vast trek aan de aan uit trekkerschakelaar 5 en laat de band korte tijd roteren Afb G 6 Te...

Страница 19: ... de trekkerschakelaar 5 omhoog en laat de band op volle snelheid komen voordat u hem over het werk beweegt Afb J 6 Druk op de vergrendelknop 4 als u continu wilt doorschuren 7 Schuur met de nerf mee in parallelle overlappende stroken 8 Om verf te verwijderen of erg ruw hout glad te maken schuurt u 45o dwars op de nerf in twee richtingen daarna eindigt u met een parallelle strook met de nerf mee 9 ...

Страница 20: ...reedschap en een eventueel verlengsnoer regelmatig te controleren op beschadigingen Indien het snoer beschadigd is dient u de snoerenset te laten vervangen in een reparatiecentrum voor elektrisch gereedschap Vervang indien nodig het verlengsnoer Reinigen 1 Houd de ventilatieopeningen van het gereedschap altijd schoon en open 2 Verwijder regelmatig stof en vuil Reinigen gaat het beste met een zacht...

Страница 21: ...NL 21 PDF Compressor Pro ...

Страница 22: ...tre site Web à www gmctools com et saisissez vos informations personnelles Vos informations personnelles seront incluses dans notre fichier client à moins que le contraire soit indiqué pour nous permettre de vous informer sur nos prochaines nouveautés Les informations fournies ne seront pas communiquées à des tiers Informations sur votre achat Date d achat Modèle Numéro de série __________________...

Страница 23: ...F NOM MODèLE Ponceuse a Bande en Fibre de Carbone Courant électrique 230 240V 50Hz 900W SE CONFORME AUx DIRECTIVES SUIVANTES Directive 2004 108 EC Electromagnetic Compatability Directive 2006 95 EC Low Voltage Directive Directive 2006 42 EC Machinery Directive Directive 2002 95 EC RoHS EN 60745 2 4 2003 A11 2007 EN 60745 1 2009 EN 55014 1 2006 EN 55014 2 1997 A1 2001 EN 61000 3 2 2006 EN 61000 3 3...

Страница 24: ... électrique Conservez le cordon électrique loin de la chaleur de l essence d extrémités coupantes ou de pièces rotatives Des cordons électriques endommagés ou entortillés augmentent le risque de décharge électrique e Lorsque vous utilisez un outil électrique à l extérieur servez vous d une rallonge appropriée à une utilisation en extérieur L utilisation d un cordon électrique adapté à une utilisat...

Страница 25: ...es f Entretenez les outils électriques Vérifiez que les éléments rotatifs sont bien alignés qu ils tournent librement et qu aucune pièce n est endommagée Vérifiez toute autre situation pouvant affecter le fonctionnement des outils électriques Si l outil électrique est endommagé faites le réparer avant son utilisation De nombreux accidents sont provoqués par des outils électriques mal entretenus g ...

Страница 26: ...rité des protections antibruit des masques à poussière et des vêtements protecteurs dont des gants de sécurité Portez des lunettes de sécurité Portez des protections antibruit Portez un masque à poussière Cet outil doit être utilisé uniquement pour son utilisation initiale Toute utilisation autre que celles mentionnées dans ce Manuel sera considérée comme un cas de mauvaise utilisation L utilisate...

Страница 27: ... Gâchette de marche arrêt 6 Rouleau d entraînement 7 Levier de tension de la bande abrasive 8 Cylindre avant de la bande abrasive 9 Indicateur de rotation de la bande abrasive 10 Molette de centrage 11 Sortie d extraction de la poussière 12 Blocage de la poignée 13 Variateur de vitesse 1 5 4 2 3 7 10 12 11 13 6 8 9 PDF Compressor Pro ...

Страница 28: ...ez que la bande abrasive de rechange possède un bon raccord et que ses extrémités ne sont pas effilochées 3 Mettez la nouvelle bande abrasive en place en la faisant glisser la flèche de rotation située à l intérieur de la bande abrasive allant dans le même sens que celle de la ponceuse schéma E 4 Faites tourner le levier de tension de la bande abrasive 7 dans le sens inverse des aiguilles d une mo...

Страница 29: ... que la bande abrasive est en bon état 3 Banchez l outil à l alimentation secteur 4 Placez la ponceuse sur la pièce de travail et appliquez une légère pression schéma I 5 Poussez la gâchette de marche arrêt 5 vers le haut et laissez fonctionner la ponceuse jusqu à ce que la bande abrasive tourne à pleine vitesse avant de déplacer l outil sur la surface de travail schéma J 6 Appuyez sur le bouton d...

Страница 30: ...fication générale Vérifiez régulièrement que toutes les vis de fixation sont bien serrées Il faut fréquemment vérifier que le cordon électrique et tous les câbles de rallonge électrique utilisés ne sont pas endommagés Si c est le cas faites remplacer le cordon électrique par un centre de réparation d outils électriques Remplacez le câble de rallonge si nécessaire Nettoyage 1 Gardez les orifices d ...

Страница 31: ...F 31 PDF Compressor Pro ...

Страница 32: ...eldung Ihrer Garantie besuchen Sie bitte unsere Website www gmctools com wo Sie Ihre Details eingeben Ihre Angaben werden wenn nicht anders angewiesen in unsere Postversandliste aufgenommen damit Sie Information über zukünftige Produkteinführungen erhalten Die von Ihnen bereitgestellten Angaben werden nicht an dritte Parteien weitergegeben Kaufinformation Kaufdatum Modell Seriennummerr ___________...

Страница 33: ...lektrischer Strom 230 240V 50Hz 900W PASST SICH AN DIE FOLGENDEN RICHTLINIEN AN Directive 2004 108 EC Electromagnetic Compatability Directive 2006 95 EC Low Voltage Directive Directive 2006 42 EC Machinery Directive Directive 2002 95 EC RoHS EN 60745 2 4 2003 A11 2007 EN 60745 1 2009 EN 55014 1 2006 EN 55014 2 1997 A1 2001 EN 61000 3 2 2006 EN 61000 3 3 1995 A1 2001 A2 2005 TECHN UNTERLAGEN HINTER...

Страница 34: ...beweglichen Teilen fernhalten Beschädigte oder verwickelte Kabel erhöhen das Stromschlagrisiko e Bei Arbeiten mit einem Elektrowerkzeug im Freien ein für draußen geeignetes Verlängerungskabel verwenden Durch Verwendung eines für draußen geeigneten Kabels wird das Stromschlagrisiko reduziert 3 Persönliche Sicherheit a Seien Sie wachsam konzentriert und lassen Sie Ihren gesunden Menschenverstand wal...

Страница 35: ... Elektrowerkzeug vor dem Gebrauch reparieren lassen Viele Unfälle werden durch unzulänglich instandgehaltene Elektrowerkzeuge verursacht g Schneidwerkzeuge scharf und sauber halten Ordnungsgemäß instandgehaltene Schneidwerkzeuge mit scharfen Schnittkanten verklemmen sich weniger wahrscheinlich und lassen sich besser kontrollieren h Verwenden Sie das Elektrowerkzeug Zubehör und Werkzeugteile usw en...

Страница 36: ...andschuhen verwenden Schutzbrille tragen Ohrenschutz tragen Atemmaske tragen Das Werkzeug darf nur für den für ihn bestimmten Zweck verwendet werden Wenn es für andere als in diesem Handbuch angegebene Zwecke verwendet wird dann wird dies als Missbrauch erachtet Für Schäden oder Verletzungen infolge eines derartigen Missbrauchs haftet der Verwender und nicht der Hersteller Der Hersteller ist nicht...

Страница 37: ...ff 4 Schalterarretierung 5 Ein Aus Schalter 6 Antriebsrolle 7 Bandspannhebel 8 Vordere Bandrolle 9 Bandrotationsanzeige 10 Spureinstellung 11 Staubabzugsöffnung 12 Griffverriegelung 13 Geschwindigkeitseinstelltaste 1 5 4 2 3 7 10 12 11 13 6 8 9 PDF Compressor Pro ...

Страница 38: ...telle hat und an den Kanten nicht fransig ist 3 Das neue Band in Position schieben wobei der Drehpfeil auf der Bandinnenseite in die selbe Richtung wie der Pfeil am Gerät zeigt Abb E 4 Den Bandspannhebel 7 zur erneuten Spannung gegen den Uhrzeigersinn drehen Abb F 5 Den Schleifer an den Netzstrom anschließen und das Gerät gut festhalten und dann den Ein Aus Schalter 5 ziehen und das Band für kurze...

Страница 39: ...as Gerät an den Netzstrom anschließen 4 Den Schleifer auf das Werkstück geben und leichten Druck anwenden Abb I 5 Den Einschalter 5 nach oben ziehen und warten bis das Band seine volle Geschwindigkeit erreicht hat bevor es über das Werkstück geführt wird Abb J 6 Wenn fortlaufender Betrieb gewünscht wird die Schalterarretierung 4 drücken 7 Mit der Maserung in parallel sich überschneidenden Bahnen s...

Страница 40: ...omschlagrisiko Allgemeine Inspektion Regelmäßig prüfen dass alle Befestigungsschrauben fest sitzen Das Stromkabel eines Werkzeugs und alle Verlängerungskabel sollten häufig auf Beschädigung überprüft werden Bei Beschädigung das Kabel von einem Elektrowerkzeug Reparaturzentrum austauschen lassen Das Verlängerungskabel bei Bedarf ersetzen Reinigung 1 Die Luftschlitze des Geräts jederzeit frei von Ve...

Страница 41: ...D 41 PDF Compressor Pro ...

Страница 42: ...ranzia Per la registrazione della garanzia visitare il sito web www gmctools com e inserire i propri dettagli A meno che non abbia specificato diversamente i dettagli del proprietario saranno inclusi nella lista di distribuzione che sarà utilizzata per inviare regolarmente informazioni sulle novità GMC I dati personali raccolti saranno trattati con la massima riservatezza e non saranno rilasciati ...

Страница 43: ...tá Il sottoscritto Mr Philip Ellis Come autorizzato di GMC Declare that TIPO NUMERO DI SERIE BS900CF NOME MODELLO Flevigatrice a Nastro in Fibra di Carbonio Energia elettrica 230 240V 50Hz 900W SI CONFORMA ALL INDIRIZZAMENTO Directive 2004 108 EC Electromagnetic Compatability Directive 2006 95 EC Low Voltage Directive Directive 2006 42 EC Machinery Directive Directive 2002 95 EC RoHS EN 60745 2 4 ...

Страница 44: ...re l elettroutensile dalla presa di corrente Tenere il cavo lontano da fondi di calore olio benzina e sostanze affini bordi appuntiti o parti in movimento I cavi danneggiati o attorcigliati aumentano il rischio di scosse elettriche e quando si usa un elettroutensile all esterno usare cavi di prolunga compatibili con l uso in ambienti esterni Un cavo idoneo all uso in ambienti esterni riduce il ris...

Страница 45: ...to siano allineate e che si possano muovere liberamente Controllare inoltre che tutti i componenti siano privi di guasti e difetti che potrebbero ridurre la funzionalità del dispositivo Non usare un elettroutensile danneggiato e rivolgersi a un centro di assistenza autorizzato per la riparazione Le cattive condizioni degli elettroutensili sono responsabili di un gran numero di incidenti g Mantener...

Страница 46: ...scherina antipolvere e indumenti protettivi inclusi i guanti di sicurezza Indossare gli occhiali di sicurezza Indossare protezioni per le orecchie Indossare una maschera respiratoria a filtro Questo apparecchio deve essere utilizzato unicamente per gli scopi prescritti Ogni altro utilizzo all infuori di quelli menzionati nel presente manuale sarà considerato un uso improprio L utilizzatore e non i...

Страница 47: ...cco di sicurezza 5 Pulsante di accensione On Off 6 Rullo di trasmissione 7 Tensionatore Nastro 8 Rullo anteriore nastro 9 Indicatore di rotazione del nastro 10 Pomello di regolazione deviazione 11 Bocchettone estrazione polvere 12 Blocco impugnatura 13 Manopola di comando velocità variabile 1 5 4 2 3 7 10 12 11 13 6 8 9 PDF Compressor Pro ...

Страница 48: ...con la freccia che indica il senso di rotazione all interno del nastro che punta nella stessa direzione della freccia sulla levigatrice Fig E 4 Girare la leva di tensionamento nastro 7 in senso antiorario per tendere nuovamente il nastro Fig F 5 Inserire la spina della levigatrice in una presa di corrente Afferrare saldamente l utensile e premere il pulsante di accensione on off 5 Attendere brevem...

Страница 49: ...o 2 Accertarsi che il nastro sia sempre in buono stato 3 Collegare la spina della levigatrice a una presa di corrente 4 Avvicinare l utensile al pezzo da lavorare e applicare una leggera pressione Fig I 5 Premere il pulsante di accensione 5 e lasciare che la levigatrice raggiunga la velocità ottimale sul pezzo da lavorare Fig J 6 Premere il tasto di sicurezza lock on 4 se si richiede il funzioname...

Страница 50: ...e a 30mA L uso di un dispositivo differenziale riduce notevolmente il rischio di scosse elettriche Ispezione generale Verificare regolarmente che tutte le viti di fissaggio siano strette saldamente Il cavo di alimentazione dell utensile e le prolunghe eventualmente utilizzate dovranno essere controllate di frequente per accertarsi che siano prive di danni Se il cavo di alimentazione dovesse essere...

Страница 51: ...I 51 PDF Compressor Pro ...

Страница 52: ...totalmente Garantía Para registrar su garantía visite nuestro sitio web en www gmctools com e introduzca sus datos Estos datos serán incluidos en nuestra lista de correo salvo indicación contraria para recibir información sobre futuras ediciones Los datos aportados no estarán a disposición de ningún tercero Registro de compra Fecha de compra Modelo Número de serie ________________________________ ...

Страница 53: ... de Fibra de Carbono Energía eléctrica 230 240V 50Hz 900W SE HALLA EN CONFORMIDAD CON LA DIRECTIVA Directive 2004 108 EC Electromagnetic Compatability Directive 2006 95 EC Low Voltage Directive Directive 2006 42 EC Machinery Directive Directive 2002 95 EC RoHS EN 60745 2 4 2003 A11 2007 EN 60745 1 2009 EN 55014 1 2006 EN 55014 2 1997 A1 2001 EN 61000 3 2 2006 EN 61000 3 3 1995 A1 2001 A2 2005 LA D...

Страница 54: ...ntará el riesgo de descarga eléctrica d No maltrate el cable de alimentación No utilice nunca el cable de alimentación para transportar estirar o desenchufar la herramienta eléctrica Mantenga el cable de alimentación alejado de fuentes de calor aceite bordes afilados o piezas en movimiento Los cables de alimentación dañados o enredados aumentan el riesgo de descarga eléctrica e Cuando utilice una ...

Страница 55: ... piezas en movimiento están mal alineadas o curvadas si hay alguna pieza rota y cualquier otra condición que pueda afectar al funcionamiento de las herramientas eléctricas Si hay algún daño haga reparar la herramienta eléctrica antes de utilizarla Muchos accidentes son causados por herramientas eléctricas mal cuidadas g Mantenga las herramientas de corte afiladas y limpias Con un mantenimiento ade...

Страница 56: ...dad protección auditiva máscara anti polvo y ropa de protección incluyendo guantes de seguridad Lleve gafas de seguridad Lleve orejeras Lleve una mascarilla respiratoria La herramienta sólo debe utilizarse para su finalidad prevista Cualquier uso distinto a los mencionados en este manual se considerará un caso de mal uso El usuario y no el fabricante será el responsable de cualquier daño o lesión ...

Страница 57: ...lo de conexión desconexión 6 Rodillo de accionamiento 7 Palanca de tensión de la correa 8 Rodillo delantero de la correa 9 Indicador de giro de la correa 10 Mando de ajuste de reglaje 11 Puerto de extracción de polvo 12 Bloqueo de asa 13 Mando de control de velocidad variable 1 5 4 2 3 7 10 12 11 13 6 8 9 E 57 PDF Compressor Pro ...

Страница 58: ...la flecha de giro en el interior de la correa apuntando hacia la misma dirección que la flecha en la lijadora Fig E 4 Gire la palanca de tensión de la correa 7 en sentido antihorario para volver a tensar la correa Fig F 5 Enchufe la lijadora en un punto de alimentación con la lijadora bien sujeta tire del interruptor de gatillo de conexión desconexión 5 y deje que la correa gire durante un breve p...

Страница 59: ...I 5 Tire del interruptor de gatillo 5 hacia arriba y deje que la correa alcance la velocidad máxima antes de desplazarla por la pieza de trabajo Fig J 6 Pulse el botón de bloqueo 4 si precisa un funcionamiento continuo 7 Lije con el grano en carreras de solapamiento paralelo 8 Para eliminar la pintura o suavizar madera muy rugosa lije transversalmente con el grano en 45o en dos direcciones y a con...

Страница 60: ...os los tornillos de fijación están apretados El cable de alimentación de la herramienta y cualquier cable de extensión utilizado deben comprobarse con frecuencia en busca de posibles daños Si está dañado haga que sustituyan el conjunto de cable en un centro de reparación de herramientas eléctricas Sustituya el cable de extensión si es necesario Limpieza 1 Mantenga las ranuras de ventilación de la ...

Страница 61: ...E 61 PDF Compressor Pro ...

Страница 62: ...62 PDF Compressor Pro ...

Страница 63: ...63 PDF Compressor Pro ...

Страница 64: ...64 PDF Compressor Pro ...

Отзывы: