background image

Содержание 1994 Safari

Страница 1: ...0 W n e r S M a n u a l ...

Страница 2: ......

Страница 3: ...rvice keep in mindthat your GMC Truckdealer knows your vehicle best and is interested in yourcomplete satisfaction Your dealer invites you to return for all of your service needs bothduring and after the warranty period Remember if you havea concern and need helphandling it to your satisfaction see theprocedure in the GMC Truck Warranty andOwner Assistance Information booklet Thanks for choosing a...

Страница 4: ...at time without further notice For vehicles first sold in Canada substitute the name General Motors of Canada Limited for GMC TruckDivision whenever it appears in this manual For Canadian OwnersWho Prefer a French Language Manual Aux proprietaires canadiens Vous pouvez vous procurer un exemplaire de ce guide en francais chez votre concessionaireou au DGN Marketing ServicesLtd 1500Bonhill Rd Missis...

Страница 5: ...Model Reference This manual covers these models Passenger Model Cargo Model 111 ...

Страница 6: ... the road and how to drive under different conditions Section 5 Problems on the Road This section tells you what to do if you have a problem while driving such as aflat tire or engine overheating ection 6 Service Appearance Care Here the manual tells you how to keep your vehicle running properly andlooking good Section 7 Scheduled Maintenance Services This section tells you whento perform vehicle ...

Страница 7: ...IONS1 6 Each section of this manual begins witha brief list of its contents so you can often find at a glance if a section contains the information you want SECTION7 This section of the manual covers the maintenance required for your vehicle SECTION8 CUSTOMER ASSISTANCE This section includes important information about reporting safety defects and gives youdetails about the Roadside Assistance pro...

Страница 8: ...uld hurt you if youwere to ignore the warning In the gray caution area we tell you what the hazard is Then we tell you what to do to help avoid or reduce the hazard Please read these cautions If you don t you or others could be hurt You will also finda circle with a slash through it in this book This safety symbol means Don t Don t do this or Don t let this happen vi ...

Страница 9: ...elp avoid the damage When you readother manuals you mightsee CAUTION andNOTICE warnings indifferent colors or in different words You ll also see warning labels on your vehicle They use yellow for cautions blue for notices and the words CAUTIONor NOTICE Vehicle Symbols These are some of the symbols you will find on your vehicle For example these symbols are usedon an original battery A Cautron Poss...

Страница 10: ...er your vehicle is driven I Fasten Safety Door LocWUnlock Belts These symbols have todo with your lights I Master Lighting Switch Parking Lights I 00 Turn Signal Direction I Daytime RunningLights A Hazard Warning Flasher I f o g Lights I Headlight High Beam Viii ...

Страница 11: ... Rear Window Wiper Washer Windshield Washer Rear Window Defogger These symbols are used on warning and indicator lights l Engine Coolant Temperature Battery Charging System n I BRAKE Brake Standard Cluster ANTI LOCK 4 Wheel Anti Lock Windshield Defroster 93 Fuel Hatch Release Engine Oil Pressure ...

Страница 12: ...Here are some other symbols you may see X ...

Страница 13: ...How to Wear Safety Belts Properly Adults Driver Position Driver s Facial Air Bag System Safety Belt Use During Pregnancy Right Front Passenger Position Rear Seat Outside Passenger Positions Center Passenger Positions LapBelt Children Smaller Children and Babies Child Restraints Larger Children Safety Belt Extender Checking Your Restraint Systems Questions Many People Ask About Safety Belts Lap Sho...

Страница 14: ... It also tells you about bucket and bench seats power seats and headrestraints Froni Seais Manual Front Seat Slide the lever at the front of the seat to the left to unlockit Slide the seat to where you wantit Then releasethe lever and try to move the seat with your body to make sure the seat is locked into place 1 2 ...

Страница 15: ...makes the rear of the seat go up anddown The center control makes the whole seat go up and down or forward and rearward Reclining Bucket Seats If you have this feature you will have either a knob or a lever on the inside of the seat toadjust the seatback If you have the knob you can adjust the seatback by rotating the knob to the left or right 1 3 ...

Страница 16: ...tingthe lever Release the lever to lock the seat back where you want it Pull up on the lever and theseat will go to an upright position Don t adjust the driver sseatback while your vehicleis moving Don t have a seatback reclined if your vehicle is moving 1 4 ...

Страница 17: ...e front of the seat Slide the lever at the front of the seat to the right to unlock it Slide the seat to where you want it Then release the lever and try to move the seat with your body to make sure the seatis locked into place The non touring center bench seat has a pivoting right armrest The left armrest can also be usedas astorage compartment The storage compartment and beverage cooler can also...

Страница 18: ... seatbacks willrecline further back thanthe rear benchseatbacks To raise or lower the center console press the button between the beverage holders Only sit in thecenter seating position when the consoleis in an upright position For details about headrests see Head Restraints in this section 1 6 ...

Страница 19: ... After the latch has beenreleased push the seatback down until it locks in place To raise the seatback unlock the seat by pushing forward on the lever Make sure the seatback is locked when it isput back in the upright position Removable Seats Touring and Non Touring Bench Seats To Remove The Seat 1 Disconnect the quick release latch plates for the lap shoulder belt from the buckles in theroof 1 7 ...

Страница 20: ... the safetybelt 3 If you have a safety beltguide on your seat pull the safety belt all the way out through the guide 4 Pull up on the seatback latch on the right rear of the front seat Push the seatback down until it locks in place non touring bench seats only 5 Lift up on the seat release latch The latches are near the floor on the rear legsof the seat To relieve pressureon the latch pull back on...

Страница 21: ... Lowertheseat into position Make sure the front retainersare hooked onto the anchor pins Pull the seat down to latch the rear retainers Make sure the seatis locked inby pulling up and down on the seat 2 Raise the seatback by pushing forward on the latch at the _I right rearof the seat Pull up on the seatback until it is locked securely in the up position 1 9 ...

Страница 22: ...the safety belt with the release hole facing inward toward the seat slide the plastic cover up so you can see the buckle Disconnect the seatbelt Slide the cover back down andreinstall the belt correctly NOTICE Be sureto put the correct seats back in the proper positions so the safety belts will work properly Head Restraints If your vehiclehas the optional touring package you haveadjustable head re...

Страница 23: ...ty Belt Reminder Light in the Index In manystates and Canadian provinces the law says to wear safety belts Here s why They work You never know ifyou ll be in a crash If you do have a crash you don t know ifit will be a bad one A few crashes are mild and some crashes can be so serious that even buckled upa person wouldn t survive But most crashes are in between In many ofthem people who buckle up c...

Страница 24: ...ety belts in vehicles the facts are clear In most crashes buckling up does matter a lot Why Safety BeltsWork When you ride in or on anything you go as fast as it goes For example if the bike is going 10mph 16km h so is the child 1 12 ...

Страница 25: ...When the bike hits the block it stops But the child keeps going Take the simplest vehicle Suppose it s just a seat on wheels H Put someone on it 1 13 ...

Страница 26: ...Get it up to speed Then stop the vehicle The rider doesn tstop The person keeps going until stoppedby something In a real vehicle it could bethe windshield or the instrument panel 1 14 ...

Страница 27: ...ater if youare belted 0 Why don t they just put in air bags sopeople won t haveto wear A Air bags or SupplementalInflatable Restraint systems are in some safety belts vehicles today and willbe in more of them in the future But they are supplemental systems only so they work with safety belts not instead of them Everyair bag systemever offered for sale has required the useof safety belts Even if yo...

Страница 28: ...emind people to fasten their safety belts Unless the driver s safety belt is already buckled a chime willalso sound How To Wear Safety Belts Properly Adults This section is only for people of adult size Be aware that there are special things to know about safety belts and children And there aredifferent rules for smaller children andbabies If a child will be ridingin your vehicle see the section a...

Страница 29: ...describes the driver srestraint system Lap Shoulder Belt The driverhas a lap shoulder belt Here s how to wear it properly 1 Close and lock the door 2 Adjust the seat to see how see Seats in the Index so you can sit up straight 1 17 ...

Страница 30: ...ch plate to make sure it is secure If the belt isn t long enough see Safety BeltExtender at the end of this section Make sure the release button on the buckle is positioned so you would be able to unbuckle the safety belt quickly if you ever had to 5 To make the lap part tight pull down on the buckle end of the belt asyou pull up onthe shoulder belt ...

Страница 31: ...d under it the belt would applyforce at your abdomen This could cause serious or even fatal injuries The shoulder belt shouldgo over the shoulder and across the chest These parts of the body are best able to take belt restraining forces The safety belt locks if there s a sudden stop or a crash Shoulder Belt HeightAdjuster 1 You can move the shoulder belt adjuster to the height that is right for yo...

Страница 32: ...you want it try to move it up and down to make sure it islocked into place You can move the adjuster up from a lower position just by pushing upon it Adjust the height so that the shoulder portion of the belt is centered on your shoulder The belt shouldbe away from your face and neck but not falling off your shoulder ...

Страница 33: ...Q What s wrong with this n n A The shoulder belt is too loose It won tgive nearly as much protection this way 1 21 ...

Страница 34: ...Q What s wrong with this A The belt is over an armrest 1 22 ...

Страница 35: ...Q What s wrong with this A The shoulder belt is worn under the arm It should be worn over the shoulder at all times 1 23 ...

Страница 36: ...ted across the body To unlatch the belt just push the buttonon the buckle The belt should go back out of the way Before you close the door be sure the beltis out of the way If you slam the door on it you can damage both the belt and your vehicle ...

Страница 37: ...Driver s FacialAir Bag System This section explains the Driver s Facial Air Bagsystem Here are the most important things to know 1 25 ...

Страница 38: ... is a problem You will see this light flash for afew seconds when you turn your ignition to RUN or START Then thelight should go out which means the system is ready Remember if the air bag readiness lightdoesn t come on when you start your vehicle or stays on or comes on when you are driving your air bag system may not work properly Have your vehicle serviced right away 1 26 ...

Страница 39: ... The airbag is also not designedto inflate in rollovers side impacts or rear impacts where the inflation would provide no occupant protection benefit In any particular crash the determination of whether the air bag shouldhave inflated cannot be basedsolely on the level of damage on the vehicle s Inflation is determined by the angle of the impact and the vehicle s deceleration of which vehicle dama...

Страница 40: ...s of smoke coming from vents in the deflated air bag Some components of the air bagmodule in the steering wheel hub may be hot for a short time but the portionof the bag thatcomes into contact with you will not be hot to the touch 0 0 0 The air bag is designed toinflate only once After it inflates you ll need some new partsfor your air bagsystem If you don tget them the air bag system won t be the...

Страница 41: ...r Facial Air Bag Equipped Vehicle The facial air bagaffects how your vehicle should be serviced There are parts of the air bag system in several places around your vehicle You don t want thesystem to inflate while someone is working on your vehicle Your GM dealer and the 1994GM ServiceManual have information about servicing your vehicle and theair bag system The air bag system does not need regula...

Страница 42: ...ht front passenger ssafety belt works thesame way asthe driver s safety belt See DriverPosition earlier in this part Rear Seat Passengers It s veryimportant for rear seat passengers to buckle up Accident statistics show that unbelted people in the rear seat are hurt more often in crashes than those who are wearing safety belts Rear passengers who aren t safety beltedcan be thrown outof the vehicle...

Страница 43: ...plate into the buckle until it clicks If the belt stops before it reaches the buckle tilt the latch plate and keep pulling until you can buckle it Pull up on the latch plate to make sure it issecure If the belt is not long enough see Safety Belt Extender at the end of this section Make sure the release button on the buckle is positioned so you would be able to unbuckle the safety belt quickly if y...

Страница 44: ...sh this applies force to thestrongpelvic bones And you d be less likely to slide under the lap belt If youslid under it the belt would apply force at your abdomen This could cause serious or even fatal injuries The shoulderbelt should go over the shoulder and across the chest These parts of the body are best able to take belt restrainingforces The safety belt locks if there s asudden stop or a cra...

Страница 45: ...To unlatch the belt just push the button on the buckle 1 33 ...

Страница 46: ... Belt If your vehicle hasrear bench seats someone can sit in thecenter positions When yousit in a center seating position you have a lap safety belt which has no retractor To make the belt longer tilt the latch plate and pull it along thebelt ...

Страница 47: ...e end of this section Make sure the release button on the buckle is positioned so you wouldbe able to unbuckle the safety belt quickly if youever had to Children Everyone in a vehicle needs protection That includes infants and all children smaller than adult size In fact the law in every state inthe United States and in every Canadian province says children up to some age must be restrained while ...

Страница 48: ...Smaller Childrenand Babies 1 36 ...

Страница 49: ...w that children are safer if theyare restrained in the rear rather than the front seat We at General Motors therefore recommend that you put your child restraint in the rear seat unless the child is an infant and you re the only adult in thevehicle In thatcase you might want to secure the restraint in the front seatwhere you can keepan eye on the baby Wherever you installit be sure to secure the c...

Страница 50: ...Securing a Child Restraint in a Rear Outside Position You ll be using the lap shoulder belt See the earlier section about thetop strap if the child restraint has one 1 Put the restraint on the seat Follow the instructions for the child restraint 2 Secure the child in the child restraint as the instructions say 3 Pull out thevehicle s safety belt Make the belt as long as possible by tilting the lat...

Страница 51: ...the shoulderbelt goes infront of the child s face or neck put it behind the child restraint 5 Buckle the belt Make sure the release button is positioned so you would beable to unbuckle the safetybelt quickly if you ever had to 6 To tighten the belt pull up on the shoulder belt while you push down on the child restraint 1 39 ...

Страница 52: ...d let it go back all the way The safety belt will movefreely again and be ready to work for an adult or larger child passenger Securing a Child Restraint in the Center Rear Seat Position When you secure a child restraint in a center seatingposition you ll be using the lap belt See the earlier section about the top strap if the child restraint has one 1 40 ...

Страница 53: ...to unbuckle the safety belt quickly if you ever had to 6 To tighten the belt pull its free end while you pushdown on the child restraint 7 Push and pull the child restraint in different directions to be sure it is secure If the child restraint isn t secure turn the latch plate over and buckle it again Then see if it issecure If it isn t secure the restraint in a different place in thevehicle and c...

Страница 54: ...ld in thechild restraint as the instructiofis say 3 Pick up the latchplate and run the lap and shoulder portions of the vehicle s safety belt through or around therestraint The child restraint instructions will show you how If the shoulderbelt goes infront of the child sface or neck putit behind the child restraint 4 Buckle the belt Make sure the release button is positioned so you would beable to...

Страница 55: ...hile you push down on the child restraint 7 Push and pull the child restraint in different directions to be sure it issecure To remove the child restraint just unbuckle the vehicle s safety belt and let it go back all the way The safety belt will move freely again andbe ready to work for an adult or larger child passenger 1 43 ...

Страница 56: ...child can wear a lap shoulderbelt and get the additional restraint ashoulder belt can provide Accident statistics show that children are safer if they are restrained in the rear seat But they need to use the safety belts properly 0 Children who aren t buckled up can be thrown out in a crash A c 8 Children who aren t buckled upcan strike other people who are 1 44 ...

Страница 57: ...ward the center of the vehicle but be sure that the shoulder belt still ison the child s shoulder so that in acrash the child s upper body wouldhave the restraint that belts provide If the child is so small thatthe shoulder belt is still veryclose to the child s face orneck you might wantto place the child in aseat that has alap belt ifyour vehicle has one 1 45 ...

Страница 58: ...n around you you should use it But if a safety belt isn t long enough to fasten your dealer will order you an extender It s free When you go in toorder it take the heaviest coat you will wear so the extender will be longenough for you The extender will be just for you and just for the seat in your vehicle thatyou choose Don t let someone else use it and useit only for the seat it is made tofit To ...

Страница 59: ...ts are cut or damaged replace them Collision damage also may mean you will need to have safety belt or seat parts repaired or replaced New parts andrepairs may be necessary evenif the belt wasn t being used at the time of the collision Q What s wrong with this A The belt is torn Torn orfrayed belts may notprotect you in a crash They can rip apart under impact forces If a belt is torn or frayed get...

Страница 60: ... P The model numberon the replacementbelt must be listed on the safety belt you wantto replace Pull the shoulder belt all the way out to see this label 1 48 ...

Страница 61: ...on of vehicle symbols refer to Vehicle Symbols in the Introduction Keys 2 3 Your Doors and How They Work 2 5 DoorLocks 2 8 Theft 2 11 New Vehicle Break In 2 12 Ignitionswitch 2 13 Starting Your Engine 2 14 FuelRegulator 2 15 Driving Through Deep Standing Water 2 15 Engine Block Heater 2 16 Automatic Transmission 2 17 Locking Rear Axle 2 20 ParkingBrake 2 20 Shifting Into P Park 2 21 Shifting Out o...

Страница 62: ... LowBeam 2 32 WindshieldWipers 2 32 Windshield Washer 2 33 RearWindow Wipermasher 2 34 Cruise Control 2 35 Lights 2 41 Mirrors 2 45 SunVisors 2 47 CigaretteLightedAshtrays 2 48 Assist Handles 2 49 StorageCompartments 2 50 InstrumentCluster 2 51 Warning Lights Gages andIndicators 2 55 Indicator Lights 2 57 Gages 2 61 Luggagecarrier 2 65 Trailer Wiring Harness 2 66 2 2 ...

Страница 63: ...Keys 2 3 ...

Страница 64: ...r a qualified locksmith how to make extra keys Keep the plugs ina safe place If you lose your keys you ll be able to have new ones made easily usingthese plugs I NOTICE Your vehicle hasa number of new features that can help prevent theft But you can have a lot of trouble getting into your vehicle if youever lock your keys inside You may even have to damage your vehicle to get in So be sure you hav...

Страница 65: ... and How They Work Side Doors To open the front side door from the outside grasp the handle and To open the front side door from the inside pull the lever toward you and pushthe door open pull the door open J 2 5 ...

Страница 66: ...ing side door pull the handle toward the back and slide the door to the rear until it latches in the open position I 2 6 To close the sliding side door pull the handle toward the front to release the rear latch and slide the door forward ...

Страница 67: ...ull on thelatch release handle in the inside of the door To close the rear doors close the left door first Check to make sure both doors are completely closed The rear doors have a check assembly to keep the doors from opening beyond 90 2 7 ...

Страница 68: ...en the doors push in on the clip and lift the check assembly up off the mounting bracket Do this on each door Replace the assemblies the same way See the caution under Swing Out Windows in this section Door Locks ...

Страница 69: ...ock front doors and sliding side door slide the lock levers down To unlock the front doors and the sliding side door from the inside Slide the lock levers up Rear doors cannot be manually lockedfrom the inside To unlock the rear hatch and split panel doors from theinside Push the top of the HATCH REL switch 2 9 ...

Страница 70: ...door All models have overriding door locks When adoor is locked thedoor handle will not work the latch This will help stop a door from being accidentally opened However powerdoor locks do not affectthe operation of the hatch Leaving Your Vehicle If you are leaving the vehicle take your keys open your door and set the locks frominside Then get out and close the door Rear Hatch and Split Panel Doors...

Страница 71: ...ally lock when the hatchis shut If the hatch is partially closed the rear doors will lock and you will need to use the key or HATCH REL switch located to theleft of the steering column to unlock them See also Hatch Release Switch Rear WiperNasher and Rear Defogger in the Index Vehicle theft is big business especially in some cities Although your vehicle has a number of theft deterrent features we ...

Страница 72: ...to lock it upand take your keys But what if you haveto leave your ignition key What if you have toleave something valuable in your vehicle 0 Put your valuables ina storage area out of sight Lock all the doors except the driver s 0 Then take the door key with you New Vehicle Break in NOTICE Your modern vehicle doesn t need an elaborate break in But it will perform better in the long run if you foll...

Страница 73: ... youinse d the key NOTICE Prolonged operationof accessories in the ACC position could drain your battery and prevent you from starting your vehicle LOCK This position locks your ignition steering wheel and transmission It s a theft deterrent feature You will only be able to remove your key when the ignition is turned toLOCK OFF This position lets you turn offthe engine but still turn the steering ...

Страница 74: ...shift lever to P Park or N Neutral Your engine won t start in any other position that s a safety feature To restart when you re already moving use N Neutral only NOTICE Don t try to shift to P Park if your vehicle is moving If you do you could damage the transmission Shift to P Park only when your vehicle is stopped 1 Without pushing theacceleratorpedal turn your ignition key to START When the eng...

Страница 75: ...tricalparts oraccessories you could change the way the fuel injection system operates Before adding electrical equipment check withyour dealer If you don t your engine might not perform properly If you ever have to have your vehicle towed see the part of this manual that tells howto do it without damagingyour vehicle See Towing Your Vehicle in the Index Fuel Regulator If you have the 4 3L engine V...

Страница 76: ...y during engine warm up Usually the coolant heater shouldbe plugged ina minimum of four hours prior tostarting your vehicle To use the coolant heater 1 Turn off the engine 2 Open the hood and unwrapthe electrical cord 3 Plug it into a normal grounded 110 volt outlet NOTICE After you ve used the coolant heater be sure to store the cord as it was before to keep it away from moving engine parts If yo...

Страница 77: ...ng here we ask that youcontact a GM dealer in the area where you ll be parking your vehicle The dealer can give you thebest advice for that particular area Automatic Transmission There are several different positions for your shift lever P Park This locks your rear wheels It sthe best position to use when you start your engine because your vehiclecan t move easily ...

Страница 78: ...this part R Reverse Use thisgear to backup NOTICE Shifting to R Reverse while your vehicle is moving forward could damage your transmission Shift to R Reverse only after yourvehicle is stopped To rock your vehicle back and forth to get out of snow ice or sand without damaging your transmission see If You reStuck In Sand Mud Ice or Snow in the Index N Neutral In this position yourengine doesn t con...

Страница 79: ... on If you manually select 2 Second Gear the transmission will drive in second gear You may use this feature forreducing torque to the rear wheels when youare trying to start your vehicle from a stop on slippery road surfaces 1 First Gear This position gives you even more power but lower fuel economy than 2 Second Gear You can use it on very steep hills or indeep snow or mud If the selector lever ...

Страница 80: ...o move the vehicle Parking Brake To Set the Parking Brake r I Hold the regular brake pedal down with your t To Release the Parking Brake right foot Push down the parkingbrake pedal with yourleft foot If the ignition is on the brake system warning light will come on Hold theregular brake pedal down Pull the brake release lever NOTICE Driving with the parking brake on can cause your rear brakes to o...

Страница 81: ...irst to keep the trailer from moving Shifting Into P Park 1 Hold the brake pedal down with your right foot and set the parking brake 2 Move the shift lever into P 3 Move the ignition key to LOCK Park position like this Pull the lever toward you lever up as far as itwill go Move the 4 Remove the key and take it with you If you can walk away from your vehicle with the ignition key in your hand your ...

Страница 82: ... vehicle has a brake transmission shift interlock You have to fully apply your regular brake before you can shift from P Park when the ignition is in theRUN position See AutomaticTransmission in the Index If youcannot shift out of P Park ease pressure on the shift lever push the shift lever all the wayinto P Park as you maintain brakeapplication Then move the shift lever into the gear you want If ...

Страница 83: ...revent torque lock setthe parking brake and then shift into P Park properly before you leave the driver s seat To find out how see Shifting Into P Park in the Index When youare ready to drive move theshift lever outof P Park BEFORE you release the parking brake If torque lock does occur you may need to have another vehicle push yours a littleuphill to take some of the pressure from the transmissio...

Страница 84: ...Engine Exhaust Running Your Engine While You re Parked It s better not to park with theengine running But if you ever have to here are somethings to know 2 24 ...

Страница 85: ...Follow the proper steps to be sure yourvehicle won t move See Shifting Into P Park in the Index If you re pulling a trailer see Towinga Trailer in the Index 2 25 ...

Страница 86: ...for extra traction This is like four wheel drive but there is no separate lever or switch to engage or disengage the front axle It is fully automatic and adjusts itself as needed for road conditions Windows I I To open yourmanual windows turn the hand crankon each door to raise or lower your side door windows 2 26 ...

Страница 87: ...have optional power windows the controls are on each of the front side doors The driver s door has a switch for the front passenger window as well Your power windows will not move unless the ignition has been turned to RUN 2 27 ...

Страница 88: ...itch is to the left of the steering column It will release the rearhatch The vehicle mustbe in P Park or N Neutral to release the hatch and unlock the split panel doors The hatch will release with or without the key in theignition ...

Страница 89: ...allows you to adjust the steering wheel before you drive You can alsoraise it to the highest level to give your legs more room when you exit and enter the vehicle To tilt the wheel hold the steering wheel and pull the lever Move the steering wheel to a comfortable level then release the lever to lock the wheel inplace 2 29 ...

Страница 90: ...owBeam WindshieldWipers 0 WindshieldWasher Cruise Control Option Turn Signal and Lane Change Indicator The turn signalhas two upward for Right and two downward for Left positions These positions allowyou to signal a turn or a lane change To signal a turn move thelever all the way up or down When the turn is finished the lever will return automatically 2 30 ...

Страница 91: ...er is used With thisflasher installed the signal indicator will flash even if a turnsignal bulb is burnedout Check thefront and rear turn signallights regularly to make sure they are working Operation of Lights Although your vehicle s lighting system headlights parking lights fog lamps side marker lights and taillights meets all applicable federal lighting requirements certain states and provinces...

Страница 92: ...r high to low pull the turn signal lever all the way toward you Then release it Windshield Wipers When the high beams are on this blue indicator light on the instrument panelalso will beon You control the windshield wipersby turning the band with the wiper symbolon it 2 32 ...

Страница 93: ...ell enough to drivesafely To avoid damage be sure to clear ice and snow from the wiper blades before using them If they re frozen to the windshield carefully loosen or thaw them If your blades do become damaged get new blades or blade inserts Heavy snow or icecan overload your wipers A circuit breaker will stop them until the motor cools Clear away snow or ice to prevent an overload Windshield Was...

Страница 94: ...system Also water doesn t clean as well as washerfluid Fill your washer fluid tank only 3 4 full whenit s very cold This allows for expansion which could damage the tank if it is completely full Don t use radiator antifreeze in your windshield washer It can damage your washer system and paint Rear Window Wiper Washer Dutch Door You control your rear window wipedwasher from a switch on your instrum...

Страница 95: ...em uses thesame fluid tank asthe windshield washer system The rear window washer system will run out of fluid before the windshield washer system indicating you need to check yourfluid level and fill the fluid tank Cruise Control Option With Cruise Control you can maintain a speed of about 25 mph 40 km h or more without keeping yourfoot on theaccelerator This can really help on long trips Cruise C...

Страница 96: ...To Set Cruise Control Move the Cruise Control switch to ON Get up to the speed you want Push in the set button at the end of the lever and release it Take your foot off the acceleratorpedal 2 36 ...

Страница 97: ...he Cruise Control switch from ON to R A Resume Accelerate and hold it for abouthalf a second You ll go right back up to your chosen speed and stay there Remember ifyou hold the switch at R A Resume Accelerate longer than half asecond the vehicle will keep going faster until yourelease the switch or apply the brake You could be startled and even lose control So unless you want to go faster don t ho...

Страница 98: ...the lever then release the button and the accelerator pedal You ll now cruise at the higherspeed Here s thesecond Move the Cruise switch from ON to RIA Resume Accelerate Hold it there until you get upto the speedyou want and then release the switch To increase your speed in very small amounts quickly less than halfa second move the switch to RIA Resume Accelerate Eachtime you do this your vehicle ...

Страница 99: ...u take your foot off thepedal your vehicle will slow down to the Cruise Control speed you set earlier Using Cruise Control on Hills How well yourCruise Control will work on hills depends u9 oil YOU speed load and the steepness of the hills When going upsteep hills you may want to step on the accelerator pedal to maintain yourspeed When going downhill you may have to brake or shift to a lower gear ...

Страница 100: ...ise Control There are two ways to turn off the Cruise Control Move the Cruise switch to OFF To Erase Speed Memory When you turn off the Cruise Control or the ignition your Cruise Control set speed memory is erased 2 40 ...

Страница 101: ... turn off allyour lights Turn the dialabove thelight switches to the left to dim your instrument panel lights Turn the dialto the right to brighten your instrument panel lights If you turn thedial all the way to the right until it clicks your interior lights will come on You can switch your headlights from high to low beam by pulling on the multifunction lever on the left of the steeringcolumn A c...

Страница 102: ...he right side of the switchto turn the fog lamps on and the leftside of theswitch to turn themoff A warning light in the switch will remind you that your fog lights are on Remember fog lamps alone will notgive off as much lightas your headlights Never use your fog lamps in the dark without turning on your headlights Fog lamps will go off whenever your high beamlights come on When the high beams go...

Страница 103: ...reduced brightness in daylight when The ignition is on 0 The headlight switch is off and The parking brake is released When you turn on your headlights the DRL will switch off and the exterior lights will come on When you turn off the headlights the exterior lights will go outand the high beams will change to the reduced brightness of DRL again The DRL indicator light on the instrument panel willg...

Страница 104: ...on when you open any of the doors You can also turn on the dome lights by turning the dimmer dial to the right until it clicks You may have the optionalreading lights next to the dome I lights Turn the lights on and off by pressing the switchnext to the light You can adjust the lights to any desired positionby rotating the lamp and they will work whenthe ignition is on or off Be sure to turn the l...

Страница 105: ...as usual If the switch is OFF the interior lights willnot come on when anyof the vehicle doors are open It is on the instrument panelabove the radio If you have the optional reading lamps they will stilloperate if the switch is in the OFF position Mirrors Inside Mirror 2 45 ...

Страница 106: ...r outside mirrorsby hand so you canjust see the side of your vehicle I Your outside mirrors can also be folded in or out Push the mirror towards the vehicle to move it in After pushing the mirror out adjustmentwill be maintained Some vehicles come with the optional remote control switch for adjustingthe outside mirror The switch is on the instrumentpanel above the radio I t 2 46 1 ...

Страница 107: ...esired direction To make sure you do not accidentally move a mirror slide the switch to themiddle off position Convex Outside Mirror Your right side mirror is convex A convex mirror ssurface is curved so you can see more from the driver s seat Sun VisorsNanityMirrors To block out glare you can swing down the visors You can also swing them from side to side 2 47 ...

Страница 108: ...go When it s ready it will pop back by itself Don t hold a cigarette lighter in with your hand while it isheating If you do it won t be able to back awayfrom the heating element when it s ready That can make it overheat damaging the lighter and the heating element To remove the front ashtray pullon the front of it while pressing on the iafier tab 2 48 ...

Страница 109: ... If you do cigarettes or other smoking materials could set them on fire causing damage Assist Handles Assist handles are located on the inside front and center vehicle pillars Grasp them as necessary to help enter and exit your vehicle If youhave the optional rear hatch and split panel doors you willalso have an assist handle on the inside hatch 2 49 ...

Страница 110: ...ve an optional sliding tray storage compartment it is under thefront passenger seat To open the compartment slide the latch in thetop handle and pullthe tray forward To open youroptional beverage cooler lift up on the armrest The cooler has a drain system that drains off as muchfluid as necessary It also has an ashtray anda cupholder for your convenience 2 50 ...

Страница 111: ...door back Use the straps to secure items lnstrument Cluster Your instrument cluster is designed tolet you knowat a glance how your vehicle is running You ll know howfast you re going about how much fuel remains and manyother things you ll need to know to drive safely and economically The optional digital cluster on your vehicle s instrument panel is displayed electronically and will tell you every...

Страница 112: ...ar Heater Switch 9 Rear N C Switch 10 Interior Light Override Switch 11 Audio System 12 ConvenienceTray 13 Glove Box 14 Ashtray 15 CigaretteLighter 16 Hood Release Handle 17 Hazard Warning Flasher 18 IgnitionSwitch 19 Horn 20 Brake Release Handle 21 MultifunctionLever 22 Cruise Control 23 Tilt Wheel Lever 24 Rear Wiperwasher Switch 25 Hatch Release Switch 26 Rear Window Defogger Switch 27 Vent 2 5...

Страница 113: ... and kilometers per hour kmdh Yourodometer shows how far your vehicle has been driven in either miles used in the U S or kilometers used in Canada Tamper Resistant Odometer Standard Cluster Digital Cluster Your odometer is tamper resistant The odometer will show silver lines between the numbersif someone tries to turn it back ...

Страница 114: ...ding when the new odometer was installed Trip Odometer Standard Cluster Digital Cluster The trip odometer can tellyou how far your vehicle has been driven since you last set thetrip odometer to zero To reset thetrip odometeron the standard cluster press the button near the readout The trip odometer on the digital willappear in place of your regular odometer when you press theTRIPbutton To reset th...

Страница 115: ...liar with this section you should not bealarmed when this happens Gages can indicate when there may be or isa problem withone of your vehicle s functions Often gages and warning lights work together to let you know when there sa problem with your vehicle When one of the warning lights comes on and stays on when youare driving or when one of the gages shows there may bea problem check the section t...

Страница 116: ...longer to stop If the light is still on have the vehicle towedfor service See TowingYour Vehicle in the Index The brake system warninglight will also come on when you set your parking brake and it will stay on if your parking brake doesn t release fully If it stays on after your parking brake is fully released it means you have a brake problem Anti Lock Brake System Warning Light Standard Cluster ...

Страница 117: ...or electrical malfunctions and the light tells you if there is a problem You will see this light flash for afew seconds when you turn yourignition to RUN or START Then the light should go out which means the system is ready Remember if the air bag readiness light doesn t come on when you start your vehicle or stays on or comes on when youare driving your air bag system may not work properly Have y...

Страница 118: ...is not running as a check to show you it is working If it does not comeon at all have it fixed right away If it stays on or it comes on while youare driving the computeris indicating that you have a problem You should take your vehicle infor service soon I NOTICE If you keep driving your vehicle with this light on after a while the emission controls won t work as well your fuel economy won t be as...

Страница 119: ...iving you mayhave a problem with the electrical charging system It could indicate that youhave a loose accessory drive belt or another electrical problem Have it checked right away Driving while this light is on could drain your battery The charging system light is on the left bottom corner of your standard cluster It is part of the digital cluster voltmeter If you mustdrive a short distance with ...

Страница 120: ... DRL indicator light is on the lower left of the standardcluster If you have the digital cluster it is on the top left Headlight High Beam Indicator Light I The high beam indicatoris on whenever youuse your high beam headlights For more details see Headlight High Low Beam Changer in this part The light is on the left hand side of the standardcluster If youhave the digital cluster it is on the top ...

Страница 121: ...sters For more details see Turn andLane Change Signal in this part Gages Fuel Gage Standard Cluster Digital Cluster The fuel gage tells you how much fuel you haveremaining when the ignition is on When the gage first indicates empty you still have a little fuel left but you should get more fuel assoon as possible A box around the fuelgage symbol on thedigital cluster will beginto flash when your ta...

Страница 122: ...Fluid Capacities Oil Pressure Gage Standard Cluster Digital Cluster a I I I The oil pressure gage shows the engine oil pressure in psi poundsper square inch when theengine is running Canadian vehiclesindicate pressure in kPa kilopascals Oil pressure may vary with engine speed outside temperature and oil viscosity but readings above the low pressure zone indicate the normal operating range A readin...

Страница 123: ...t shows the engine coolant temperature If the gage pointer movesto the H red side your engine is too hot It means that yourengine coolant has overheated If you have been operating your vehicle under normaldriving conditions you should pulloff the road stop your vehicle and turnoff the engine as soon aspossible If you have a digital cluster a box around the temperature symbol will also flash when y...

Страница 124: ...When the ignition is running thegage shows the conditionof the chargingsystem Readings between the low and high warningzones indicate the normal operating range Readings in either warning zone indicate a possible problem inthe electrical system On the digital cluster a box around the voltmeter symbolwill begin the flash when the charging system needs service You can only drive for a short time wit...

Страница 125: ...des of your vehicle Load your cargo so that it rests on the slats and does not scratch or damage the vehicle Put the cargo against the side rails andfasten it securely to theluggage carrier Put themain weight as far forward as you can Don t exceed the maximum vehicle capacity when loading your vehicle For more information on vehicle capacity and loading see Loading Your Vehicle inthe Index To prev...

Страница 126: ...ice person Attach the harness tothe trailer thentape or strap it to your vehicle s frame rail Be sure you leave it loose enough so the wiring doesn t bend or break but notso loose that it drags on the ground The harness must be routed out of your vehicle between therear door and the floor with enoughof the harness left on both sides so that the trailer or the body won t pullit Store theharness in ...

Страница 127: ...Notes ...

Страница 128: ...Notes ...

Страница 129: ... 4 Heating Air Conditioning System 3 5 RearHeater 3 6 Rear Air Conditioning 3 6 RearWindow Defogger 3 7 Engine Coolant Heater 3 8 Audio Systems 3 8 FMStereo 3 8 AM 3 8 AMStereo 3 8 How to Operate YourETR AM Radio 3 9 How to Operate YourETR AM FM StereoAudio System 3 11 How to Operate Your ETR AM FM Stereo Audio How to Operate Your ETR AM FM StereoAudio Cassette System Cassette System 3 13 With Equ...

Страница 130: ... or the air conditioningfan is running Ventilation Tips Keep the hood and front air inlet free of ice snow or any other obstruction such as leaves The heater anddefroster will workfar better reducing the chance of fogging theinside of your windows When you enter a vehicle in cold weather turn the blower fan to HIGH for afew moments before drivingoff This helps clear the intake ducts of snow and mo...

Страница 131: ... to direct the flow of air or close the vents altogether When you close a vent it will increase the flow of air coming out of any vents that are open If your vehicle doesn t have airconditioning there is an air vent in the right hand kick panel below the instrument panel The vent hasa handle to open andclose it 3 3 ...

Страница 132: ...he floor vents andfront side windows Use this when youget fog or iceon the windshield HTR Heater Most of theair comes out near the floor The rest comes out from the defroster vents under the windshield and at the front side windows This is bestfor cold weather VENT The air comes out at the vents on your instrument panel BLEND Position1 With this setting the heated outside air comes out between the...

Страница 133: ...lever can be moved tofour different functions DEFROST The setting with the defrost symbol operates the defroster Most of the air comes out near the windshield withsome going to the floor vents andside window defrost vents Use this when you get fog or ice on the windshield BLEND With thissetting the heated outside air comes out between the heater vents anddefroster vents with some air coming throug...

Страница 134: ...o outside air will be going through yourvehicle MAX A C This cools the air thefastest Move the other lever all the way to Cold MAX A C lets in only a little air from the outside You can use MAX A C at first when it s really hot outside and you need to cool off quickly When the airconditioning defrost or Blend is on you may notice a slight increase or decrease inengine speed due to compressor opera...

Страница 135: ... as much snow or ice as possible before using the rear window defogger To turn on the rear window defogger find the switch marked REAR DEFOG on your instrument panel to the left of the steering column Press the top of this switch until the light in the switch comes on then release it The rear window defogger will only work when the ignition switchis in the RUN position You can turn the defogger of...

Страница 136: ...y adjusting the volume controlon your radio toa safe sound level before your hearing adapts to it To help avoid hearing loss or damage Adjust the volumecontrol to the lowest setting 0 Increase volume slowly untilyou hear comfortably and clearly FM Stereo FM stereo will give you the best sound But FM signals will reach only about 10to 40 miles 16 to 65 km Tall buildingsor hills caninterfere with FM...

Страница 137: ...ation of sound equipment that has been added improperly So before adding sound equipment check with your dealer and be sure to check Federal rules covering mobile radio and telephone units How to Operate Your ET AM Radio R This part tells you how your ETR AM radio works The Upper Knob The upper knob does these three things 0 It controls the volume The VOLknob increases volume when rotated to the r...

Страница 138: ...e in the station 0 Push SET SET appears inthe VF display for a few seconds Within 5 seconds push one of the four pushbuttons Whenever you push that button the preset station will return NOTE Up to three additionalstations may be presetby pressing two adjoining buttons at the same time 0 Tune in the station 0 Push SET SETappears in the VF display for a few seconds 0 Within 5 seconds push any two ad...

Страница 139: ...display thetime The control behind the upper knob moves the sound between your left and right speakers The Lower Knob Turn the lower knob tochoose radio stations Push it to get AM or FM The control behind thelower knob moves the sound between your front and rear speakers Tone Levers These two levers control the toneof your radio BASS Slide this lever up to increase the bass response TREBLE Slide t...

Страница 140: ...0 Within 5 seconds push two buttons next to each other at the same time Whenever you push that pair of buttons the preset station will return Repeat these stepsfor each pair of buttons SCAN Button When you pushthis the radio willgo to the next station and stay there a few seconds Thenit will go to the next station and pause and keep doing that Press SCANagain to stopscanning SEEK Button This choos...

Страница 141: ... display the station It tells you the time Whenthe ignition is off push the knob to display the time It allows you to hear theother side of the tape Press knob while the cassette is playing The control behind the upper knob moves the sound between your left and right speakers The Lower Knob Turn the lower knob tochoose radio stations Push it to get AM or FM The control behind the lower knob moves ...

Страница 142: ...ds 0 Within 5 seconds pushone of the four pushbuttons Whenever you push that button the preset station will return Repeat these steps for each pushbutton NOTE You can preset 3 more stations on each band by pushing a pair of buttons next to each other at the same time Just 0 Tune in the station Push SET SETappears in theVF display for afew seconds 0 Within 5 seconds push two buttons nextto each oth...

Страница 143: ...The longer side with the tape visible goes infirst If you hear nothingor hear just garbled sound it may not be in squarely Push STOP EJECT to remove the tape and start over Once the tapeis playing I the upper andlower knobs for volume and balance just as youdo forradio The arrows show whichside of the tape is playing To go forward to another part of the tape push the button with an arrow pointing ...

Страница 144: ...onis off push the knobto display It allows you to hear the other side of the tape Press the knobwhile The control behind the upper knob moves the sound between your left and right speakers The LowerKnob Turn thelower knob to choose radio stations Push it toget AM or FM The control behind thelower knob moves the sound between your front and rear speakers Tone Levers Equalizer The 5 levers near the ...

Страница 145: ...the station Push SET SETappears in the VF display for afew seconds 0 Within 5 seconds push one of the four pushbuttons Whenever you push that button the preset station will return Repeat these steps for each pushbutton NOTE You can preset3 more stations on each bandby pushing a pair of buttons next to each otherat the same time Just Tune in the station Push SET SETappears in the VF display for a f...

Страница 146: ...gor hear just garbled sound it may not be in squarely Push STOP EJECT to remove the tape and start over Once the tape is playing use the upper and lower knobs for volume and balance just as you do forradio The arrows show whichside of the tape is playing To go forward to another partof the tape pushb 0 To go backward push 4 To stop the tape push the STOP EJECT button lightly 0 To go from oneside o...

Страница 147: ...ld be cleaned regularly each month or after every 15hours of use If you notice a reduction in sound quality trya known good cassette to see if the tape or the player is at fault If this other cassette has no improvement in sound quality clean the tape player Clean your tape player with a wiping action non abrasive cleaning cassette and follow the directionsprovided withit Cassettes are subject to ...

Страница 148: ...from the radio or CD player stops By pressing the knob again or by turning theVOL knob to the right sound will begin again Lefmight Speaker Control The control ring behind the upper knob allows you to balance the sound between the left and right speakers Balance will be displayed briefly when using this control Lower Knob The lower knob hastwo functions It enables you to tune in different radio st...

Страница 149: ... you press thatbutton the presetstation will return Clock To set the clock just Press the SET button The radio may be on or off 0 Within 5 seconds press and holdeither SEEK bto increase the minutes or 4 SEEK to decrease the minutesuntil the correct minute appears on the display Press and holdSCANuntil the correct hour appears on the display RCL Press the RCLbutton to alternate between time andradi...

Страница 150: ...rty scratched or wet Too much moisture is in the air If there is wait about one hour and try again RCL Press RCL to see what trackis playing Press it again within 5 seconds to see how long it has been playing The track number also appears when you change the volume or when a new track starts to play COMP Press the COMPbutton tomake soft and loud passages more nearlyequal in volume COMP appears in ...

Страница 151: ...rt at track 1when youreinsert it Anti Theft Feature Delco LOC II is an Anti Theft feature for the compact disc player Itcan be usedor ignored If ignored the system plays normally If it is used your player won t beusable if it is ever stolen because it won t turnon The instructions below tell you how toenter a secret code into the system If your car loses battery power for any reason you must unloc...

Страница 152: ...ndicating that the disabling sequence was successful If the display indicatesSEC the numbers did not match and the unit is still secured Disabling The Theft System 1 Depress presets 1 and 4 for 5 seconds with ignitionon and radio power off The display will showSEC indicating the unitis in thesecure mode 2 Depress the SETbutton The display will show000 3 Enter the first three digitsof the code foll...

Страница 153: ...to the edge Be sure never to touch thesignal surface when handlingdiscs Pick up discs by grasping the outer edges or the edge of the hole andthe outer edge Fixed Mast Antenna The fixed mast antenna can withstand mostcar washes without being damaged If the mast shouldever become slightly bent you can straightenit out by hand If the mast is badly bent as it might beby vandals you should replace it C...

Страница 154: ...Notes 3 26 ...

Страница 155: ... also included many other useful tips on driving Defensive Driving 4 2 DrunkenDriving 4 2 Control of a Vehicle Braking 4 5 Steering 4 7 Steering Tips 4 8 Passing 4 10 Loss of Control 4 11 DrivingatNight 4 12 Driving in the Rain 4 13 CityDriving 4 15 Freeway Driving 4 16 Hill andMountain Roads 4 18 Winter Driving 4 20 Towing a Trailer 4 23 4 1 ...

Страница 156: ...ath toll claiming thousands of victims every year Alcohol takes away three things that anyone needs to drive a vehicle Judgment 0 Muscular Coordination Vision Police records show that almost half of all motor vehicle related deaths involve alcohol a driver apassenger or someoneelse such as a pedestrian had beendrinking In mostcases these deaths are the result of someone who was drinking and drivin...

Страница 157: ...tinis 3 ounces or 90 ml of liquor each withinan hour the person s BAC would be close to 0 12 percent A person who consumes food just before or during drinking will have a slightly lower BAC level NUMBER OF DRINKS as in picture 100 120 140 150 180 200 220 240 BODY WEIGHT IN POUNDS 3 HOURS 2 HOURS 1 HOUR The law in most U S states sets the legal limitat a BACof 0 10 percent In Canada the limit is 0 ...

Страница 158: ...thechances are twenty five times greater And the bodytakes about anhour to rid itselfof the alcohol in one drink No amount of coffee or number of cold showers will speed that up I ll becareful isn t the right answer Whatif there s an emergency a need to take sudden action as when a childdarts into the street A personwith a higher BAC might not beable to react quickly enoughto avoid the collision T...

Страница 159: ...ion time Then you haveto bring up yourfoot and do it That s reaction time Average reaction time is about 314 of a second But that s onlyan average It might beless with one driver and aslong as two or three secondsor more with another Age physical condition alertness coordination and eyesight all playa part So do alcohol drugs and frustration But even in314 of a second a vehicle moving at 60 mph 10...

Страница 160: ...assist is used up it may takelonger to stop and the brake pedal will be harder to push Anti Lock Brakes ABS Your vehicle has an advanced electronic braking system that can help you keep it under control When you start your vehicle and begin to drive away you may heara momentary motoror clicking noise This is the ABS system testing itself Here s how anti lock works Let s say the roadis wet You redr...

Страница 161: ... have anti lock brakes To Use Four WheelAnti Lock Don t pump the brakes Just hold the brake pedal down and let anti lock work for you You may feel the brakesvibrate or you may noticesome noise but this is normal Braking in Emergencies Use your anti lock braking system when you need to With anti lock you can steer and brake at thesame time In many emergencies steering can help you more than even th...

Страница 162: ...p on theacceleratorpedal steer the vehicle theway you want it to go and slow down Speed limitsigns near curves warn that you should adjust your speed Of course the postedspeeds are based on good weather and road conditions Under lessfavorable conditions you ll want togo slower If you need to reduce your speed as you approach a curve do it before you enter the curve while yourfront wheels arestraig...

Страница 163: ...g at all times and wear safety belts properly Off Road Recovery You may find sometime that your right wheels have dropped off the edge of a road onto the shoulder while you re driving If the levelof the shoulder is only slightly below the pavement recovery should be fairly easy Ease off the accelerator and then if there is nothing in the way steer so that your vehicle straddles the edge of the pav...

Страница 164: ...ine even if the road seems empty of approaching traffic Do not get too close to the vehicle you want to pass while you re awaiting an opportunity Forone thing following too closely reduces your areaof vision especiallyif you re followinga larger vehicle Also you won t have adequate space if the vehicle ahead suddenly slows or stops Keep back a reasonable distance When it looks like a chance to pas...

Страница 165: ...sive drivers avoid most skids by takingreasonable care suited to existing conditions and by not overdriving those conditions But skids are always possible The three types of skids correspond to your Vehicle s three control systems In the braking skid your wheels aren t rolling In the steering or cornering skid too much speedor steering in a curve causes tires to slip and lose cornering force And i...

Страница 166: ...S helps avoid only the braking skid Driving at Night Night driving is more dangerous than daydriving One reason is thatsome drivers are likely to be impaired by alcohol or drugs with night vision problems or by fatigue Here aresome tips on night driving Drive defensively 0 Don t drink and drive 0 Adjust your inside rearview mirror to reduce the glare from headlights behind you Since you can t see ...

Страница 167: ...ghts slow down a little Avoid staring directly into theapproaching lights Keep your windshield and all the glass on your vehicle clean inside and out Glare atnight is made much worse by dirt on the glass Even the inside of the glass can build up a film caused by dust Dirty glass makes lights dazzle and flash more than clean glass would making the pupils of your eyes contract repeatedly Remember th...

Страница 168: ...ic signals pavementmarkings the edge of the road and even people walking It s wise to keep your wiping equipmentin good shape and keep your windshield washer tank filled Replace your windshieldwiper inserts when they show signs of streakingor missing areas on the windshield or when strips of rubber start to separatefrom the inserts I Driving too fast through large water puddles or even going throu...

Страница 169: ...uld be hydroplaning Hydroplaning usually happens at higher speeds Therejust isn t a hard and fast rule about hydroplaning The best advice is to slow down whenit is raining Some Other Rainy Weatherlips Turn on your low beam headlights notjust your parkinglights to Besides slowing down allow some extra following distance And be help makeyou more visible to others especially careful when you pass ano...

Страница 170: ...they have their own special rules The most importantadvice on freeway drivingis Keep up with traffic and keep to the right Drive at the same speed mostof the otherdrivers are driving Too fast or too slow driving breaks a smooth traffic flow Treat the left lane on a freeway asa passing lane At the entrance there is usually a ramp that leads to the freeway If you have a clearview of the freeway as y...

Страница 171: ... plan to make too many miles that first part ofthejourney Wear comfortable clothing and shoes you can easily drive in Is your vehicle ready for a long trip If you keep it serviced and maintained it s readyto go If it needs service have it done before starting out Of course you ll find experienced and able service experts in GM dealerships all across North America They ll be ready and willing to he...

Страница 172: ...eare some tips Make sure your vehicleis well ventilated with a comfortably cool interior Keep youreyes moving Scan the road ahead and to the sides Check your mirrors and your instruments frequently If you get sleepy pull off the road into a rest service or parking area and take a nap getsome exercise or both For safetv treat drowsiness on the highway as an emergency Hill and Mountain Roads i Drivi...

Страница 173: ...the hill better Stay in your ownlane when driving on two lane roads in hillsor mountains Don t swing wide or cut across the center of the road Drive at speeds that let you stay in your own lane As you go over the top of a hill be alert There could be something in your lane like astalled car or an accident You may see highway signs on mountains that warn of special problems Examples are long grades...

Страница 174: ...th and a couple of reflective warning triangles And if you will be driving under severe conditions include a small bag of sand a piece of old carpet or a couple of burlap bags to help provide traction Be sure you properly secure these items in your vehicle Driving on Snow or Ice Most of the time those places where your tires meet the road probably have good traction However if there is snow or ice...

Страница 175: ...e Your anti lock brakes improve your ability to make a hard stop on a slippery road Even though you havean anti lock braking system you ll want to begin stopping sooner than you wouldon dry pavement See Anti lock in the Index 0 Allow greater following distance on any slippery road 0 Watch for slippery spots The road might befine until you hit a spot that s covered with ice On anotherwise clear roa...

Страница 176: ...ummon helpand keep yourself and your passengers safe Turn on your hazard flashers Tie a redcloth to your vehicle to alert police that you ve been stopped by the snow Put on extra clothing or wrap a blanket around you If you have no blanketsor extra clothing make body insulatorsfrom newspapers burlap bags rags floor mats anything you can wrap around yourself or tuck under your clothing to keep warm...

Страница 177: ... the vehicle and possiblyfor signaling later on with yourheadlights Let the heater run for awhile Then shut the engine off andclose the window almost all the way to preserve the heat Start the engine again and repeatthis only when youfeel really uncomfortable from thecold But do it as little as possible Preserve the fuel as long as youcan To help keep warm you can get out of the vehicle and do som...

Страница 178: ...ull A Trailer If you do here are some important points 0 There are many different laws having to do with trailering Make sure your rig willbe legal not only where you live but also where you ll be driving A good sourcefor this information can be state or provincial police 0 Consider using a sway control if your trailer will weigh2 000pounds 900 kg or less You should alwaysuse a sway controlif your...

Страница 179: ...sure because it affects the total or gross weight of your vehicle The gross vehicle weight GVW includes the curb weight of the vehicle any cargo you may carry init and the people who willbe riding in the vehicle And if you will tow a trailer you must add the tongue load to the GVW because your vehicle will becarrying that weight too See Loading Your Vehicle in the Index for more information about ...

Страница 180: ...xhaust can get into your vehicle see Carbon Monoxide in the Index Dirt and water can too Safety Chains You should alwaysattach chains betweenyour vehicle and your trailer Cross the safetychains under the tongueof the trailerso that the tongue will not drop to the road if it becomes separatedfrom the hitch Instructions about safety chains may be provided by the hitch manufactureror by the trailer m...

Страница 181: ...urrig Acquaint yourself with the feel of handling and braking withthe added weightof the trailer And always keep in mind that the vehicle you aredriving is now a good deal longer and not nearlyso responsive as yourvehicle is by itself Before you start check the trailer hitch and platform safety chains electrical connector lights tires and mirroradjustment If the trailer has electric brakes startyo...

Страница 182: ...erky orsudden maneuvers Signal well in advance Turn Signals When Towing a Trailer When you tow a trailer your vehicle has to have a different turn signal flasher and extra wiring The green arrows on your instrument panel will flash whenever you signal a turnor lane change Properly hooked up the trailer lights will also flash telling other drivers you re about to turn change lanes or stop When towi...

Страница 183: ... brakes and hold the pedal down while you Start your engine 0 Shift intoa gear and Release the parking brake 2 Let upon the brake pedal 3 Drive slowly until the traileris clear of the chocks 4 Stop and have someone pick up and store the chocks Maintenance When Trailer Towing Your vehicle will need service more often when you repulling a trailer See the Maintenance Schedule for more on this Things ...

Страница 184: ...Motes ...

Страница 185: ...at can occur on the road HazardWarning Flasher 5 2 OtherWarningDevices 5 3 Towing Your Vehicle 5 7 Engine Overheating 5 11 EngineFanNoise 5 18 If a Tire Goes Flat 5 18 Changing a Flat Tire 5 19 Compact SpareTire 5 32 If You re Stuck In Sand Mud Ice or Snow 5 33 Jumpstarting 5 3 5 1 ...

Страница 186: ...sh on and off But they won tflash if you re braking Press the button in to make yourfront and rear t u r nsignal lights flash on andoff Your flashers workno matter what position your keyis in and even if the key isn t in To turn off the flashers pull out on the collar When the hazard warning flashers are on your turn signals won t work 5 2 ...

Страница 187: ...ase follow the steps below to do it safely NOTICE Ignoring these steps couia result in costlydamage to your vehicle that wouldn t be covered by your warranty Trying to startyour vehicle by pushing or pulling it won t work and it could damage your vehicle ToJump Start Your Vehicle 1 Check the other vehicle It must have a 12 volt battery with a negative ground system NOTICE If the othersystem isn ta...

Страница 188: ...omatic transmission in P Park or a manual transmission in N Neutral If you have a four wheel drive vehicle witha manual transfer caseshift lever be sure the transfercase is not in N Neutral 3 T u r n off the ignition on both vehicles Turn off all lights that aren t needed and radios This will avoidsparks and helpsave both batteries And it couldsave your radio NOTICE If you leave your radio on it c...

Страница 189: ...ct the red positive cable to the positive terminal of the vehicle withthe dead battery Usea remote positive terminal if the vehicle has one Dead Battery Good Battery I 7 Don t let the other end touch metal Connect it to the positive terminal ofthe good battery Use a remote positive terminal if the vehicle hasone 8 Now connect the black negative cable to the good battery s negative terminal Don t l...

Страница 190: ...o the battery is much less Now start the vehicle with the good battery and runthe engine for a while Try to start the vehicle with the dead battery If it won t start aftera few tries it probably needs service Remove thecables in reverse order to prevent electrical shorting Take care that theydon t touch each other or any other metal Remove Cables InThis Order 2 1 Heavy Metal Engine Part 2 GoodBatt...

Страница 191: ...e front with sling type equipment That your vehicle has rear wheeldrive or that it has the The make model and yearof your vehicle all wheel drive option Whether you can still move the shift lever If there was anaccident what was damaged When your vehicle is being towed have the ignition key off The steering wheel shouldbe clamped in a straight ahead position with a clamping device designed for tow...

Страница 192: ... drive don t haveit towed on the rear wheels unless you must If a vehicle with rear wheeldrive must be towedon the rear wheels don tgo more than35 mph 56 km h or farther than 50 miles 80 km or your transmission will be damaged If these limits must be exceeded then the rear wheels have to be supported on a dolly Towing All Wheel Drive Vehicles NOTICE Do not tow with sling type equipment or the fron...

Страница 193: ...n towingfrom the front Towing From the Front Except AII Wheel Drive NOTICE Do not tow with sling type equipment or the front bumper system will bedamaged Use wheel liftor car carrierequipment Additional ramping may berequired for car carrier equipment Use safety chains and wheel straps If your vehicle has the all wheel drive option a dolly MUST be used under the rear wheels when towingfrom the fro...

Страница 194: ...the rearbumper system will be damaged Use wheellift or car carrier equipment Additional ramping may berequired for car carrier equipment Use safety chainsand wheel straps If your vehiclehas the all wheel drive option a dollyMUST be used under the front wheels when towingfrom the rear 5 10 ...

Страница 195: ...ating If Steam I s Coming From Your Engine NOTICE If your engine catches fire because you keep driving with no coolant your vehicle can be badly damaged The costly repairs would not be covered by your warranty 5 11 ...

Страница 196: ...cessary 3 If you re in a traffic jam shift to N Neutral If you no longer have theoverheat warning you can drive Just to be safe drive slower for about ten minutes If the warning doesn tcome back on you can drive normally If the warning continues pull over stop and park your vehicle right away If there s still no sign of steam push theaccelerator until theengine speed is about twice as fast as norm...

Страница 197: ...d be ator above FULL If it isn t you may have a leak in the radiator hoses heater hoses radiator water pumpor somewhere else in the cooling system NOTICE Engine damage from running your engine without coolant isn t covered by your warranty If there seems to be noleak start the engine again See if the fan speed increases when idle speed is doubled by pushing the accelerator pedal down If it doesn t...

Страница 198: ...n the Indexfor more informationabout the proper coolant mix NOTICE In cold weather water can freeze and crack the engine radiator heater core and other parts Use the recommended coolant When the coolant in the coolant recovery tank is at or above the FULL mark start your vehicle If the overheat warning continues there s one more thingyou can try You can add the propercoolant mix directlyto the rad...

Страница 199: ...How to Add Coolant to the Radiator 5 15 ...

Страница 200: ...ressurecap slowly to the leftuntil it first stops Don t press down while turning the pressure cap If you hear a hiss waitfor that to stop A hiss means thereis still some pressure left 2 Then keep turning the pressure cap but now push down as you turn it Remove the pressure cap 3 Fillthe Radiator with the proper mix up to the base of thefiller neck 5 16 ...

Страница 201: ... cap off 1 6 Start the engine and let it run until you can feel the upper radiator hose getting hot Watch outfor the engine fan 7 By this time thecoolant level inside the radiatorfiller neck may be lower If the levelis lower add moreof the proper mix through the filler neck until the level reaches the base of the filler neck ...

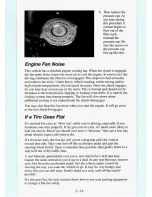
Страница 202: ...se when you start the engine It will go away as the fan clutch disengages If a Tire Goes Flat It s unusualfor a tire to blow out whileyou re driving especially if you maintain your tires properly If air goes out of a tire it s much more likely to leak out slowly But if you should ever have a blowout here are a few tips about what toexpect and whatto do If a front tire fails the flat tire will crea...

Страница 203: ...Tire If a tire goes flat avoid further tire and wheeldamage by driving slowly to a level place Turn on your hazard warning flashers Tat Tire The following steps will tell you how to use thejack and change a tire 5 19 ...

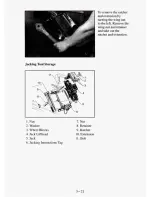
Страница 204: ... the passengerside wall To remove yourjack cover takeoff the plastic wing nutby turning it to the left Lift up on the latch and pull the jack cover off Remove thewheel blocks andjack by turning the wing nut to the left Remove the wing nut and washer then pull the wheel blocks and jack off the bolt 5 20 ...

Страница 205: ...cks 4 Jack Lifthead 5 Jack 6 Jacking Instructions Tag 7 Nut 8 Retainer 9 Ratchet 10 Extension 11 Bolt To remove the ratchet and extension by turning the wing nut to the left Remove the wing nut andretainer and take out the ratchet and extension 5 21 ...

Страница 206: ...Spare Tire I Your spare tire is stored underneath your vehicle You will use the ratchet and extension to lower the spare tire The ratchet has an UP side And aDOWN side 5 22 ...

Страница 207: ...e through thehole in the rear door frame above the bumper Be sure the flat end connects into the hoist shaft Turn the ratchet to the left to lower the spare tire to the ground Keep turning the ratchet until thespare tire can be pulledout from under the vehicle I 4 When thetire has been lowered tilt the retainer at the end of the cable and pull it through the wheel opening ...

Страница 208: ...ttach the socket end of the extension to the jack bolt like this Attach the ratchetto the extension withthe UP side facing you Rotate the ratchet to the right That will raise thejack lift head a little Before raising the vehicle do the following steps 5 24 ...

Страница 209: ...at the opposite end Put yourspare tire near theflat tire Remove the wheeltrim If you have an aluminum hub cap remove it by using the flat end of the extension Pry along the edge of the cap until it comes off Be careful the rim edges may be sharp Don t try to remove it with your bare hands If the wheel has a plastic center cap you do not have to remove the center cap to loosen the wheel nuts 5 25 ...

Страница 210: ...he hubcap from the brushed aluminum wheel fit the flat end of the extension into the notch andpop the hubcap off With DOWN facing you use the ratchet and socketto loosen all the wheel nuts Don t remove them yet A 6 5 in 16 5 cm B 12 0in 30 0 cm Positionjack under the vehicle 5 26 ...

Страница 211: ... fall off the jack Be sureto fit the jack lift head into the proper location before raising your vehicle Raise the vehicleby rotating the ratchetto the right Make sure the UP marking faces you Raise the vehicle far enough off the ground so there is enough room for the spare tire to fit Remove all the wheel nuts 5 27 ...

Страница 212: ... lake O H the tlat tire Remove any rustor dirt from the wheel bolts mounting surfacesand spare wheel Place thespare on the wheel mounting surface 5 28 ...

Страница 213: ...wheel nuts with the rounded end of the nuts toward the wheel Tighten each nut by hand until the wheel is held against the hub 1 Lower the vehicle by rotating the ratchet to the left Lower the jack completely I 5 29 ...

Страница 214: ...y in a criss cross sequenceas shown Rotate the ratchet to the right with the UP marking facing you NOTICE Wheel coverswon t fit on your compact Spare If you try toput a wheel coveron your compact spare you could damage the cover or the spare Remove the wheel blocks 5 3 0 ...

Страница 215: ...le through the hole in the rear door frame above the bumper Turn theratchet to the right until the tire is against the underside of the vehicle You will hear two c1icks when the tire is all the way Try to move the tire with your hands tomake sure it is securely in place Return thejack ratchet extension and wheel blocks to the proper location in the rear storage area Replace allbolts retainers and ...

Страница 216: ...size tire repaired or replaced whereyou want Of course it s bestto replace your spare with a full size tire as soon as you can Your spare will last longer and be in good shape in case you need itagain I NOTICE Don t take your compact spare through an automatic car wash with guide rails The compact spare can get caught on the rails That can damage the tire andwheel and maybe other parts of your veh...

Страница 217: ...sion back and forth you can destroy your transmission Rocking your vehicle to get it out First turn your steering wheel left and right Thatwill clear the area around your front wheels Then shift back and forth between R Reverse and a forward gear spinning the wheels aslittle as possible Release the accelerator pedal while youshift and press lightly on the accelerator pedal when the transmission is...

Страница 218: ...Notes ...

Страница 219: ...eoil 6 9 Enginecover 6 15 Aircleaner 6 19 Automatic TransmissionFluid 6 20 RearAxle 6 24 All WheelDrive 6 24 Transfer Case 6 24 FrontAxle 6 25 Enginecoolant 6 26 WindshieldWasherFluid 6 31 Brake Master Cylinder 6 32 Replacing Brake System Parts 6 35 Vehicle Storage 6 35 FluidLeakCheck 6 36 Bulb Replacement 6 36 Other Maintenance Items 6 4 1 Loading YourVehicle 6 44 Tires 6 47 Appearancecare 6 54 V...

Страница 220: ...t todo some of your own service work you ll want to get the proper GM Service Manual It tells you much more about how to service your vehicle than this manual can To order the proper service manual see Service Publications in the Index Your vehicle hasa facial air bag system Before attempting to do your own service work see ServicingYour Facial Air Bag Equipped Vehicle in the Index You should keep...

Страница 221: ...s so you should not have to add anything to the fuel In the U S andCanada it s easyto be sure you get the right kind of gasoline unleaded You llsee UNLEADED right on the pump And only unleaded nozzles will fit intoyour vehicle s filler neck Be sure the postedoctane is at least 91 for premium 89 for middle grade and 87 for regular If the octane is less than 87 you may get a heavy knocking noise whe...

Страница 222: ...ur emissioncontrol system working properly It s good for your vehicle andyou ll be doing your partfor cleaner air Many gasolines are now blended with oxygenates General Motors recommends that you usegasolines with these blending materials such as MTBE and ethanol By doing so you can help clean the air especiallyin those parts of the country that have high carbon monoxide levels In addition some ga...

Страница 223: ...nsor will be damaged All of that means costlyrepairs that wouldn t be covered by your warranty To check on fuel availability ask an auto club or contact a major oil company that does business in the country where you ll be driving You can also write us at the followingaddress for advice Just tell us where you re going and give your Vehicle Identification Number VIN General Motors Overseas Distribu...

Страница 224: ...While refueling hang the cap inside the fuel door To take off the cap turn it slowly to the left counter clockwise ...

Страница 225: ...ICE If you need a new cap be sure to get the right type Your dealer can get one for you If you get the wrong type it may notfit or have proper venting and your fuel tank and emissions system might be damaged Checking Things Under the Hood Hood Release To open the hood first pull the handle inside the vehicle on the right sideof the steering column Then go to the front of the vehlcle andrelease the...

Страница 226: ...and put the hood propinto the slot in the hood Before closing the hood be sureall the filler caps are on properly Then lift the hood to relieve pressure onthe hood Prop I Remove the hood prop from the slotin the hood and return the prop to its retainer 6 8 ...

Страница 227: ...ck your engine oil every time you get fuel In order to get an accurate reading the oil must be warm andthe vehicle must be on level ground Turn offthe engine and give the oil a few minutes to drain back into the oil pan If you 1 don t the oil dipstick might not show the actual level 6 9 ...

Страница 228: ... or below the ADD line then you ll needto add some oil But you must use the right kind This section explains what kindof oil to use For crankcase capacity see Capacities and Specifications in the Index NOTICE Don t add too much oil If your engine has so much oil that the oil level gets above the cross hatched area that shows the proper operating range your engine could be damaged 6 10 ...

Страница 229: ...g midyear 1993 oils of the proper quality for your vehicle will be identified with this new starburst symbol The starburst symbol indicates that the oil has been certified by the AmericanPetroleum Institute API and ispreferred for use in your gasoline engine You should look for this on the front of the oil container and useonly oils that display this new symbol 6 11 ...

Страница 230: ...R SAE SW 30 PREFERRED LOOK FOR ONE OFTHESE LABELS SAE 1OW 30 IF NEITHERSAE 5W 30 NORSAE 1OW 30 GRADE OILS AREAVAILABLE SAE 30 GRADEMAYBEUSEDATTEMPERATURES ABOVE 40 DEGREES F 4 DEGREES C DO NOT USE SAE 1OW 40 SAE 2OW 50 OR ANYOTHERGRADE O I L NOT RECOMMENDED As shown in the chart SAE 5W 30 is best for your vehicle However you can use SAE 1OW 30 if it s going to be 0 F I 8 C or above These numbers o...

Страница 231: ...W 30 Energy Conserving I I Oils with these words on the container will help you save fuel These three things are usually included in a doughnut shaped logo symbol on most containers If you cannot find oils with the starburst symbol you should look for oils with thedoughnut shaped symbol containing the three things notedabove NOTICE If you useoils that do not have either the starburst symbol or an ...

Страница 232: ...lant heater canbe a big helpif you have to parkoutside in very cold weather 0 F 1 8 C or colder If your vehicle has this option see Engine Coolant Heater in the Index What to Do with Used Oil Did you knowthat used engine oil contains certain elements that may be unhealthy for your skin and could even cause cancer Don t let used oil stay on your skin for very long Clean your skin and nails with soa...

Страница 233: ...your vehicle behindthe instrument panel extension To Remove the Engine Cover 1 Move both front seats as far back as they willgo 2 Remove the instrument panel extension by removing the two screws and two nuts 3 The screwsare on each side at the top of the extension The nuts areon the bottom of the extension 6 15 ...

Страница 234: ...he bottom of the extension Lift up and then pull out 5 Disconnectthe electrical connectorfor the cigarette lighter Set the extension aside 6 Grasp the top of the heater duct and pull down gently to remove 6 16 I I ...

Страница 235: ...7 Remove the bolt from the engine cover bracket 8 Loosenthenut and move the bracket out of the way 6 17 9 Lift up on each of the two latches at the bottomof the cover ...

Страница 236: ...ngine cover into the vehicle andslide it all theway forward Make sure the rubber seal is over the latches Install the two screwsat the engine cover Do not tightenthe screws all the way Press down on each of the two latches at the bottom of the cover Make sure they aresecure Tighten thetwo screws at the engine cover Turn the bracket into position and install the bolt Tighten the nut at the other en...

Страница 237: ...e 4 3L engine VIN Code Z with the round air cleaner you must first remove the engine cover before changing the filter See Engine Cover earlier in this section After removing theengine cover unscrew the wing nuts to take the cover off the air cleaner After changing the filter put the cover back on and besure the wing nutsare properly tightened Be sure air cleaner lid is correctly positionedto seal ...

Страница 238: ...CE If the air cleaner is off a backfire can causea damaging engine fire And dirt can easily get into your engine which will damage it Always have the air cleaner in place when you re driving Automatic Transmission Fluid When to Check and Change A good time to check your automatic transmission fluid level is when the engine oil is changed Refer to the Maintenance Scheduleto determine when to change...

Страница 239: ...ive the vehicle in D 3rd Gear until the engine temperature gage moves and thenremains steady for ten minutes Then follow the hotcheck procedures To check transmissionfluid cold A cold check is madeafter the vehicle has been sitting for eight hours or more with the engine off and is used onlyas a reference Let the engine run atidle for fiveminutes if outside temperatures are 50 F 10 C ormore If it ...

Страница 240: ...with a clean rag or paper towel 2 Push it back in all L the way wait three seconds and then pull it back out again 3 Check both sides of the dipstick and read the lower level The fluid level must be in the COLD area for a cold check or in the HOT area or cross hatched area for a hot check 6 22 I ...

Страница 241: ...OLD area for acold check or theHOT area for ahot check It doesn t take much fluid generally less than a pint Don t overfill We recommend you use onlyfluid labeled DEXRON 111or DEXRON IIE because fluids with that label are made especially for our automatic transmission Damage caused by fluid other than DEXRON d 1II or DEXRON IIEis not coveredby your new vehicle warranty After adding fluid recheck t...

Страница 242: ...icant to raise the level to the What to Use Refer to the Maintenance Schedule to determine what kindof lubricant to use See Recommended Fluids and Lubricants in the Index All Wheel Drive If you have an all wheel drive vehicle be sure to perform the lubricant checks described in this section However they have two additional systems that need lubrication Transfer Case When to Check Lubricant Refer t...

Страница 243: ...e Schedule to determine what kind of lubricant to use See RecommendedFluids and Lubricants in the Index Front Axle When to Check and Change Lubricant Refer to the Maintenance Schedule to determine how often to check the lubricant and when to change it See ScheduledMaintenance Services in the Index How to Check Lubricant If the level is below the bottom of the filler plug hole you ll need to add so...

Страница 244: ...wn to 20 F 29 C or 34 F 37 C in Canada and for vehicles withthe cold climate option Give boiling protectionup to 258 F 125 C Protect against rust and corrosion Help keep the proper engine temperature Let the warning gages work as they should What to Use Use a mixture of one half clean water preferably distilled and one half antifreeze that meets GM Specification 6038 M which won t damage aluminum ...

Страница 245: ...he coolant level whenthe engine is cold and follow the steps under Adding Coolant for the properway to add coolant If you haveto add coolant more than four times a year have yourdealer check yourcooling system I NOTICE If you usethe proper coolant you don t haveto add extra inhibitors or additiveswhich claimto improve the system These can beharmful Adding Coolant To Check Coolant When yourengine i...

Страница 246: ...ToAdd Coolant If you need more coolant add the proper mix at the coolant recovery tank Add coolant mix at the eecoverytank but be careful not to spill it 6 28 ...

Страница 247: ...be on the radiator filler neck When youreplace your radiator pressure cap an AC cap is recommended See Service Replacement Part and Filler Recommendations in the Index Thermostat Engine coolant temperature is controlled by a thermostat in the engine coolant system The thermostat stops the flow of coolant through the radiator until the coolant reaches a preset temperature When youreplace your therm...

Страница 248: ...n remove thecap again and look at the fluid level on the dipstick When the engine compartment is hot the level should be at theHOT mark When the engine compartment is cool the level should be at the FULL COLD mark What to Add Refer to the Maintenance Schedule to determine what kindof fluid to use See Recommended Fluids and Lubricants in the Index 6 30 ...

Страница 249: ... washer fluid followthe manufacturer s instructions for adding water Don t mix water with ready to use washer fluid Water can cause the solution to freeze and damage your washer fluid tank and other parts of the washer system Also water doesn t cleanas well as washer fluid Fill your washer fluid tank only 3 4 full whenit s very cold This allows for expansion which could damage the tank if it is co...

Страница 250: ... out of the brake system If it is you should have your brakesystem fixed since a leak means that sooneror later your brakes won t workwell or won t work at all So it isn t a good idea to top off your brake fluid Adding brakefluid won t correct a leak If you add fluid whenyour linings are worn then you ll have too much fluid when you get newbrake linings You should add or remove brake fluid asneces...

Страница 251: ... do need brakefluid use only DOT 3 brake fluid such as Delco SupremeII GM P a r tNo 1052535 Use new brakefluid froma sealed container only and alwaysclean the brake fluid reservoir cap before removing it NOTICE Don t let someone put in the wrong kindof fluid For example just a few drops of mineral based oil suchas engine oil in your brake system can damage brake system parts so badly that they ll ...

Страница 252: ...rear drum brakes don t have wear indicators but if you ever hear a rear brake rubbing noise have the rear brake linings inspected Also the rear brake drums should be removed and inspected each time the tires are removed for rotation or changing When you havethe front brakes replaced have the rear brakes inspected too Brake linings should always be replaced as complete axle sets Brake Pedal Trave S...

Страница 253: ...brakes can change for the worse The braking performance you ve come to expect can change in many other ways if someone puts in the wrong replacement brakeparts Hydro Boost Brake System The power steering pump also powers the Hydro Boost Refer to Power Steering Fluid in the section when checking the fluid level or adding fluid Battery Every newvehicle has a Delco Freedom battery You never have to a...

Страница 254: ...tment Oshawa Ontario LlJ 526 Fluid Leak Check After the vehicle has been parked for awhile inspect the surface beneath the vehicle for water oil fuel or other fluids Water dripping from the air conditioning system isnormal If you notice fuel leaks or fumes the causes should be found and corrected at once Bulb Replacement Before replacing any bulbs makesure all lights are off and the vehicle is not...

Страница 255: ...ull the bezelout so you can see the parkinghrn signal sockets 3 Press the tab and turn the socket to the leftto remove the socket from the bezel If the socket does not have a tab turn the socket to the left Set the bezel aside 4 Removethe four retainer screws and the retainer ...

Страница 256: ...Parkingmum Signal Lights 1 Open the hood 2 Remove the four screws from the headlight bezel Pull the bezel out so you can see the parkinghurn signal sockets p l 3 Press the tab and turn thesocket to the left toremove the socket from the bezel If the socket does not have a tab turn the socket to the left to remove the socket from the bezel ...

Страница 257: ...5 Reverse steps 1 3 to reinstall the headlight Rear Lights 1 Open the rear door 4 Pull out the bulb and replace it with the new bulb 3 Pull out the taillight assembly so you can see the socket 6 39 ...

Страница 258: ...e socket to the left to remove the socket from the bezel 5 Pull out the bulb and replaceit with the new bulb 6 Reverse steps 1 4 to reinstall the taillight Center High Mounted Stop Lamp CHMSL s1 Your CHMSLbulbs are not replaced separately You must replace the entire unit See your GM dealer for areplacement CHMSL assembly 6 40 ...

Страница 259: ...ithseveral belts The belt runsover or around the pulleys on the engine A tensioner is used to keep the belt tight at all times The tensioner also makes replacing the belt easier If you needto replace the belt be sure to get the correct replacement belt Your dealership or parts supplier can help you withthis The Accessory DriveBelt Routing label on your vehicle will show YOU how to route the belt y...

Страница 260: ... wouldcause moisture to enter the cables Hood Latches and Hood Hinge Refer to the Maintenance Schedule to determine how to lubricate the hood latch and hood hinge assembly Sliding Door Tracks Your vehicle s slidingdoor has three tracks which need lubrication For the upper andlower tracks open the door wipe the track clean and then lubricate with Lubriplate White Grease For the outside middle track...

Страница 261: ...d lubricant and cause the lock to bind De icers which contain alcohol could also wash awaythe lubricant so be sure to lubricate the lock after usinga de icer of this type Exhaust System To help prevent damage to your exhaust system do not continue to drive your vehicle if you notice 0 Engine misfiring Loss of performance Other unusual operating conditions Have your engine and exhaust system servic...

Страница 262: ... system serviced right away Loading Your Vehicle This iscalled the GVWR Gross Vehicle Weight Rating The GVWR includes the weight of the vehicle alloccupants fuel and cargo The CertificationRirelabel also tells you the maximum weightsfor the front and rear axles called Gross Axle Weight Rating GAWR To find out the actual loads on yourfront and rearaxles you need to goto a weigh station and weighyou...

Страница 263: ...sk your dealer to help you load your vehicle the right way NOTICE Your warranty does not cover parts or components that fail because of overloading If you put things inside your vehicle like suitcases tools packages or anything else they will go as fast as the vehicle goes If you have to stop or turn quickly or if there is a crash they ll keep going 6 45 ...

Страница 264: ...eightof these thingsfrom the payload Your dealer can help you with this TraileringPackage If your vehicle comes with the Trailering Package there is also a load rating which includes the weightof the vehicle and the trailer it tows This rating is called the Gross Combination Weight Rating GCWR When you weigh your trailer besure to include the weight of everything you put init And remember to figur...

Страница 265: ... doesn t cover parts or components that fail because of overloading Tires We don t make tires Your new vehicle comes with high quality tires made by a leading tire manufacturer These tires are warranted by thetire manufacturers and their warranties are delivered with everynew vehicle If your spare tire is adifferent brand than your road tires you will havea tire warranty folder from eachof these m...

Страница 266: ... overloading 0 Badwear 0 Bad handling Bad fuel economy If your tires have too much air overinflation you can get 0 Unusualwear 0 Bad handling 0 Rough ride 0 Needless damagefrom road hazards When to Check Check your tiresonce a month or more Don t forget your compact sparetire It should be at 60 psi 420 P a How to Check Use a good quality pcket type gage to checktire pressure Simplylooking at the t...

Страница 267: ...rn Do not include compact spare tire in rotation If your vehicle has front tires with different load ratings or treaddesigns such as all seasonvs ordoff road thanthe rear tires don t rotate your tires front to rear After the tires have been rotated adjust the frontand rearinflation pressure as shownon the CertificatiodTire label Make certain that all wheel nuts are properly tightened See Wheel Nut...

Страница 268: ...puncture cut or other damage that can t be repaired well because of the size or location of the damage Buying New Tires To find out what kind andsize of tires you need lookat the CertificatiodTire label The tires installed on your vehicle whenit was new had a Tire Performance Criteria Specification TPC Spec number on each tire s sidewall When you get new tires get ones with that same TPC Spec numb...

Страница 269: ...cified government test course For example a tire graded 150would wearone and a half 1 1 2 times as wellon the government course as a tire graded 100 The relative performance of tires depends upon theactual conditions of their use however andmay depart significantlyfrom the norm due to variationsin driving habits service practices and differences in roadcharacteristics and climate Traction A B C Th...

Страница 270: ...tires While the tiresavailable as standard or optional equipmenton General Motors vehicles may vary with respect to these grades all such tires meet General Motors performance standards and have been approved for use on General Motors vehicles All passenger type PMetric tires mustconform to Federal safety requirementsin addition to thesegrades Wheel Alignment and Tire Balance The wheels on your ve...

Страница 271: ...replace them only with newGM original equipment parts This way you will be sure to havethe right wheel wheel bolts and wheel nuts for your GM model I NOTICE The wrong wheel canalso cause problems with bearing life brake cooling speedometer odometer calibration headlight aim bumper height vehicle ground clearance and tire or tire chain clearance to the body and chassis Used Replacement Wheels 6 53 ...

Страница 272: ... s instructions Ifyou can hear the chains contacting your vehicle stop and retighten them If the contact continues slow downuntil it stops Driving too fast with chains on will damageyour vehicle Appearance Care Remember cleaning products can be hazardous Some are toxic Otherscan burst into flame if you strike a match or get them on a hot partof the vehicle Some are dangerousif youbreathe their fum...

Страница 273: ...nd loose dirt Wipe vinylor leather with a clean damp cloth Your GM dealer has two GM cleaners a solvent type spot lifter and a foam type powdered cleaner They will clean normal spots and stains very well Do not usethem on vinylor leather Here are some cleaning tips 0 Always read the instructions on the cleaner label Clean up stains as soon as you can before they set Use a clean cloth or sponge and...

Страница 274: ...low dryer or a heat lamp NOTICE Be careful with a hair dryer or heat lamp You could scorch the fabric 0 Wipe with aclean cloth Using Solvent Type Cleaner on Fabric First see if youhave to use solvent type cleaner at all Some spots and stains will clean off better withjust water and mild soap If you need to use a solvent 9 Gently scrape excess soil from the trim material witha clean dull knife or s...

Страница 275: ...lish wax crayon tar and asphalt will stain if left ona vehicle seat fabric They should be removed as soonas possible Becareful because thecleaner will dissolve them and maycause them to spread Non Greasy Stains Such as catsup coffee black egg fruit fruitjuice milk soft drinks wine vomit urine and blood Carefully scrape off excess stain then sponge the soiled area with cool water If a stain remains...

Страница 276: ...Safety Belts Keep belts clean and dry Glass Glass should be cleanedoften GM Glass Cleaner GM P a r tNo 1050427 or a liquid household glasscleaner will remove normal tobaccosmoke and dust films Don t use abrasivecleaners on glass because theymay cause scratches Avoid placing decalson the inside rear window since they may have to be scraped off later If abrasive cleaners are used on the inside of th...

Страница 277: ...d hand dish or car washing mild detergent soaps Don t usecleaning agents that contain acidor abrasives All cleaning agents should be flushed promptly and not allowedto dry on the surface or they couldstain Dry the finish with a soft clean chamoisor a 100 cotton towel to avoidsurface scratches and waterspotting High pressure vehicle washes maycause water to enter vour vehicle Finish Care Occasional...

Страница 278: ...ou have aluminum wheels don t use an automatic vehicle wash that has hard silicon carbide cleaning brushes These brushes can take off the protective coating Weatherstrips Silicone grease on weatherstrips willmake them last longer seal better and not stick or squeak Apply silicone grease with a clean cloth at least every six months During verycold damp weather morefrequent application may be requir...

Страница 279: ...water Clean anyareas where mud and other debris can collect Dirt packed in closed areas of theframe should be loosenedbefore being flushed Your dealer oran underbodyvehicle washing system cando this for you Fiberglass Springs I NOTICE I Don t use corrosive or acidic cleaning agents engine degreasers aluminum cleaning agents or other harsh solvents to clean fiberglass springs they ll damage the spr...

Страница 280: ...op Cleaner 1602 0 473L Preservatone 8 oz 0 237L Spot Lifter 1052870 16oz 0 473L Wash Wax conc 1050201 1602 0 473L Magic Mirror Cleaner Polish USAGE Removesold waxes polishes tar and roadoil Removesrust and corrosion on chrome and stainless steel Cleans white and black tires Spot and stain removal on leather or vinyl Spot and stain removal oncloth and fabric Glass cleaning and spot cleaning on viny...

Страница 281: ...appears ona plate in the front corner of the instrument panel on the driver s side You can see it if you look through the windshieldfrom outside your vehicle The VTN also appears on the Vehicle Certification and Service Parts labels and the certificates of title and registration 6 63 ...

Страница 282: ...Engine ldentification The eighth character in yourVIN is the engine code This code will help you identify your engine specifications and replacementparts n z s U cv c r rJ I I I t 1 W f I 6 64 ...

Страница 283: ... and a list of all production options and special equipment Be sure that this label is not removed from the vehicle Add on Electrical Equipment NOTICE Don t add anything electrical to your vehicle unless you check with your dealer first Some electrical equipment can damage your vehicle and the damage wouldn t be covered by your warranty Some add on electrical equipment can keep other components fr...

Страница 284: ...d right away Windshield Wipers The windshield wiper motor is protected by a circuit breaker anda fuse If the motor overheats due to heavy snow etc the wiper willstop until the motor cools If the overloadis caused by some electrical problem and not snow etc besure to get it fixed Power Windows and Other Power Options Circuit breakers in the fuse panel protect the power windows and other power acces...

Страница 285: ... index finger and pullstraight out Be sure to use the correct fuse If you ever have a problem on the road and don t havea spare fuse you can borrow one of the correct value Just pick some feature of your vehicle that you can get along without like the radio or cigarette lighter and use its fuse if it is of the value you need Replace it as soon as you can See Fuses and Circuit Breakers in this sect...

Страница 286: ...ed in this manualis not the same as the part usedin your vehicle when it was built or if you haveany questions please contact yourGM truck dealer Engine Identification Engine Description Type VTN Code Fuel System Produced By Emissions Throttle Body Fuel Injection Central Port Fuel Injection Wheel NutTorque DESCRIPTION Base or Optional Wheel 4 3L V6 z TBI U S L D 4 3L V6 w CPI U S L D TORQUE 100ft ...

Страница 287: ...e approximate After refill the level MUST bechecked Crankcase Capacity ENGINE 4 3L 4 3L VIN CODE Z w QUANTITY QUANTITY Without Filter With Filter 4 Quarts 4 5 Quarts 3 8 Liters 4 3 Liters 4 Quarts 4 5 Quarts 3 8 Liters 4 3 Liters All quantities are approximate After refill the level MUST be checked Do not overfill Fuel Tank Capacity TYPE Standard Tank All quantities are approximate QUANTITY 27 Gal...

Страница 288: ...er AC Control Visor Vanity MirrorLamps Stepwell Lamp Reading Lamp with Roof Console Reading Lamp w o Roof Console Ashtray Lamp Heater or A C Control QUANTITY 2 2 2 4 2 1 1 Unit 2 3 1 2 4 3 4 2 1 2 TRADE NO H6054 2057 2057 194 1156 194 See GM Dealer 211 2 211 2 194 37 194 2111 2 906 906 161 194 Instrument Cluster Lamps NOTE A PC part number indicates that the bulb and base are one assembly and must...

Страница 289: ...rningIndicator Lamp Brake WarningIndicator Lamp Transmission Indicator Dial Fog Lamps Safety Belt Warning Safety Belt Warning Daytime Running Lights Indicator Daytime Running Lights Indicator Anti lock Warning Indicator Anti lock Warning Indicator Air Bag Air Bag With Standard Cluster With Digital Cluster QUANTITY 1 1 1 1 1 1 2 2 1 1 1 2 2 TRADE NO PC74 PC94 PC74 PC161 PC74 PCI94 PC74 PC194 PC74 P...

Страница 290: ...ircuit Breakers 6941 3 SHUNT E 3 CIGLTWDM HRNlTL LPS I SHUNT GAGES AUX HTR A C STOPlHAZ 20 20 Fuse Legend 0 5 Amp Tan 7 5 Amp Brown 0 10Amp Red 15 Amp Blue 15Amp Blue 0 20 Amp Yellow 0 25 Amp Clear 0 30 Amp Green ...

Страница 291: ...Audio Alarm Headlight Switch Illumination Ash Tray Illumination Cruise Control Auxiliary Heater Rear A C if equipped Stop Lamps Hazard Flash Digital Instrument Cluster Headlamp Switch Tail and Parking Lamps Horn Relay Direction Signal Flash Back Up Lamps Front Heater Air Conditioning Radio Engine Control Module Engine Control Module Power Windows Air Bag Windshield Wiper Anti Lock Brake System Spe...

Страница 292: ...n line fuse Canadaonly In line fuse certain models Service ReplacementPart and Filter Recommendations ENGINE VIN OIL FILTER AIR CLEANER FILTER PCV VALVE SPARKPLUGS FUEL FILTER RADIATOR CAP 4 3L Z PF52 A773C CV789C CR43TSM GF48 1 RC36 CIRCUIT BREAKER 4 3L W PF52 A1163C cv774c CR43TSM GF481 RC36 Usecopper cored resistor type spark plugs 6 74 ...

Страница 293: ...ation see your Warranty andOwner Assistance Information booklet Air Conditioning Refrigerant Capacity TYPE R 134a R 134a QUANTITY 2 00 lbs 91 kg 3 00 lbs I 36 kg All Quantities Are Approximate Front A C Only Front Rear A C NOTICE R 134a refrigerant is not compatible with R 12 refrigerant in an air conditioning system R 12 in an R 134a systemwill cause compressor failure refrigerant oil sludge or p...

Страница 294: ...Notes ...

Страница 295: ...lecting The Proper Maintenance Schedule 7 3 Maintenance Schedule I 7 4 MaintenanceScheduleII 7 6 Explanation of Scheduled Maintenance Services 7 7 Owner Checks and Services 7 10 At Least Once a Month 7 10 At Least Once a Year 7 10 Periodic Maintenance Inspections 7 1 2 Recommended Fluids Lubricants 3 13 Maintenance Record 7 15 Service Station Checks 7 16 1 Iprotection PJan Have you purchased theGM...

Страница 296: ...elps keep your vehicle in good working condition but italso helps the environment All recommended maintenance proceduresare important Improper vehicle maintenanceor the removal of important components can significantly affect the quality of the air we breathe Improper fluid levels or even the wrong tireinflation can increase the level of emissions from your vehicle To help protectour environment a...

Страница 297: ...rDriving and the Road use the proper fuel See Fuel in the Index Selecting TheProper Maintenance Schedule Your driving conditions and how you use your vehicle will help you determine which schedule to use The schedules are found later in this section MAINTENANCE SCHEDULE I Is any one of these true for your vehicle Most trips are less than 4 miles 6 kilometers Most trips are less than 10miles 16 kil...

Страница 298: ...ionof Scheduled Maintenance Services in the Index e CaliforniaAir Resources Board has determined that the failureto perform this lintenance item will not nullifythe emission warranty orlimit recallliabilityprior to the mpletionof vehicle useful life General Motors however urges thatall recommended lintenance servicesbe performed at the indicatedintervalsand the maintenance be orded 7 4 ...

Страница 299: ...MAINTENANCE SCHEDULEI continued THE SERVICES SHOWN ON THIS CHART UP TO 60 000 MILES 100 000 km ARE TO BE DONE AFTER60 000 MILES AT THE SAME INTERVALS T1002 ...

Страница 300: ...Accessory Drive Belt i Inspection 1 Tire and Wheel Rotation Drive Axle Service Brake Systems Inspection n Emission Control Service ee Explanation of Scheduled Mai l e California Air Resources Board aintenance item will not nullify the ltenance Services in the Index las determined that the failureto perform this 3mission warranty or limit recall liability priorto the completionof vehicle useful lif...

Страница 301: ...every engine oil change whichever comes first Ball joints and king pin bushings should not be lubricated unless their temperature is 10 F 12 C or higher When the weather is cold let them warm up before lubricating them or they couldbe damaged Also be sure to check all the vehiclefluid levels at this time COOLING SYSTEM SERVICE Drain flush and refillthe system with new or approved recycled coolant ...

Страница 302: ...acks or other damage Check the wireboot fit at the distributor and at thespark plugs Replace wires as needed Adjust timing to underhood label specifications Inspect the inside and outside of the distributor cap and rotorfor cracks carbon tracking and corrosion Clean or replace as needed fuel tank cap and lines for damage or leaks Removefuel cap inspect gasket for an even filler neck imprint and an...

Страница 303: ...lications drain fluid at every 15 000miles 24 135kilometers and refill Standard Differential Check fluid level and addas needed at every oil change In dustyareas or trailer towing applications drain fluid every 15 000miles 24 135kilometers and refill 15 BRAKESYSTEM INSPECTION When the engine oil is changed inspect the lines and hosesfor proper hookup binding leaks cracks chafing etc Check the park...

Страница 304: ... If they are low inflate them to the levelspecified on the Certification label See Inflation Tire Pressure in the Index At Least Oncea Year Key Lock Cylinder Lubrication Lubricate key lockcylinders with one of the lubricants recommended in this section Transmission Neutral or Clutch Start Switch Operation 1 Before you start be sure you have enough room around thevehicle 2 Firmly apply both themanu...

Страница 305: ...cle is held by the parking brake only To check the P Park mechanism s holding ability Apply the regular brake and shift to P 7 Park Release the manual parking brake then slowly release the regular brake Lap and Shoulder Belts Condition and Operation Inspect belt system including webbing buckles latch plates retractors guide loops and anchors Have a beltassembly replaced if the webbing has beencut ...

Страница 306: ... acceleratoror cruise control cables Replace any cables that have high effort or excessive wear Exhaust System Inspection Inspect thecomplete system Inspect the body near the exhaust system Lookfor broken damaged missingor out of position parts as well as open seams holes loose connections or other conditions which could causea heat buildup in the floor pan or could let exhaust fumes seep into the...

Страница 307: ...ed viscosityoil for your vehicle s engine e g SAE 5W 30 See Engine Oil in the Index Mixture of water anda good quality ethylene glycol baseantifreeze or an approved recycled coolant conforming to GM SpecificationGM 6038 M GM Part No 1052103 Delco Supreme I1brake fluid GM Part No 1052535or DOT 3 Chassis lubricant meeting requirements of NLGI Grade 2 Category LBor GC LB or GM Part No 1052497 GM Hydr...

Страница 308: ...eting requirements of NLGI Grade 2 Catagory LB or GM Part No 1052497or equivalent or GC LB Wheel bearing lubricant meeting requirements of NLGI Grade2 Catagory GC or GC LB GM Part No 1051344 Engine Oil GMPart No 1050109 GM Multi Purpose lubricant GM PartNo 12345120 or a synthetic light weight engine oil SAE 5W 30 Chassis lubricant meeting requirements of NLGI Grade2 Category LB or GC LB GM Part No...

Страница 309: ...nance Services is performed record thedate odometer reading services performed listitem numbers and who performed the services in theappropriatecolumn In addition retain copies of your receipts Itis suggested that receiptsbe kept withyour Owner sManual TOO01 7 15 ...

Страница 310: ...form these under hood checks at each fuelfill 0 Check the engine oil level and addif necessary 0 Check the engine coolant level and addif necessary 0 Check the windshield washer fluid level and add if necessary See the Index under theseitems for information on howto check them 7 1 6 ...

Страница 311: ...ee Page 6 3 Hood Release Lever see Page 6 7 Engine uil See Page 6 9 Battery TheDelco Freedom battery Cooling System Checkandadd coolantonlyat thecoolant recoverytank See Page 6 26 Windshield Washer Fluid See Page 6 31 b o w e r Steering Reservoir See Page 6 30 Spare fire Pressure CompactSpare See Page 6 48 Cold Tire Pressure See TireLoading labelonthe driver s door See Page 6 44 7 17 ...

Страница 312: ...Notes 7 18 ...

Страница 313: ... SatisfactionProcedure 8 2 Customer Assistance for the Hearing or Speech Impaired TDD 8 3 GM Participation in BBB AUTO LINE Alternative Dispute Resolution Program 8 3 Reporting Safety Defects To the United States Government 8 4 Reporting Safety Defects To the Canadian Government r I 1 r 8 5 Reporting Safety Defects To General Motors 8 5 Roadside Assistance 8 6 Courtesy Transportation 8 6 ServicePu...

Страница 314: ...nter in Oshawaby calling 1 800 263 3777 English or 1 800 263 7854 French In Mexico call 525 254 3777 In Puerto Rico or U S Virgin Islands call 1 809 763 1 315 In all otheroverseas locations contactGM North American Export Sales in Canada by calling 1 416 644 4 112 Asof October4 1993 call 1 905 644 4 112 For prompt assistance please have the following information available to give the Customer Assi...

Страница 315: ...GMC Truck dealer are committed to making sure you are completely satisfied with your new vehicle Our experience has shown if a situation arises where you feel your concern has not been adequately addressed the Customer SatisfactionProcedure described earlier in this section is very successful There may be instances where an impartial third party canassist in arriving at a solution to a disagreemen...

Страница 316: ...equire you to use thisprogram before filing a claim with a state run arbitration program or in the courts For further information contact theBBB at 1 800 955 5100 or the GMC Truck Customer Assistance Center at 1 800 GMC TRUCK 1 800 462 8782 REPORTING SAFETY DEFECTS TO THE UNITED STATES GOVERNMENT If you believe that your vehicle hasa defect which couldcause a crash or could cause injury or death y...

Страница 317: ...io KlG 352 REPORTING SAFETY DEFECTS TO GENERAL MOTORS In addition to notifying NHTSA or Transport Canada in a situation like this we certainlyhope you ll notifyus Please call us at 1 800 GMC TRUCK 1 800 462 8782 or write GMC Truck Consumer Relations 31E Judson Street 1607 04 Pontiac MI 48342 2230 In Canada please call us at 1 800 263 3777 English or 1 800 263 7854 French Or write General Motors of...

Страница 318: ...ion 0 The GMC TruckCommitmentPlus Program offers courtesy transportationfor customers when obtaining warranty service The Courtesy TransportationProgram is availableto retail purchasers of CommitmentPlus eligible 1994GMC light duty trucks This program is offered in conjunction with the 36 month 36 000mile BUMPER TO BUMPER New Vehicle Limited Warranty 0 In Canada please consult your GMDealer for in...

Страница 319: ... Truck regularly sends its dealers useful service bulletins about GMC Truck products GMC Truck monitors product performance in the field We then prepare bulletins for servicing our products better Now you canget these bulletins too Bulletins cover various subjects Some pertain to the proper use and care of your vehicle Some describe costly repairs Others describe inexpensive repairs which if done ...

Страница 320: ...ly published issue Check the ordering form for indexes for earlier model years Cut out the ordering form fill itout and mailit in We will then seeto it that an index is mailed to you There is no chargefor indexes for the 1989 1994 model years Toll Free Telephone Number If you want an additional ordering form for an indexor asubscription just call toll free and we ll be happy to send youone Automat...

Страница 321: ...Notes I 8 9 ...

Страница 322: ...h includesall of thesepublications Ask for form number 15959036 it costs 15 00 SERVICEMANUALSFORALL LIGm bum TRUCKS Model 1994 C K Models NATP 9431K 120 00 1994 G Van NATP 9457K 1 20 00 1994 P3 Models P G Models NATP 9432K 1 20 00 1994 Safari NATP 9430K 120 00 1994 STT Models NATP 9429K 1 20 00 Includes ServiceManual UnitRepairManual Driveability Emissions andElectricalDiagnosisManual PRODUCTSERVI...

Страница 323: ...W 0 ...

Страница 324: ......

Страница 325: ...io Cassette System with Equalizer 3 16 AM FM Stereo Audio Cassette System 3 13 AM FM Stereo Audio Compact Disc CD System 3 20 AM FM Stereo Audio System 3 11 Anti TheftFeature 3 23 CassetteTapePlayer 3 15 CompactDiscCare 3 25 AutomaticTransmission 2 17 Fluid 6 20 Axle Front 6 25 Rear 6 24 Servicing Your AirBag EquippedVehicle 1 29 Battery 6 35 Belts See Safety Belts Better Business Bureau Brakes Me...

Страница 326: ...ertificatioflire Label 6 44 Glass 6 58 InsideofVehicle 6 55 Instrumentpanel 6 58 OutsideofVehicle 6 59 Special Problems 6 57 VinylorLeather 6 58 Windshield 6 58 AMRadio 3 10 AM FM Stereo Audio Compact Disc CD System 3 21 Clock AM FM Stereo Audio System 3 12 AM FM Stereo Audio System with Cassette Deck 3 15 CoolingSystem 6 69 AM FM Stereo Audio System with Cassette Deck and Equalizer 3 18 ComfortCo...

Страница 327: ...Or Ice 4 20 5 33 InRain 4 13 InWater 4 14 LossofControl 4 11 Nightvision 4 13 On Hill and Mountain Roads 4 18 OnSnoworIce 4 20 Passing 4 10 Skidding 4 11 Stuck in Deep Snow 4 22 5 33 Throughwater 2 15 4 14 Uphill 4 19 Winter 4 20 WithaTrailer 4 23 DrunkenDriving 4 2 Defogger RearWindow 3 7 Driving Engine Coolant Block Heater 3 8 16 CoolantTemperatureGage 2 63 Cover 6 15 Exhaust 2 24 6 43 FanNoise ...

Страница 328: ...s 2 42 Four wheel Anti lock 4 7 Frontseats 1 2 Fuel 6 3 FillingYourTank 6 5 Gage 2 61 Gasolines for Cleaner Air 6 4 Tankcapacity 6 69 FusesandCircuitBreakers 6 72 FuseBlock 6 67 Headlights 6 66 Power Windows and Other Power Options 6 66 ForeignCountries 6 5 TrailerWiringHarness 6 66 WindshieldWipers 6 66 G Gages 2 61 FuelGage 2 61 Odometer 2 53 Speedometer 2 53 Voltmeter 2 64 Gasolinesfor CleanerA...

Страница 329: ... 7 LatchesandHinge 6 42 Release 6 7 Hydroplaning 4 15 Horn 2 29 I If You re Stuckin Sand Mud Ice or Snow 5 33 Ignitionswitch 2 13 Inflation TirePressure 6 48 Instrumentcluster 2 52 Digital 2 53 Standard 2 53 J Jackstorage 5 20 Jumpstarting 5 3 K Keys 2 3 L Labels Certification Tire 6 44 ServiceParts Identification 6 65 Lights 2 41 Dome 2 44 FogLamps 2 4 2 Frontparking 6 38 Indicator 2 57 Taillight...

Страница 330: ...ecord 7 15 ScheduledMaintenance 7 3 7 7 Underbody 6 61 WhenTowingaTrailer 4 23 Mirrors 2 4 5 Inside 2 45 Outside 2 4 6 Vanity 2 47 ModelReference m PeriodicInspections 7 12 0 Odometer 2 54 Trip 2 54 Off RoadRecovery 4 9 Oil 6 9 Additives 6 14 DisposalofUsed 6 14 PressureGage 2 62 ToCheck 6 10 WhatKindtoUse 6 11 Whentochange 6 14 Owner Checks and Services 7 10 P Parking Brake 2 20 OnHills 4 29 Over...

Страница 331: ...eckingRestraintSystems 1 47 DriverPosition 1 17 Extender 1 46 Lap ShoulderBelt 1 17 LargerChildren 1 44 PassengerPositions 1 30 1 34 Properwear 1 16 Questions and Answers 1 15 ReminderLight 1 11 Replacing After a Crash 1 47 Shoulder Belt Height Adjuster 1 19 SmallerChildrenandBabies 1 36 UseDuringPregnancy 1 29 WhyTheyWork 1 12 SafetyChains 4 26 SafetyWarnings vi Scheduled Maintenance Services 7 3...

Страница 332: ...pareTire 5 31 SunVisors 2 47 T Theft 2 11 Thermostat 6 29 Tilt Wheel 2 29 Tires 6 47 Chains 6 54 Compactspare 5 32 Loading 6 44 New 6 50 Pressure 6 48 TopStrap 1 38 TowingYourVehicle 5 7 TowingATrailer 4 23 BackingUp 4 28 MakingTurns 4 28 Turnsignals 4 28 Brakes 4 26 WiringHarness 2 66 6 66 TraileringPackage 6 46 Transfercase 6 24 AddFluid 6 23 CheckFluid 6 20 TorqueLock 2 23 Tripodometer 2 54 Cha...

Страница 333: ...r 5 3 Service Engine Soon 2 58 6 44 Washing YourVehicle 6 59 Weatherstrips 6 60 Wheels Alignment and Tire Balance 6 52 Aluminum 6 60 Front Bearings Two Wheel Drive 6 41 NutTorque 6 68 Replacement 6 52 Windows 2 26 RearDefogger 3 7 Swing Out 2 27 WindshieldWasher 2 33 Fluid 6 31 Rearwasher 2 34 Windshield Wipers 2 32 6 41 Bladechatter 6 58 Bladecleaning 6 58 Bladehserts 6 41 Rearwindow 2 34 WinterD...

Страница 334: ...Notes ...

Страница 335: ...Notes 4 ...

Страница 336: ...Notes ...

Страница 337: ...i I i 1 Notes ...

Страница 338: ...Notes ...

Страница 339: ......

Страница 340: ...UNTARY TECHNICIAN CERTIFICATION THROUGH National Institute for AUTOMOTIVE SERVICE EXCELLENCE Keep withvehicle at all times Contains Important Operating Safety and Maintenance Instructions GMC TRUCK THE STRENGTHOF EXPERIENCE ...

Отзывы: