22
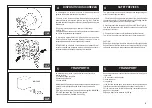
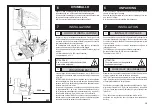
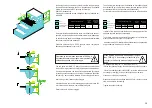
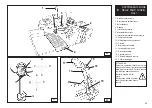
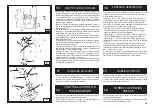
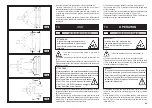
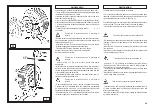
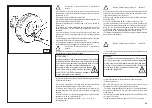
Act first on joystick (11, Fig. C) to tilt the arm to this position.
Agire quindi, prima di tutto, sul manipolatore (11, Fig. D) per ribaltare
il braccio in questa posizione.
azionare il manipolatore verso sinistra (c): il carrello portautensili e
la pedana mobile (13, Fig. D) devono avvicinarsi all'autocentrante
(3, Fig. A); azionare il manipolatore verso destra (d): il carrello e la
pedana devono allontanarsi dall'autocentrante.
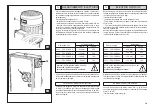
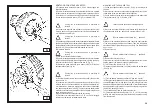
2) Azionare il manipolatore (11, Fig. C) nella varie posizioni e con-
trollare che i movimenti siano come quelli descritti nel capitolo 10,
"identificazione comandi"
3) Azionare l'interruttore (5, Fig. C) verso l'alto: i bracci dell'autocen-
trante (3, Fig. A) devono aprirsi; azionare l'interruttore verso il basso:
i bracci dell'autocentrante devono chiudersi.
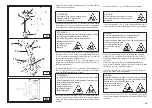
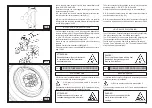
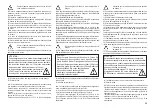
1) Move the joystick (8, Fig. C) up (a): the spindle carrier arm (2,
Fig. A) should lift; move the joystick down (b): the arm should lower.
1) Azionare il manipolatore (8, Fig. C) verso l'alto (a): il braccio porta
autocentrante (2, Fig. A) deve sollevarsi; azionare il manipolatore
verso il basso (b): il braccio porta autocentrante deve abbassarsi;
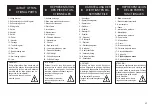
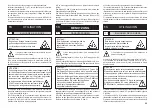
DANGER!
When the spindle carrier arm is lowered, there is
always a potential for crushing anything in its
movement range. Always work from the position given in
the instructions keep well
out of the working range
of the various moving
arms.
ATTENZIONE!
L'abbassamento del braccio porta autocentrante crea dei
potenziali punti di schiacciamento. Operare
sempre dalla posizione indicata nelle istruzioni
mantenendosi al di fuori
del raggio di azione
dei vari bracci
operanti.
Move the joystick leftwards (c): the tool carriage and the mobile
platform (13, Fig. D) shall move close to chuck (3, Fig. A); move
the joystick rightwards (d): carriage and platform shall move away
from chuck.
2) Move the joystick (11, Fig. C) to all available positions and
check for each the related movement that must correspond to what
described in chap. 10, “Controls description”.
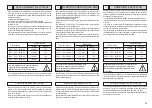
3) Move the switch (5, Fig. C) up: the chuck arms (3, Fig. A) shall
open; move it down: the arms shall close.
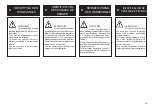
ATTENZIONE!
Le operazioni di apertura e chiusura dell'autocen-trante
creano potenziali punti di schiacciamento. Operare esclu-
sivamente dalle posizioni indicate
nelle istruzioni d'uso
mantenedosi al di fuori
del raggio di azione
dell'autocentrante.
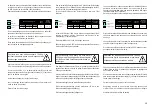
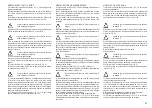
3) Premere il pedale a bilanciere (10, Fig. C) sul lato destro: l'auto-
centrante (3, Fig. A) deve ruotare in senso orario; premere il pedale
a bilanciere sul lato sinistro: l'autocentrante deve ruotare in senso
antiorario.
3) Depress the right pedal (10, Fig. C): the spindle (3, Fig. A) should
turn clockwise; depress the left pedal: the spindle should turn anti-
clockwise.
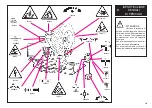
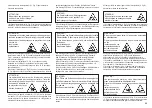
DANGER!
When the spindle arms open or closed, there is always a
potential for crushing anything in their movement range.
Always work from the position given in the
instructions keep well out
of the spindle’s working
range.
CAUTION!
Do not move your face close to the tool
carrier arm when you release it to tip it
as needed.
ATTENZIONE!
Non tenere il viso vicino al braccio porta
utensili mentre lo si "sgancia" per
effettuare il ribaltamento.
D
C
E/1
a
b
c
d
e
f
g
h
10
9
5
8
11
18
14
13
19
17
15
Содержание S 560
Страница 64: ...64 SCHEMA ELETTRICO SCHEMA ELECTRIQUE ELECTRIC DIAGRAM SCHALTPLAN 1...
Страница 65: ...65 SCHEMA ELETTRICO SCHEMA ELECTRIQUE ELECTRIC DIAGRAM SCHALTPLAN 2...
Страница 66: ...66 SCHEMA ELETTRICO SCHEMA ELECTRIQUE ELECTRIC DIAGRAM SCHALTPLAN 3...
Страница 67: ...67 SCHEMA IDRAULICO SCHEMA HYDRAULIQUE HYDRAULIC DIAGRAM HYDRAULIKPLAN...
Страница 68: ......

