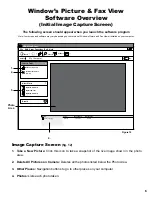
Viewing Saved Photos
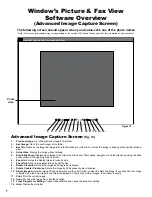
Your saved photos can be viewed in the photo archiving software of your choice. There are several programs available for
viewing and editing digital photos including Adobe Photoshop Elements and Corel Paintshop Pro. There are many free photo
viewing and edition programs that can be download from the internet including Picasa and Paint.net. You can also check for
programs that may already be loaded onto your computer like Microsoft Publisher.
Photo Archiving
Below are some recommendations for naming, saving and archiving photos.
Naming Folders
We recommend the following system for creating and saving your photos and folders.
• Create a folder where all your photos will be saved named “Skin Scanner Photos”.
• Inside the “Skin Scanner Photos” folder you should create a master folder for each patient/client using their name.
• Inside the patient/client folder you should create a folder for every date a treatment will be photographed.
• Inside of each date folder you could have two additional folders called “Before Treatment” and “After Treatment”.
Photo Backup
Periodically you will want to backup photos or remove them from your computer to create more hard drive space. Below are
the most popular storage devices for archiving photos.
•
CD Burner:
Many new computers are equipped with a CD burner. CD’s can hold up to 800 megabytes of storage.
•
Portable External Hard Drive:
Plugs into an available USB port and can hold several hundred gigabytes.
•
Flash Drive/Key Drives:
These very small, inexpensive drives can hold up to 1 or 2 gigabytes worth of data.
•
Online Server:
Allows you to backup computer files onto an online sever. You can access the photos from any computer
that is connected to the internet. This method eliminates physical media including CD’s and flash drives.
Precautions
1.
Do not use the equipment in a wet environment to avoid electrical shock.
2.
Always verify the right voltage/power supply.
3.
Do not operate the Skin Scanner in high temperature.
4.
Do not store the Skin Scanner in direct sunlight, high humidity and dusty places.
5.
Do not touch the inside of the equipment when operating.
6.
Always use on a level flat surface.
7.
After usage, switch off the power supply.
8.
Do not use chemical agents to clean the lens or mirror.
9.
Do not use chemical agents to clean the surface of the Skin Scanner.
10.
Do not drop the equipment.
11.
This appliance is not intended for use by persons (including children) with reduced physical, sensory or mental capabili-
ties or lack of experience and knowledge, unless they have been given supervision or instruction concerning use of the
appliance by a person responsible for their safety.
12.
To prevent electrical shock or damage do not attempt to disassemble or repair the Skin Scanner or camera yourself.
Maintenance
1.
The outside of the Skin Scanner can be cleaned with a damp wet cloth/towel.
2.
Never spray liquids or chemicals directly onto the Skin Scanner.
3.
Do not use chemical agents to clean the lens or mirror.
4.
Clean the camera lens with a lens brush or dry, soft lens cleaning cloth (available at camera stores).
5.
To replace bulbs rotate the bulb 90 degrees. Carefully slid bulb prongs out of socket loading slots. Dispose of bulbs ac-
cording to local, state and federal regulations. Remove new bulb from box. Carefully line up the prongs on each end of
the bulb. Insert the prongs into the socket loading slots and rotate 90 degrees.
6.
To replace fuses, open fuse box located under the power switch.
8


