background image

English

1

Using GIGABYTE Netbook for the First Time

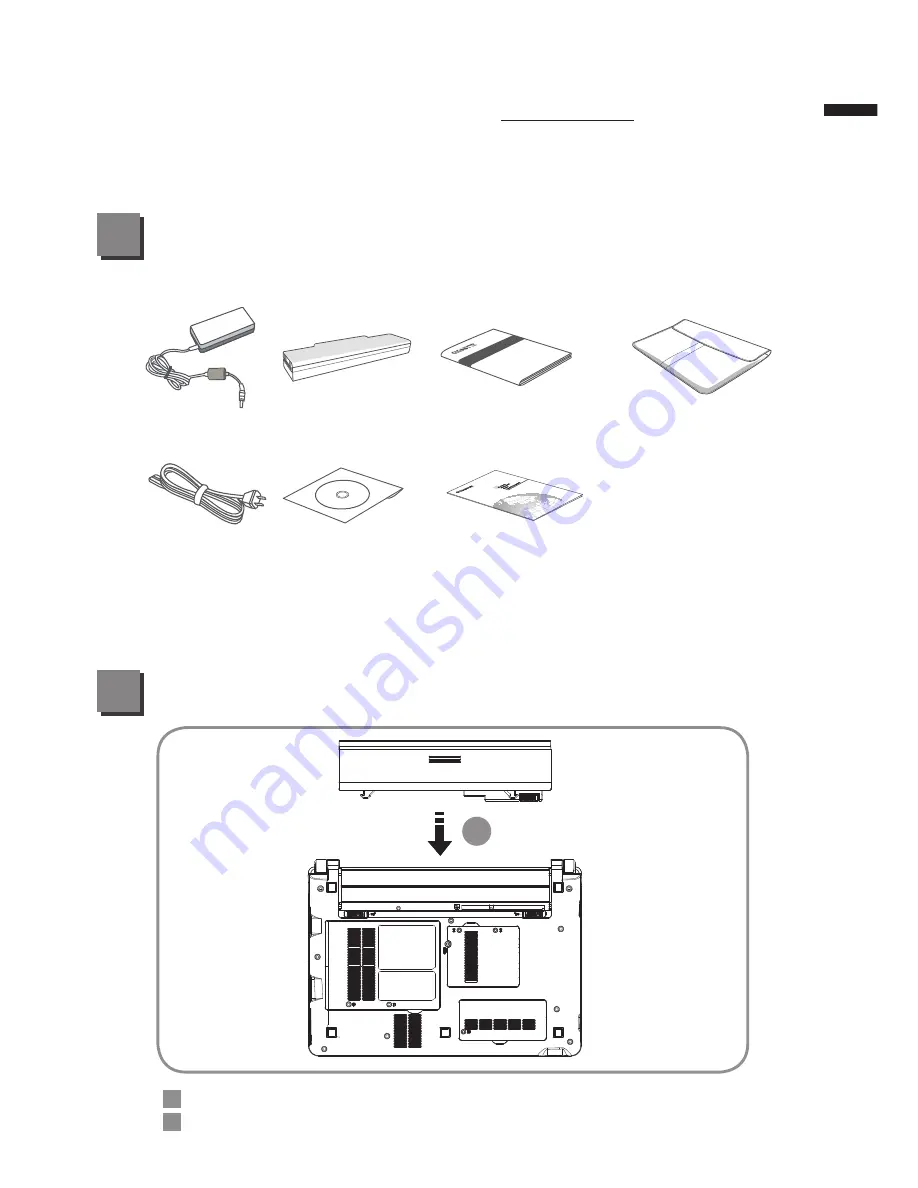
Check Supplied Items

1

2

AC Adapter

Power Cord

Battery Pack

Driver CD

Manual

Global Warranty Card

Handy Bag

* The illustrations in this document may appear different from your model.

1

Insert the battery pack into the compartment.

Remember to slide the switch to the “Lock” position.

1
2

Congratulations on the Purchase of Your New GIGABYTE Netbook

This manual will help you to get started with setting up your netbook.

For more detailed information, please visit our website at www.gigabyte.com.

All specifications are subject to the manufacturer's configuration at the time of shipping and may 

change without prior notice, written or otherwise.

Содержание M1005 Series

Страница 1: ...Giga Byte Booktop M1005 M1005C M1005M M1005P R1005 User s Manual...

Страница 2: ...Please discard used batteries according to the manufacturer s instructions Before you connect your Booktop to a power source ensure that the voltage rating of the AC adapter matches that of the avail...

Страница 3: ...correctly oriented and aligned Before you clean your Booktop turn it off first unplug it from its power source and remove the battery Handle interior components with care When removing a component ple...

Страница 4: ...ded For cables connecting to PCMCIA cards see the option manual or installation instructions RF exposure This equipment must be installed and operated in accordance with provided instructions and must...

Страница 5: ...erly handled or discarded Keep the battery away from metal appliances Affix tape to the battery contacts before disposing of the battery Do not touch the battery contacts with your hands or metal obje...

Страница 6: ...e battery pack into the compartment Remember to slide the switch to the Lock position 1 2 Congratulations on the Purchase of Your New GIGABYTE Netbook This manual will help you to get started with set...

Страница 7: ...Connect the the power cord to the AC adapter Connect the AC adapter to the DC in jack on the right side of the netbook Connect the power cord to the power outlet 1 3 2 1 3 2 Your computer takes a few...

Страница 8: ...Guider 1 Webcam 2 LCD Display 3 Speaker 4 Power Button 5 Keyboard 6 LED Indicators 7 Touchpad 8 Status Indicator Bluetooth Status LED Wireless LAN Status LED HDD Status LED Battery Status LED Power St...

Страница 9: ...Port 4 Ethernet Port 5 DC in Jack 6 Kensington Lock Slot Supports Secure Digital SD Multi Media Card MMC Memory Stick MS Memory Stick PRO MS PRO card Base View 2 1 3 4 1 Hard Disk Bay 2 Battery Bay 3...

Отзывы: