Gigabyte GV-RX19X512VB-RH Скачать руководство пользователя страница 34

- 32 -

English

GV-RX19X512VB-RH Graphics Accelerator
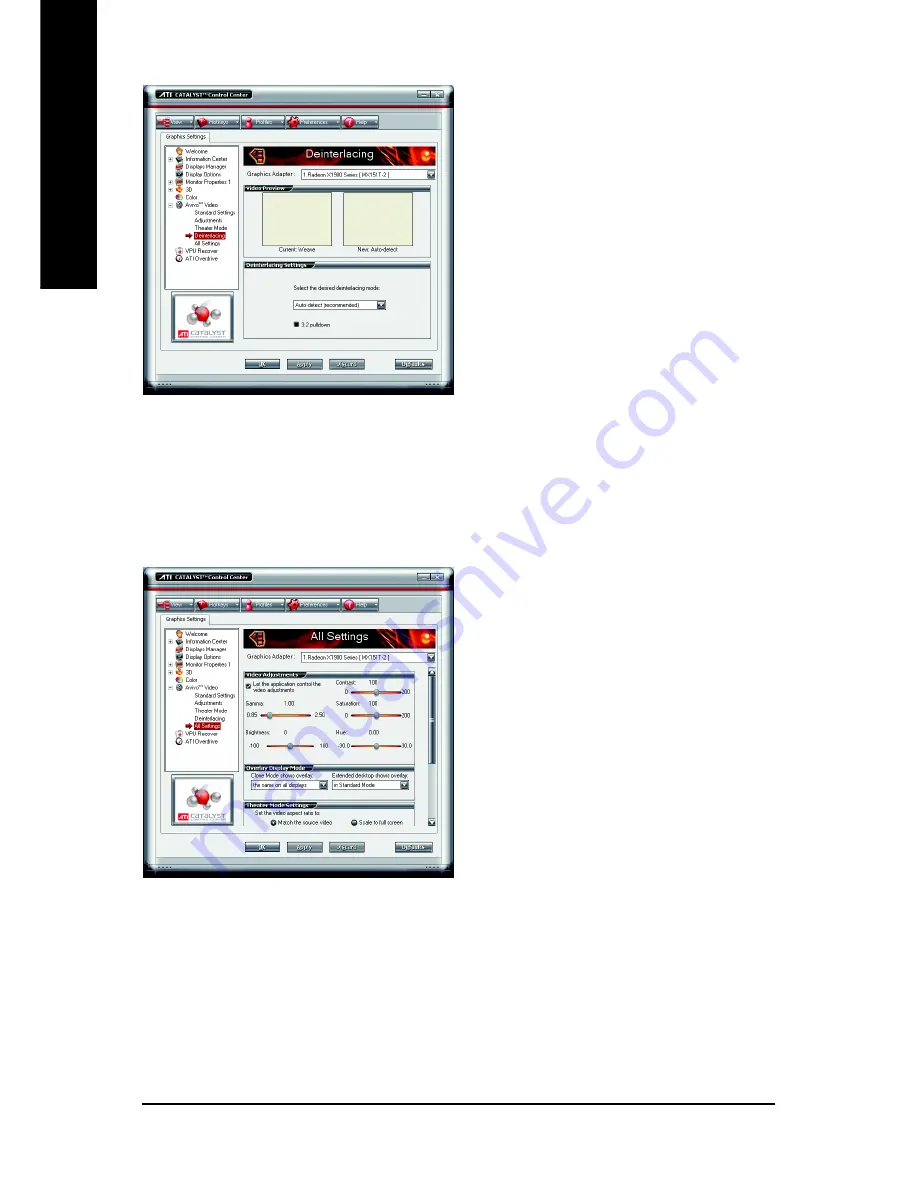
„

Deinterlacing

Deinterlacing creates a sharp image from the
two video fields of interlaced video. Select one
of five options for deinterlacing video for better
viewing.
• Auto Detect lets the multimedia driver to

select the best deinterlacing scheme for
different video sources and sizes.

• Bob deinterlacing, when selected, removes

every other line of the video image and is
recommended for motion video.

• Adaptive deinterlacing, when selected,

reacts to the amount of motion in the video
and apply a media filter on a motion block
and apply weave on the remaining blocks.

• Motion Adaptive deinterlacing, when selected,

applies the advanced motion detection to
deinterlace the video.

• Weave does not apply any deinterlacing.

„

All Settings

The All Settings page combines all of the
principal Video features onto a single page,
without any preview window, allowing quick
access and adjustment.
This page is useful when it is not necessary to
preview the adjusted settings because the
effect is already known or understood.

Содержание GV-RX19X512VB-RH

Страница 1: ...Jan 25 2006 VGA Card GV RX19X512VB RH ...

Страница 2: ...VGA Card Jan 25 2006 GV RX19X512VB RH ...

Страница 3: ...fications might be out of date before publication of this booklet The author assumes no responsibility for any errors or omissions that may appear in this document nor does the author make a commitment to update the information contained herein GV RX19X512VB RH Radeon X1900XTX GraphicsAccelerator User s Manual Rev 101 12MD RX19X5BR 101R The WEEE marking on the product indicates this product must n...

Страница 4: ...dows XP Driver and Utilities Installation 8 3 1 1 Operating System Requirement 8 3 1 2 DirectX Installation 9 3 1 3 Driver Installation 10 3 1 4 Utilities on Driver CD 12 3 1 5 Video In Introduction 13 3 1 6 Taskbar Icon 16 3 1 7 Display Properties pages 17 3 2 Windows 2000 Driver Installation 34 4 Troubleshooting Tips 35 5 Appendix 36 5 1 How to Reflash the BIOS in MS DOS mode 36 5 2 Resolutions ...

Страница 5: ...2MB of system memory 1GB or more for best performance Optical drive for installation software CD ROM or DVD ROM drive A 450watt power supply or above must be used Operating System Windows XP with Service Pack 2 SP2 Windows XP Professional x64 Edition Windows 2000 CrossFireTM Compatibility If you are planning on using this grpahics card as part of a CorssFireTM system the following is required A Cr...

Страница 6: ...t VIVO Note DVI I Connector 2 Analog LCD Monitor Digital LCD Monitor DVI Output DVI I Connector 1 DVI I to D Sub Adapter VGA Output Note Please refer to page 13 about Video In introduction NTSC PAL TV Projector S Video Output Y HDTV Pr Pb AV Output DVI I Connector 2 VIVO DVI I Connector 1 ...

Страница 7: ...eparated from the system The card contains sensitive electric components which can be easily damaged by static electricity so the card should be left in its original packing until it is installed Unpacking and installation should be done on a grounded anti static mat The operator should be wearing an anti static wristband grounded at the same point as the anti static mat Inspect the card carton fo...

Страница 8: ...wer off the computer and monitor then disconnect the display cable from the back of your computer 2 Remove the computer cover If necessary consult your computer s manual for help in removing the cover 3 Remove any existing graphics card from your computer Or if your computer has any on board graphicscapability youmayneedtodisable itonthemotherboard Formoreinformation see your computer documentatio...

Страница 9: ... to your graphics card use the DVI I connector To connect a VGA monitor to the DVI I connector plug the DVI I to D sub adapter into the DVI I connector then plug the monitor cable into the adapter After installation please connect the power cable to your graphics card or the system will not boot Connect a flat panel Connect a VGA monitor via DVI I to D sub adapter To install your new graphics card...

Страница 10: ...ur graphics card driver Please follow the subsection 3 1 3 Driver installation to install the driver for your graphics accelerator 3 1 Windows XP Driver and Utilities Installation 3 1 1 Operating System Requirement When loading the graphics card drivers for the system please make sure your system has installed DirectX 9 or later version If you install the graphics card drivers for the motherboard ...

Страница 11: ...r Windows XP you must install DirectX first Users who run Windows XP with Service Pack 2 or above do not need to install DirectX separately Step 1 When autorun window show up click the Install DirectX 9 item Step 2 Choose I accept the agreement and click the Next button Step 3 Click the Next button Step 4 Click Finish to restart computer Then the DirectX 9 installation is completed Installing the ...

Страница 12: ...y step installation guide Step 1 Found new hardware wizard Video controller VGA Compatible Click the Next button to install the driver There is a driver CD disk that came with your graphics accelerator please insert it now Or click the Cancel button to install the driver from AUTORUN window Step 2 Found new hardware wizard Searching and installing The wizard will search for the driver and install ...

Страница 13: ... setup exe Click the Install Display Drivers Radeon X1900 Series item Step 1 When autorun window show up click the Install Display Drivers Radeon X1900 Series item Step 2 Click the Next button Step 3 Click the Yes button Setp 4 Click the Express or Custom icon Step 5 Click the Finish button to restart computer Then the driver installation is completed Windows installings the components ...

Страница 14: ...N window If it does not show up please run D setup exe z Install Hydravision Step 2 Click the Next button Click the Hydravision Install item Step 3 Click the Yes button Step 4 Click the Next button Windows installings the components Step 6 Click the Finish button to restart computer Then the Hydravision Installis completed Step 5 Click the Next button ...

Страница 15: ... 3 X Installation Note Please install the Cyberlink Power Director 3 X or above version with your graphics card Press the Capture button PowerDirector enter Capture mode in which you can capture media from a variety of device Figure 1 Figure 1 Note Power Director 3 X only supported on the Windows XP operating systems ...

Страница 16: ...is turned on and enter VCR mode moreover make sure FireWire cable connect well Furthermore when capturing media by VIVO based graphics card you could chose two ways Note including Composite COMP IN and SVideo SVID IN Afterward please click the play button of captured devices and click the red REC button between Capture preview window and Capture device selection area Figure 4 When you got the medi...

Страница 17: ...ded into Library immediately Figure 4 At this moment in time you can expand a series of outstanding editing experience to fill you life with boundless possibility For more details about movie editing function of PowerDirector please refer to user s guide or visit Cyberlink website for official technical support ...

Страница 18: ...ngs Advanced ATI CATALYST Control Center tab and press ATI CATALYST tm Control Center button refer to Fig 2 Fig 1 Fig 2 HYDRAVISIONTM HYDRAVISION has everything you need to manage increased amounts of information across your computer desktop It allows you to quickly and easily tailor your computer desktop to the way you work You can arrange and rearrange monitors assign Hot Key shortcuts create up...

Страница 19: ... may adjust the screen resolution and color quality settings in this dialog box Note The CRT TV configuration requires that you connect your CRT display to the DVI connector 2 on the card using the DVI I to VGA adapter to ensure normal operation This configuration is not supported if the CRT monitor is directly attached to the DVI connector 1 on the card You can click the item to change the color ...

Страница 20: ...each page The left navigation pane displays a tree view that lists all the advanced features The Advanced view is recommended for experienced users Custom View The Custom view allows you to display only the features you choose in the left navigation pane The Custom view is recommended for experienced users who want to expose only the features they adjust most often or that their 3D application sup...

Страница 21: ...e Preferences page helps to restore defaults change skins and update the CATALYST Control Center The CATALYST Control Center Preferences page contains the following options Note A profile applies to a specific graphics card If there is more than one graphics card installed in your computer you need to select the appropriate card before creating loading or activating a Profile Always on Top Hide To...

Страница 22: ...The CATALYST Control Center Help feature offers the following options Help for this Page Help Contents Search Help Go to ATI com About CATALYST Control Center Information Properties The Information Center provides detailed information about the installed graphics hardware and associatedsoftware Graphics Software Graphics Software includes information such as installed 2D and 3D driver versions Ope...

Страница 23: ...cs card such as the installed graphics chipset device ID bus type memory size and BIOS version Displays Manager Displays Manager Standard View Use Displays Manager Standard View to set yourdesktopresolution arrangeyourdisplays enable secondary devices such as a TV or use the Wizard to help you configure your display s ...

Страница 24: ...et a refresh rate of your choice when a full screen application or game has a default refresh rate that is lower than optimal Choose one of the Display Detection Options to prevent screen flicker when detecting a display If you are using an older TV or one that has non standard inputs that may not be automatically detected use Force TV Detection When a TV is detected using this method it appears i...

Страница 25: ...lay Identification Data Extended Display Identification Data EDID uses the information provided by the attached monitor to determine the limits for the resolution and refresh rate AvivoTM Color Use AvivoTM Color for ATI graphics cards that supports per display color settings Independently set the hue saturation and temperature for each attached and enabled display ...

Страница 26: ...orts one or more HDTV modes that are not initially listed in the Displays Manager due to an incomplete EDID Selecting one or both of the HDTV modes adds them to the Force button located in the Displays Manager when the associated display is selected If you have a CRT and DFP device and want both to support HDTV you must go to both HDTV Support pages and select both Add 720p and Add 1080i check box...

Страница 27: ...bles you to adjust for overall system performance overall 3D image quality or a balance between the two Anti Aliasing Anti Aliasing is a technique used to smooth out the jagged edges of three dimensional curved objects or objects with diagonal edges Anti aliasing can be set to favor either an increase in system processing performance or improved image quality Setting for performance is best used w...

Страница 28: ... like those seen in CAD applications Setting for quality is best used with applications that display highly detailed scenes backgrounds and textured objects like those seen in 3D games If you are unsure how to configure anisotropic filtering use the Let the Application Decide option Your display will automatically adjust to the application s requirements AdaptiveAnti Aliasing Adaptive anti aliasin...

Страница 29: ...round A series of low and high resolution texture maps are stored in memory and selectively used to create the object s surface depending on what level of detail is needed Mipmap detail level can be set to favor either an increase in system processing performance or improved image quality Setting for performance is best used when the 3D image is animated and smoothness of motion is the most import...

Страница 30: ... the shader programs more complex effects can be created to accurately model the visual properties of materials and surfaces including hair skin wood and water All settings The All Settings page combines all of the principal 3D features onto a single page without any preview window allowing for quick access and adjustment You can change the settings for the following 3D features as you normally wo...

Страница 31: ...olor Correction Images to preview the changes before applying them The Color curve is a graphical representation of all the values of gamma brightness or contrast The color curve line will reflect any changes made to these elements Set color correction for Desktop Adjust the overall richness of color by using the Gamma control To adjust the overall bright ness use the Brightness control and the ov...

Страница 32: ...tings with a Wizard or selecting a video preset Use Adjustments to configure gamma brightness and hue Use Theater Mode to set aspect ratio and overlay display mode Preview your changes before applyingthem StandardSettings To quickly adjust your video settings choose one of the video presets or use the Video Wizard to configure your display devices ...

Страница 33: ...tware Installation 31 English Adjustments Use AvivoTM Video Adjustments to manually set Gamma Brightness Contrast Saturation and Hue TheaterMode Use Theater Mode to change the way you view streaming video ...

Страница 34: ...ended for motion video Adaptive deinterlacing when selected reacts to the amount of motion in the video and apply a media filter on a motion block and apply weave on the remaining blocks Motion Adaptive deinterlacing when selected applies the advanced motion detection to deinterlace the video Weave does not apply any deinterlacing All Settings The All Settings page combines all of the principal Vi...

Страница 35: ...he computer Enable VPU Recover Prepare an error report if VPU Recover is activated for submission toATI Technologies Allows the VPU Recover once it is activated to generate an error report that you can send to ATI via e mail ATI Overdrive VUse theATI OverdriveTM aspect to maximize the performance of the graphics processing unit GPU on your graphics card An on chip thermal sensor constantly monitor...

Страница 36: ...l the driver If Windows does not show the CD automatically please run following steps 1 Click the Start button on the control bar 2 Select Run 3 Type the following D SETUP exe If D is not your CD ROM drive substitute D with the correct drive letter 4 Click OK 5 Click on Install Display Drivers to begin the Installation Wizard 6 Click Next 7 Click Yes to the license agreement 8 Follow the Wizard s ...

Страница 37: ...nufacturer NOTE Some manufacturers do not allow the built in graphics to be disabled or to become the secondary display Make sure you selected the appropriate display device and graphics card when you installed the graphics driver Restart your computer Press the F8 key on your keyboard after system starts up When the WindowsAdvanced Options Menu appears select Safe Mode and press Enter After getti...

Страница 38: ... DOS mode For Windows 2000 XP you need a startup disk to restart the computer in MS DOS mode 3 Change the command prompt to A 4 To back up the current BIOS at the A prompt type BIOS flash utility name s BIOS file name example gvf13 s rx85x8vb f1 and press Enter 5 To flash BIOS at the A prompt type BIOS flash utility name p BIOS file name example gvf13 p rx85x8vb f2 and press Enter 6 Wait until it ...

Страница 39: ...120 3 3 3 1600 x 1200 100 3 3 3 1792 x 1344 85 3 3 3 1800 x 1440 70 3 3 3 1856 x 1392 75 3 3 3 1920 x 1080 75 3 3 3 1920 x 1200 85 3 3 3 1920 x 1440 75 3 3 3 2048 x 1536 66 3 3 3 Radeon X1900XTX 2D Single Display Modes The table is for reference only The actual resolutions supported depend on the monitor you use Display Maximum Screen Refresh Rate Resolution Hz 480i 640 x 480 30 704 x 480 30 720 x...

Страница 40: ... 38 English GV RX19X512VB RH Graphics Accelerator ...

Страница 41: ...Appendix 39 English ...

Страница 42: ... 40 English GV RX19X512VB RH Graphics Accelerator ...

Отзывы: