


- 49 -
System Hardware Installation
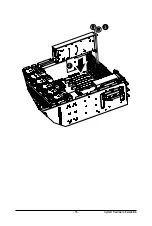
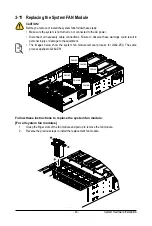
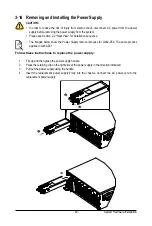
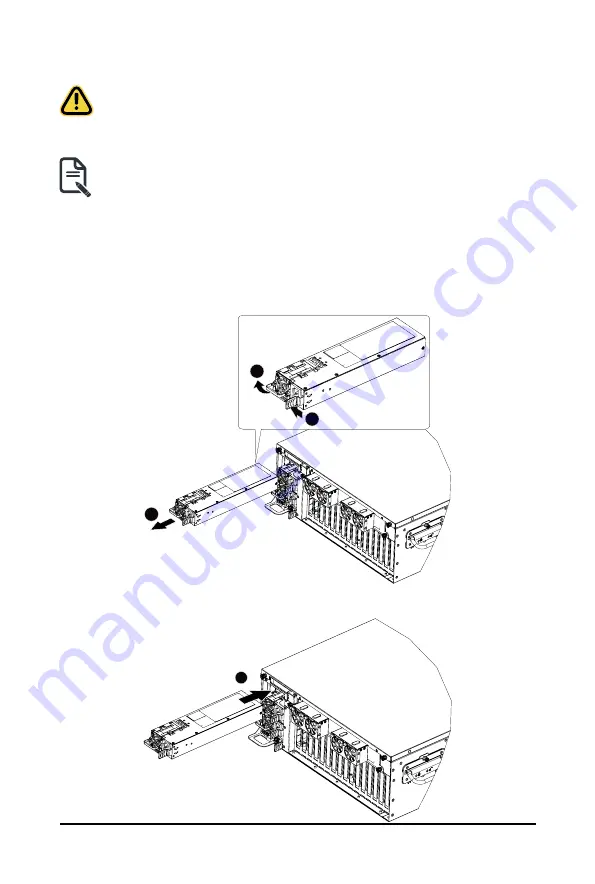
3-14 Removing and Installing the Power Supply
Follow these instructions to replace the power supply:
1. Flip up and then grasp the power supply handle.
2. Press the retaining clip on the right side of the power supply in the direction indicated.
3. Pull out the power supply using the handle.
4.
Insert the replacement power supply firmly into the chassis. Connect the AC power cord to the
replacement power supply.
1
3
2
4
CAUTION!
•
In order to reduce the risk of injury from electric shock, disconnect AC power from the power
supply before removing the power supply from the system.
•
Please see Section 2-2 "Rear View" for installation sequence.
•
The images below show the Power Supply removal process for G482-Z50. The same process
applies to G482-Z51.
Содержание G482-Z50
Страница 1: ...G482 Z50 G482 Z51 AMD EPYCTM 7002 Series Processor Server User Manual Rev 1 0 ...
Страница 16: ...Hardware Installation 16 1 3 System Block Diagram 1 3 1 G482 Z50 1 3 2 G482 Z51 ...
Страница 30: ...System Hardware Installation 30 3 4 5 ...
Страница 31: ... 31 System Hardware Installation 6 6 6 ...
Страница 33: ... 33 System Hardware Installation 3 5 4 ...
Страница 35: ... 35 System Hardware Installation 2 3 ...
Страница 48: ...System Hardware Installation 48 4 ...
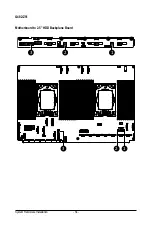
Страница 54: ...System Hardware Installation 54 G482 Z51 1 2 3 2 1 3 Motherboard to 2 5 HDD Backplane Board ...
Страница 80: ...BIOS Setup 80 5 2 13 SATA Configuration ...
Страница 85: ... 85 BIOS Setup 5 2 18 Intel R I350 Gigabit Network Connection ...
Страница 87: ... 87 BIOS Setup 5 2 19 VLAN Configuration ...
Страница 91: ... 91 BIOS Setup 5 2 22 Intel R Ethernet Controller X550 ...