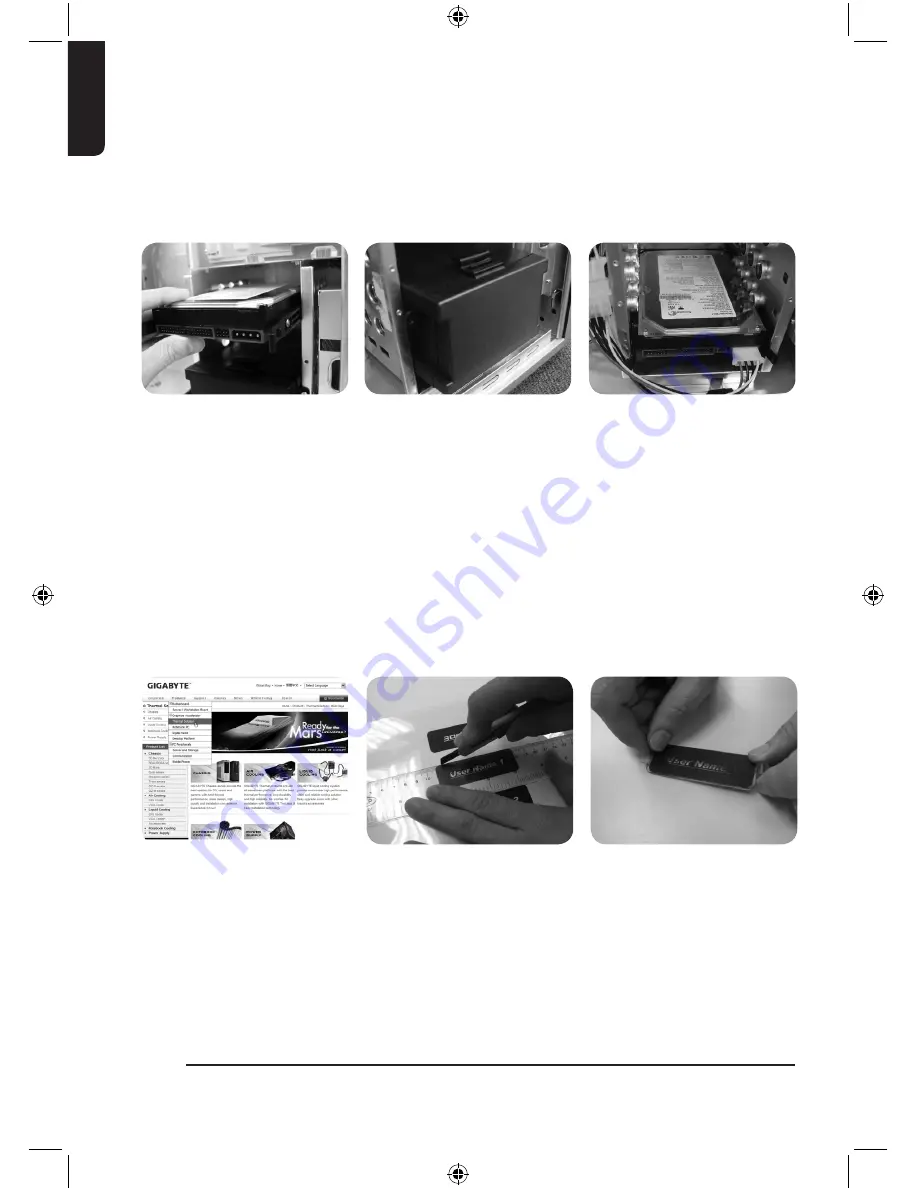
4-8 Installation of 3.5” Internal Device Bay
3DAURORA / 3DAURORA 570 / 3DAURORA 570S provides built-in bays to accommo-
date up to 5 hard disc drives (after removal of the tool enclosure). The built-in HDD
requires securing runners, which can be found in the tool enclosure.
4-9 Application of DIY Projector Bracket
Please connect the LED 4-pin power connecter to the 4-pin power connector from
power supply unit. 3DAURORA / 3DAURORA 570 / 3DAURORA 570S is provided with
extra transparent projector panel, which can be customized into a personalized logo
and replaced with the provided “3DAURORA” projector bracket under the front
panel.
4-8-3 In case the length of power
cable is not sufficient for
installation of the bottom
HDD, it is possible to use
the power extension cable
(4-pin / SATA) inside the tool
enclosure.
4-8-1 Place the runners on both
sides of the HDD. Slide the
HDD into the hard disk bay
evenly.
4-8-2 For installation of the fourth
and fifth HDDs, loosen the
tool enclosure, and then in-
stall the HDD in accordance
with step 4-8-1
4-9-3 Trim the film along the edge
lines.
4-9-1 Visit Gigabyte Technology’
s website> Thermal Solu-
tion > Chassis> 3DAURORA
series section, and look for the
DIY_bracket.doc
4-9-2 Print out the projector film by
1 to 1 scale (Please use a
laser printer or copy machine
to print the projector film)
En
gl
is
h
14


