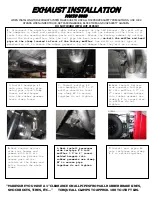
2.Install headpipe #A
onto your factory pipe
using your stock clamp
insert welded hanger
into the rubber grommet
leave clamp loose.
3. Install muffler #B
onto headpipe 1.5” to 2”
muffler should be level
use clamp #E to secure
together do not tighten.
4.
Next install Drivers
side overaxle tailpipe
#C into muffler 1.5” to
2” insert welded hanger
into rubber grommet use
clamp # F to secure pipe
to muffler do not
tighten
EXHAUST INSTALLATION
PART# 5669
WHEN INSTALLING THIS EXHAUST SYSTEM MAKE SURE TO USE ALL THE PROPER SAFETY PRECAUTIONS. USE JACK
STANDS WHEN UNDER TRUCK, SET PARKING BRAKE, BLOCK TIRES AND USE SAFETY GLASSES.
DO NOT WORK WITH HOT PIPES!!!
1.
Disconnect the negative battery cable before removal of the OEM Exhaust. This will allow
the computer to reset and recognize the new exhaust. Lay out the exhaust on the floor so it
looks like the drawing and compare parts with manual. Remove the factory exhaust by cutting
behind the factory muffler. Once the tail pipe has been removed
un-bolt the muffler and head
pipe at the clamp located in front of the factory muffler.
Use wd-40 or another type of
penetrating oil to remove the rubber grommets. Do not damage these they will be re used.
“MAKE SURE YOU HAVE A 1” CLEARANCE ON ALL PIPES FROM ALL RUBBER BRAKE LINES,
SHOCK BOOTS, TIRES, ETC…” TORQUE ALL CLAMPS TO APPROX. 100 TO 150 FT LBS.
5.
Next install drivers
side rear hanger and
gommet with bolt kit
provided see picture the
hanger goes on the
outside of the frame and
bolts through the whole
frame
6.Next install passenger
side tailpipe # D into
muffler 1.5”to 2” insert
welded hangers into
rubber grommets use clamp
#F to secure pipe
together do not tighten
7.
Install exit pipes #E
onto tailpipes use clamp
# F to secure together


