background image

5

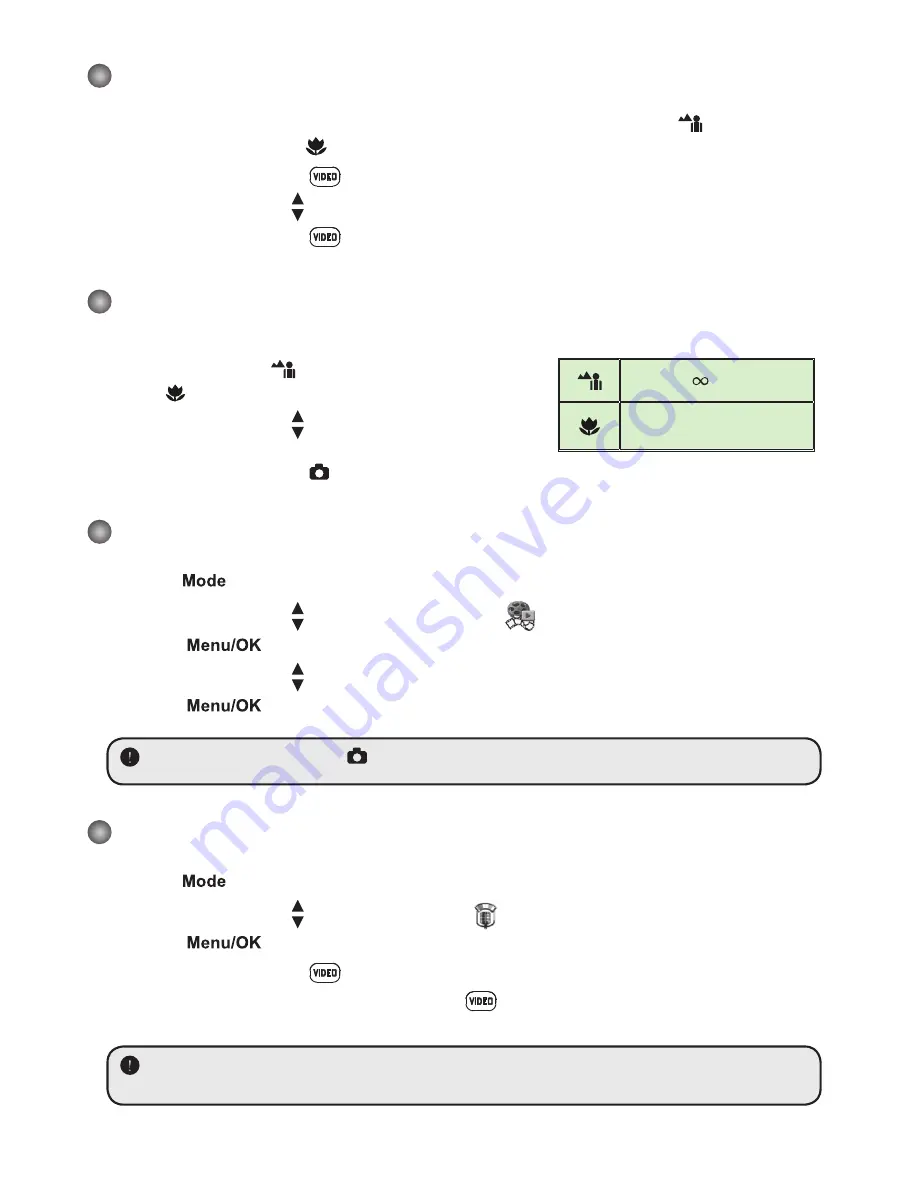
 Recording a video clip

1. Set the focus to an appropriate setting. Normally, you may set the focus to ( 

  )   for most 

filming conditions. Select (   ) only for close-ups.

2. Press the 

Record 

button ( 

 ) to start recording.

3. Use the 

Zoom 

buttons (   ) to zoom in or zoom out the screen. 

4. Press the 

Record

 button ( 

 ) again to stop recording.

 Taking a still picture

1. Set the focus to an appropriate setting. Normally, you 

may set the focus to ( 

  ) for most filming conditions. 

Select (   ) only for close-ups.

2. Use the 

Zoom 

buttons (   ) to zoom in or zoom out the 

screen.  

3. Press the 

Shutter 

button 

(   ) 

to take a still picture. 

 Playing back your recordings

1. Press the 

 button.

2. Use the 

Zoom

 buttons (   ) to select the

 Playback ( 


)


mode.

3. Press the  

  button to enter.

4. Use the 

Zoom 

buttons (   ) to shift between files.

5. Press the  


 button to review/play the file.


 Press the 

Shutter 

button 

(   ) 

to delete files.  


 Recording a voice clip

1. Press the 

 button.

2. Use the 

Zoom

 buttons (   ) to select the

 Voice (

mode.

3. Press the  

  button to confirm. (*)

4. Press the 

Record

 button ( 

 ) to start recording.

5. When you are done, press the 

Record

 button ( 

 ) again to stop recording. 


 When entering the

 Voice

 mode, the remaining recordable time will be displayed on the 

LCD.  

50cm ~   

30cm ~ 50cm

Содержание V502G-J66

Страница 1: ...User Manual V502G J66 12MP Digital Camcorder ...

Страница 2: ... in 6 Down button Zoom out 7 Button 8 Mode button 9 USB Port 10 TV out Connector 11 SD MMC Card Slot 12 Power Button Video light 13 LCD Panel 14 Speaker 15 Shutter Button 16 Lens 17 Video light 18 Flash strobe 19 Battery cover 20 Tripod Port 12 3 13 1 19 18 17 16 15 14 9 10 8 6 5 11 7 20 2 4 ...

Страница 3: ...partment with and ends correctly installed 3 Replace the cover Inserting the SD MMC card optional 1 Lift the SD card cover 2 Insert the card in the direction of indication until it reaches the end of the slot 3 When using a SD card the built in memory will become inaccessible 4 To remove the SD card gently push the card until it pops up open close ...

Страница 4: ...e LCD panel OR Press and hold down the Power button for 3 seconds Press the Power button shortly will turn the video light on off Setting Language Power on Press the Mode button Enter the Setting mode Use the Zoom buttons to select the Language ABC item Use the Zoom buttons to select a suitable language and press the button to confirm ...

Страница 5: ...s mode Flash mode Photo resolution Zoom ratio Number of pictures files SD card inserted Battery life Play mode Recording time Volume Current total recordings Play mode Highlight box NightShot File type Video resolution Zoom ratio Recording time Battery life Focus mode Video light mode Recording NightShot SD card inserted ...

Страница 6: ...tons to zoom in or zoom out the screen 3 Press the Shutter button to take a still picture Playing back your recordings 1 Press the button 2 Use the Zoom buttons to select the Playback mode 3 Press the button to enter 4 Use the Zoom buttons to shift between files 5 Press the button to review play the file Press the Shutter button to delete files Recording a voice clip 1 Press the button 2 Use the Zoom...

Страница 7: ...re information Taiwan NTSC America NTSC Europe PAL China PAL 2 Connect the audio and video ends of the AV cable to the TV 3 Turn on the camcorder 4 Connect the other end of the AV cable to your camcorder Connecting the camcorder to your PC 1 Turn on the camcorder 2 Connect the camcorder to your computer by the USB cable The default is set to Disk mode When connected to a PC the camcorder will auto...

Страница 8: ... Press the button Item Option Description Resolution 5 Mega pixel Camera 1M 3M 5M 12 Mega pixel Camera 1M 3M 5M 12M Selftimer On Off Enable the selftimer After the selftimer is turned on the camcorder will have ten seconds delay before recording when the Shutter button is pressed Flash Auto The flash automatically fires when the lighting is insufficient On The flash is forced to fire in every shot Off ...

Страница 9: ...incandescent lamp lighting or environments with low color temperature Effect Normal Make recordings in natural color B W Make recordings in black and white Classic Make recordings in sepia toned color Exposure 2 2 Manually adjust the exposure to gain better effect when the preview image appears too bright or too dark A positive value indicates the image will be brighter than usual while a negative...

Страница 10: ... option is suitable for America Taiwan Japan and Korea areas PAL Set TV system compatibility to PAL This option is suitable for Germany England Italy Netherlands China Japan and Hong Kong Icon On Off Enable disable OSD icons to display on the screen LCD Bright 0 4 Set LCD brightness A greater value makes the LCD brighter while a smaller value makes the LCD dimmer Volume 0 10 Set the volume 0 mute ...

Страница 11: ...ed to a PC the camcorder automatically enters Disk removable disk mode Start Movie On Off Enable disable the movie sequence when the camcorder is powered on Default On Off Restore factory defaults Note that your current settings will be overridden Flicker Settings Area England Germany France Italy Spain Russia Setting 50Hz 50Hz 50Hz 50Hz 50Hz 50Hz Area Portugal America Taiwan China Japan Korea Set...

Страница 12: ...400 700 1600 SD MMC card 512MB 200 800 1400 3200 SD MMC card 1GB 400 1600 2800 6400 Note The actual value of capacity may vary up to 30 depending on the color saturation and complexity of your subject and surroundings Battery Life Indicator Icon Description Full battery life Moderate battery life Low battery life Empty battery life Note To avoid sudden outage of power supply you are recommended to...

Страница 13: ...return it to any Meijer store for a full refund within 6 months 180 days of purchase when accompanied by a receipt For customer support please call 866 845 9436 or go to www gfmproducts com Dist by Wholesale Merchandisers Inc 2929 Walker NW Grand Rapids MI 49544 Made in China 12 ...

Страница 14: ...82 448 02040 000v1 0 ...

Отзывы: