background image

14

Electrical Connection

For mains and control cables you can use multi-core flexible control cable (conductor size  

0.75 - 1.5 mm²) .
  1.  Unscrew housing screws 

a

, remove housing cover 

c

Fig. 5

  2.  Unscrew union nuts of cable entries 

b

.

The terminal box can be turned t/– 180 °.

  3.  Loosen hexagon nut 

with 17 mm open-end spanner  but do not remove! 

Fig. 6

  4.  Turn electrode terminal box into desired direction (+/– 180°).
  5.  Tighten hexagon nut 

j

 slightly.

  6.  Remove terminal strips 

f

 from circuit board.

  7.  Connect terminal strip according to wiring diagram, establish PE connection 

g

.

  8.  Plug in terminal strips 

f

.

  9.  Install cable entry 

b

.

10.  Put housing cover 

c

 in place, insert and  fasten housing screws 

a

.

NRGS 11-2, NRGS 16-2

Fig. 10

Wiring diagram

S1 Disconnector
F1 Fuse

Содержание NRGS 11-2

Страница 1: ...1 E N English Original Installation Instructions 810366 05 Compact System NRGS 11 2 NRGS 16 2 ...

Страница 2: ...n of Conformity Declaration by the Manufacturer 4 Important Notes Page Explanatory Notes Scope of supply 5 Function 5 NRGS 11 2 NRGS 16 2 13 Table Functions 13 Tools 14 Examples of installation 15 Key 16 Installation NRGS 11 2 NRGS 16 2 6 7 Name plate marking 8 Dimensions 9 Technical data NRGS 11 2 NRGS 16 2 10 Key 12 Design NRGS 11 2 NRGS 16 2 11 Key 12 Functional Elements ...

Страница 3: ...0 Checking low level MIN alarm 20 Commissioning Procedure Resetting low level MIN alarm 20 Operation Fault finding list for troubleshooting 21 Operational malfunctions Factory setting 19 Switch selection of response sensitivity 19 Tools 19 Sensitivity of response Exchanging the electronic insert 22 Removing and disposing of the compact system 22 Exchanging the electronic insert removing the compac...

Страница 4: ...on The name plate specifies the technical features of the equipment Do not commission or operate any item of equipment that does not bear its specific name plate Usage for the intended purpose Use the compact system NRGS 11 2 NRGT 16 2 as water level controller limiter in e g steam boilers and pressurised hot water installations as well as in condensate and feedwater tanks ATEX Atmosphère Explosib...

Страница 5: ...tacts The safety circuit for the heating will be opened after the de energizing delay and the two MIN LED are illuminated A MIN alarm can be simulated by pressing the test button The heating will be switched off and interlocked To reset the interlock the MIN electrode tips must enter the water again and the button Reset must be pushed Explanatory Notes Scope of supply NRGS 11 2 1 Compact system NR...

Страница 6: ...n to ensure interference suppression Indicators and adjustors 2 red LEDs for signalling Low water level 1 green LED for Pump ON 1 four pole code switch for selecting the response sensitivity 1 push button for testing the MIN low level alarm 1 Push button Reset Cable entry Cable gland with integral cable clamp M 16 PG 9 M 20 PG 16 Protection IP 65 to DIN EN 60529 Weight Approx 0 8 kg Ambient temper...

Страница 7: ...isposal note Type approval no Safety note Equipment designation Type of threaded end material number Pressure rating Supply voltage Max ambient temperature Protection Electrical specification Response sensitivity XX CE Marking Operating note Manufacturer ...

Страница 8: ...8 Dimensions Technical Data continued Fig 2 42 b 70 Fig 3 N8 N10 0 5 40 1 DIN 228 7 9 8 0 50 65 70 14 173 140 337 5 500 1000 1500 ...

Страница 9: ...9 Functional Elements NRGS 11 2 NRGS 16 2 Fig 5 Fig 4 a b c 1 2 3 4 d j i f h g 6 5 e k 6 5 ...

Страница 10: ...of steam boiler 8 Seating surface 9 Joint ring D 33 x 39 DIN ISO 7603 1 4301 bright annealed 0 Screw in thread G1 EN ISO 228 1 a Housing screws M4 b Cable gland PG 9 PG 11 c Housing cover d Fixing screws for cover plate e Separating segment f Terminal strip g PE connection h Terminal strip for testing i Thermal fuse Tmax 102 C j Hexagon nut k Cover plate Dimensions Functional Elements continued Ke...

Страница 11: ...or flange provided on vessel and tighten with a 41 mm open end spanner The torque required for tightening when cold is 140 Nm Table Functions Please enter data Function Function Electrode tip Length mm Low level alarm 1 Low level alarm 2 e g pump ON 3 e g pump OFF 4 Attention n Do not subject the electrode tips to shocks and do not bend the electrode tips when mounting Use only the supplied joint ...

Страница 12: ...50 1 20 20 90 Fig 6 Fig 7 20 20 10 DN 50 1 90 20 1500 DN 20 DN 20 Centre distance 20 1 DN 20 Fig 9 20 DN 100 24 5 24 5 20 20 G Fig 8 20 90 3000 1 14 Examples of installation o l m n o l m n p o u m l s u r m t w n p o s p q u v p q u v l ...

Страница 13: ...relevant regulations must be considered n Vent hole o High water HW p Electrode tip 5 mm q Protection tube DN 80 r Protection tube DN 100 s Electrode distance 14 mm t Electrode distance 40 mm u Low water LW v Reducer DIN 2616 part 2 K K88 9 x 3 2 242 4 x 2 6 W w Reducer DIN 2616 part 2 K K114 3 x 3 6 648 3 x 2 9 W Installation continued ...

Страница 14: ...oosen hexagon nut j with 17 mm open end spanner but do not remove Fig 6 4 Turn electrode terminal box into desired direction 180 5 Tighten hexagon nut j slightly 6 Remove terminal strips f from circuit board 7 Connect terminal strip according to wiring diagram establish PE connection g 8 Plug in terminal strips f 9 Install cable entry b 10 Put housing cover c in place insert and fasten housing scr...

Страница 15: ...nsure interference suppression n Provide an external slow blow fuse for the compact system 63 mA for 230 V and 115 V or 150 mA for 24 V n Install an easily accessible disconnecting switch for the compact system in the close proximity of the equipment EN 61010 1 n Mark respective switch as disconnecting device for the compact system Tools Attention n Screwdriver for cross head screws size 1 n Screw...

Страница 16: ...ut cover plate k in place and fix it with screws d 4 Put cover in place c and fasten housing screws a Sensitivity of response Factory settings The equipment features the following factory set default value n Response sensitivity 10µS cm2 Switch selection of response sensitivity Attention n Screwdriver for cross head screws size 1 n Screwdriver for slotted screws size 2 5 completely insulated accor...

Страница 17: ... 2 is wired in accordance with the wiring diagram Fig 11 2 Make sure that the supply voltage agrees with the specification on the name plate The terminal strip of the NRGS 11 2 NRGS 16 2 is live during operation This presents the danger of electric shock Cut off power supply before mounting or removing the housing cover Checking electrical connection Applying mains voltage Checking assignation of ...

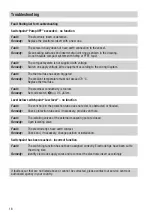
Страница 18: ...t The electrical conductivity is too low Remedy Set code switch 4 to 0 5 μS cm Level below switchpoint Low level no function Fault The vent hole in the protection tube does not exist is obstructed or flooded Remedy Check protection tube and if necessary provide vent hole Fault The isolating valves of the external measuring pot are closed Remedy Open isolating valve Fault The electrode tips have ea...

Страница 19: ... be 0 bar The equipment becomes hot during operation Touching the hot equipment presents the risk of severe burns to hands and arms All installation removal and maintenance work must only be performed when the system is cold The terminal strips of the equipment are live during operation This presents the danger of electric shock Always cut off power supply to the equipment before mounting removing...

Страница 20: ...8434 09 GESTRA AG Bremen Printed in Germany GESTRA AG Münchener Straße 77 28215 Bremen Germany Telefon 49 421 3503 0 Telefax 49 421 3503 393 E mail info de gestra com Web www gestra de Agencies all over the world www gestra de ...

Отзывы: