


Setting Up
42
2
❖
❖
❖
❖
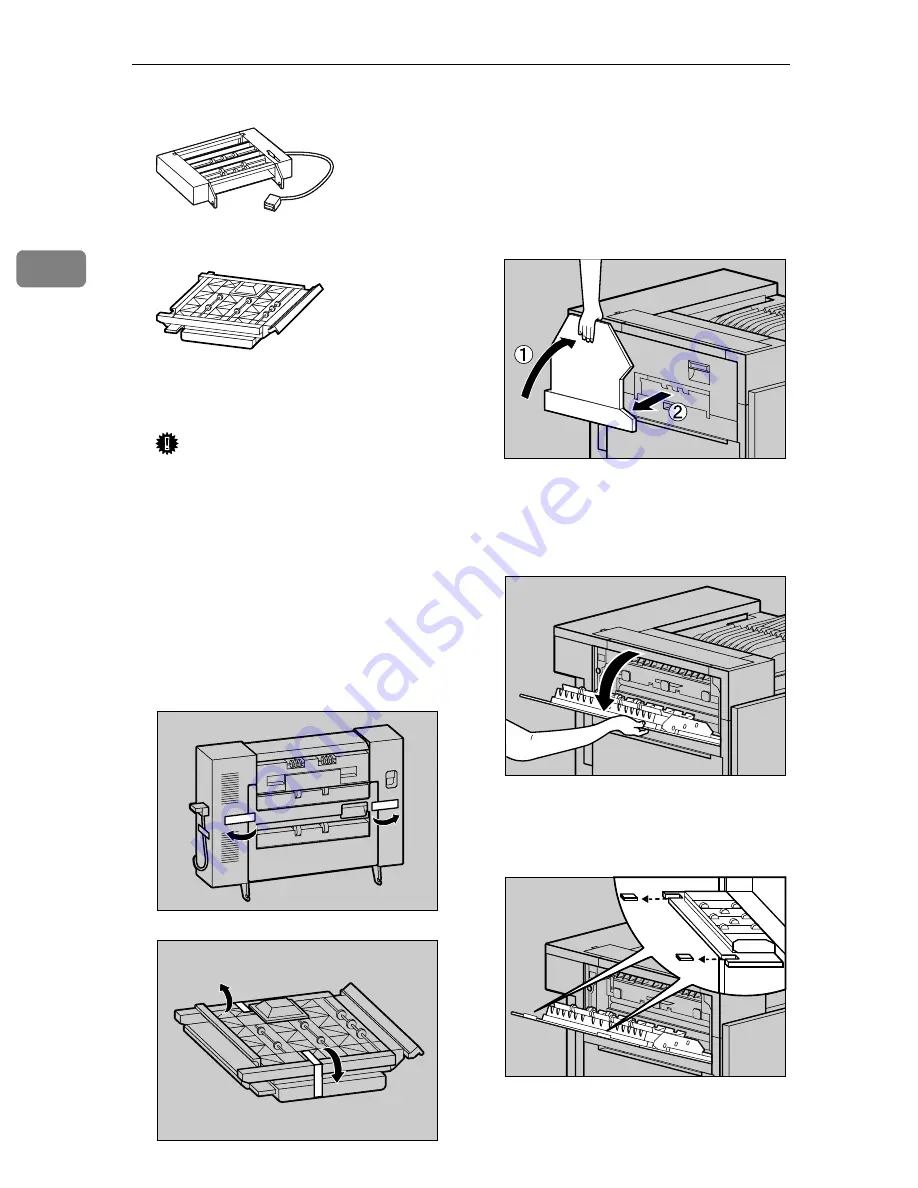
Duplex Reversal Unit
❖
❖
❖
❖
Duplex Feed Unit
B
Remove the adhesive tape and
packing materials.
Important
❒
Do not remove the adhesive
tape which hold the auxiliary
bar at this point. Remove it in
step
C
on P.44
“Installing the Du-
plex Reversal Unit”
❒
Do not remove the adhesive
tape which hold the cable of the
Duplex Reversal Unit at this
point. Remove it in step
G
on
P.44
“Installing the Duplex Rever-
sal Unit”
C
Turn off the power switch and
unplug the power cable from the
wall outlet.
D
Lift the External Tray in the direc-
tion of the arrow (
A
A
A
A
) and remove
(
B
B
B
B
).
E
Remove the two small covers on
the upper left cover of the printer.
A
Open the upper left cover.
B
Pinch the two small covers and
pull in the direction of the ar-
row to remove them.
ZDJP711J
ZDJP712J
ZDJP038J
ZDJP039J
ZDJP040J
Содержание DSc38
Страница 14: ...Getting Started 6 1...
Страница 81: ...Copyright 2001...
Страница 82: ...UE USA G060 6900...


