Operating Instructions
P.7
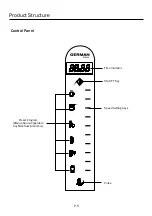
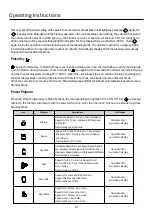
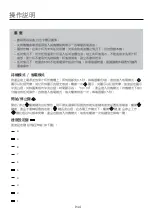
Press any bar of the speed setting, all the bars in the bars underneath will flash in full brightness. Press the again, the
icon stays lit in white light and the blender operates in the corresponding speed setting. The selected bar & all in
the bottom will also stay lit in white light (e.g. the blender operates in speed 8, all the bars from 1-8 will light on).
All the other bars of the speed setting will light in dim light. The Time Display starts counting from “00:01”. Press
again to stop the operation and the blender resumes the Stand-by Mode. The maximum period for a single operation
is 10 minutes. When the operation time reaches 10 minutes (Time Display shows 10:00), the blender automatically
stops and resumes Stand-by Mode.
Pulse Key
icon is the Pulse Key. In Stand-by Mode or any operation status, press once, the icon flashes in 0.5 second intervals
and the blender does not operate. Press and hold the icon again within 5 seconds, the blender operates in H speed
and the Time Display starts counting from “00:01”. When the user releases the icon, the blender stops operating and
the Time Display stops counting. If the blender is left idle for 5 seconds, the blender resumes Stand-by Mode.
When the operation time reaches 10 minutes (Time Display shows 10:00), the blender automatically stops and resumes
Stand-by Mode.
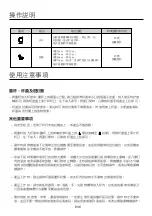
Preset Program
Press and Preset Program Key in Stand-by Mode, the corresponding icon will flash. If the ON/OFF Key is pressed
within 5s, the blender will operate with the selected function. After the operation finishes, the blender resumes
Stand-by Mode.
Icon
Program
Bisque
Sauce
Soy Milk
Nuts
Smoothie
Vegetable
Operation time
countdown display
Operation time
countdown display
Operation time
countdown display
Operation time
countdown display
Descriptions
LCD Display
Increase to Speed 7 in 5 sec, then increase to
Speed H in 5~10 sec, and keep at this speed
until finish.
Total duration is 8 minutes.
Increase to Speed 5 in 5 sec. Stay in Speed 5 for 25
sec. Increase to Speed 8 and run for 30 sec. Then
increase to Speed H and run at this speed until finish.
Total duration is 6 minutes.
Speed 5 for 5s. Then run in Speed 8 for 2
sec and stop for 1 sec, Repeat this process
for 10 cycles
Total duration is 35 sec.
Operation time
countdown display
Operation time
countdown display
Speed H for 8 sec and stop for 2 sec.
Repeat this process until finish.
Total duration is 30 sec.
Speed H for 30 sec, stop 2 sec;
Speed 6 for 10 sec, stop 2 sec;
Speed H for 60 sec, stop 2 sec;
Speed 6 for 10 sec, finish.
Total duration is 1 min 56 sec.
Speed 8 for 2 sec and stop for 1 sec. Repeat
this process for 5 cycles. Then run in Speed
H for 45 sec.
Total duration is 1 minute.
Содержание PRO-12S
Страница 10: ...14 12 16 17 18 19 11...
Страница 11: ...P 11 1 2 3 4 5 6 7 8 9 10 11 12 13 14 15 16 17 18 45 19 20...
Страница 12: ...P 12...
Страница 13: ...P 13...
Страница 14: ...P 14 0 5 1 00 00 3 0 5 1Hz 1 H 1 5 H 9 8 7 6 5 4 3 2 1...
Страница 16: ...P 16 8 H 2 30 H 30sec 2sec 6 10sec 2sec H 60sec 2sec 6 10sec 1 56 45...
Страница 17: ...P 17 2 10 3 1 750ml 1 2 1 56 2 1 3 2 3...
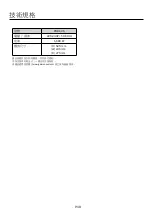
Страница 18: ...P 18 www germanpool com PRO 12S 220 240V 50 60Hz 1 680 W H 525 mm W 246 mm D 275 mm...


