


Continued on the reverse
Quick Start Guide
Exiting to Windows
Returning to GV-Desktop
Click the Windows
Start
button, select
All Programs
, click
GV-NVR
, and click
Key
Lock Utility
.
The GV-NVR System Lite is protected by GV-Desktop that is limited to run the
selected programs. If you need to exit to Windows desktop, follow these steps.
Several resolution, aspec ratio and codec options are available for GV IP cameras,
except GV-Fisheye cameras.
1. On the GV-Desktop, click the
Settings
button, and type the valid ID and
password. The default ID and password are “
0000
”. The Setting dialog box
appears.
2. Under
Desktop
Type,
select
Windows
from the drop-down list, and click
OK
.
3. Click
the
Log Off
button, and enter the valid ID and Password. The Windows
desktop appears.
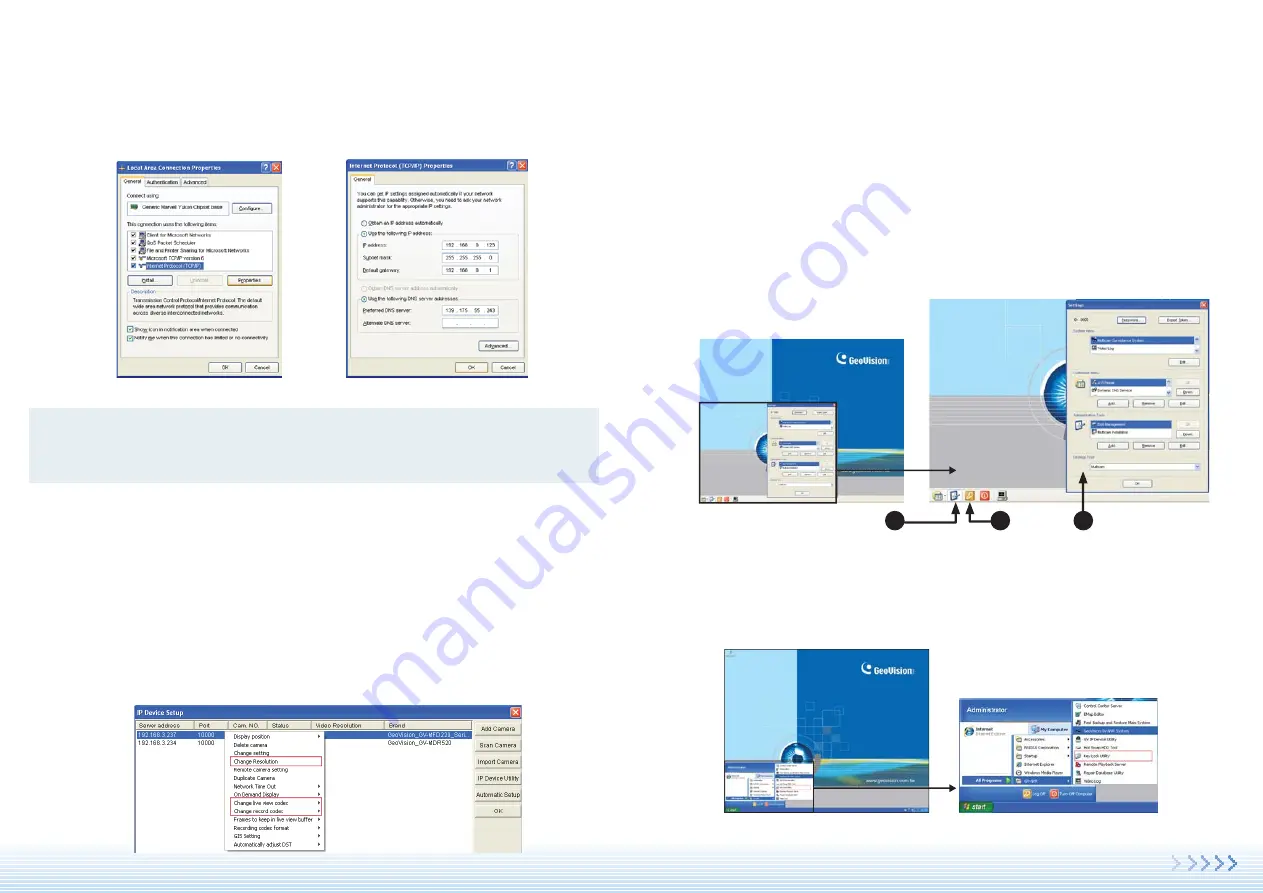
4. In the Local Area Connection Properties dialog box, select
Internet Protocol
(TCP/IP)
and click
Properties
.
5. Select
Use the following IP address
, type the new IP information, and click
OK
to finish the setting.
Note:
After you change the IP address of GV-NVR System Lite, you should also
change the IP addresses of GV IP cameras accordingly to the same network;
otherwise, the GV-NVR System Lite cannot detect the cameras.
1. On the main screen, click the
Configure
button, select
System Configure
and
click
IP Camera Install
. This dialog box appears.
2. Click the listed camera, and select
Change live view codec
,
Change record
codec
or
Change Resolution
to change the Live View codec or Recording
codec and recording resolution.
3
2
1
Changing Codec and Resolution of GV IP Cameras
Step 4
Step 5


