


Quick Start Guide
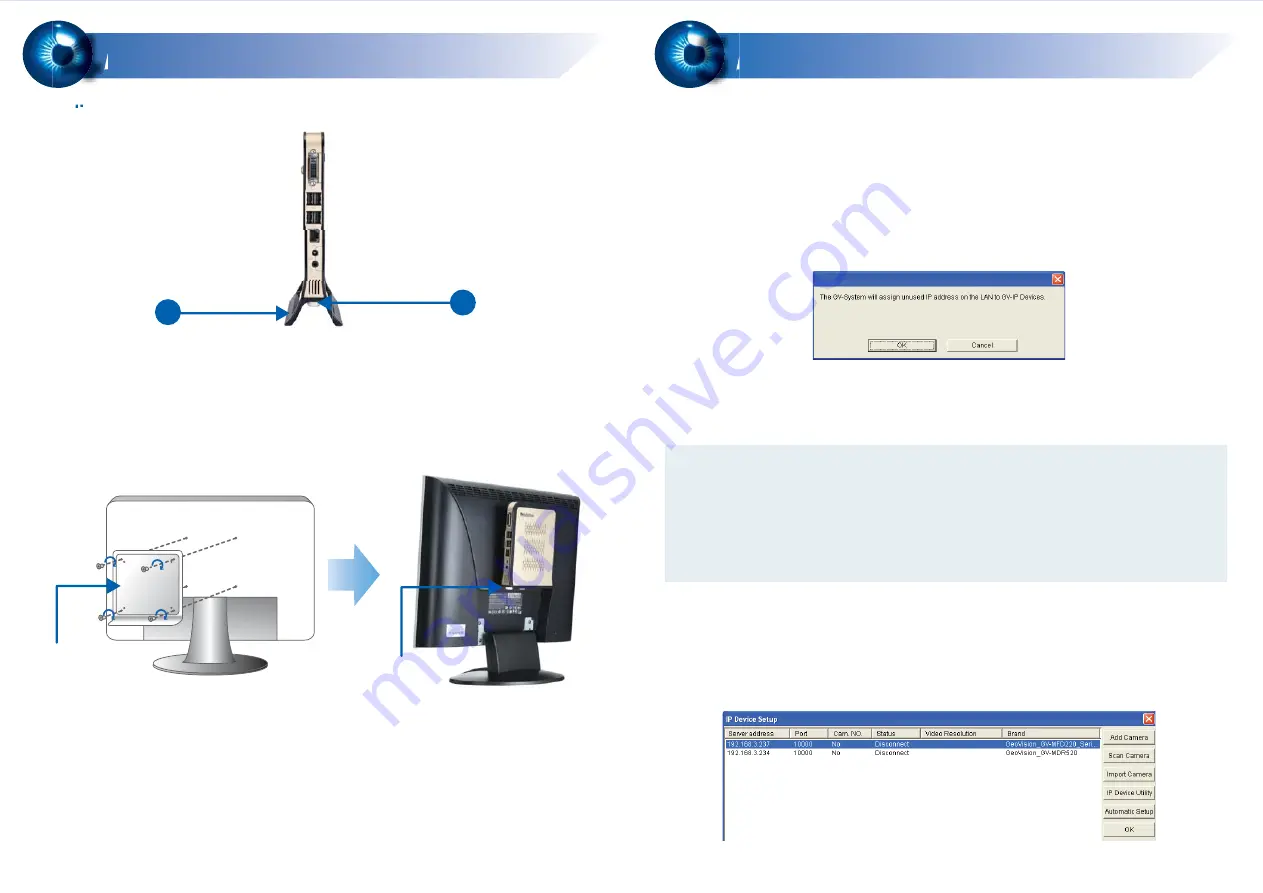
Standing Mount
Monitor Mount
1. Attach the base stand to the GV-NVR System Lite.
2. Tighten the base stand screw.
1. Using the 4 fix screws, tighten the VESA monitor mount on the back of the
computer monitor.
2. Attach the GV-NVR System Lite to the VESA monitor mount.
3. Tighten the stand screw.
Mounting Method
4
4
Note:
1. The randomly assigned IP addresses will be adopted by the GV IP cameras.
However, you can still manually change the IP address. See
Changing the IP
address of the GV IP Cameras
later in the
Quick Start Guide
.
2. If you select
Cancel
for manual IP assignment, see
3.4 Setting Up IP
Cameras
in the
GV-NVR System Lite User's Manual
.
Basic Configuration
5
5
After you have installed the necessary cables and IP cameras, you are ready to
display the channels on GV-NVR System Lite.
Setting Up GV IP Cameras Automatically
Setting Up Third-Party IP Cameras
1. Power on the GV-NVR System Lite. The GV IP cameras with the default IP
address (192.168.0.10), ID (admin) and password (admin) are detected, this
message appears.
1. Power on the GV-NVR System Lite. On the main screen, click the
Configure
button, select
System Configure
, and click
IP Camera Install
. This dialog box
appears.
2. Click
OK
. The GV-NVR System Lite will assign unused IP addresses and connect
to each of the GV IP camera in the form of 192.168.X.X. The channel will then be
displayed on the main screen.
1
2
VESA monitor
mount
stand screw


