29
Verwendung des Rotationswalzenmoduls mit der GRBL Firmware
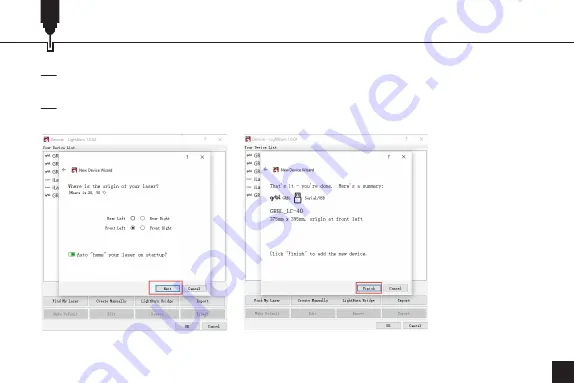
Abbildung 19
Abbildung 20
2.5 Überprüfen Sie die Geräteinformationen im Assistenten für die Geräteerkennung und klicken
Sie auf "Finish", wenn alle Angaben korrekt sind. (Abbildung 19)
2.6 Sie können nun das neu hinzugefügte Gerät in Ihrer Geräteliste sehen, es auswählen und auf
"OK" klicken, um es mit LightBurn zu verwenden. (Abbildung 20)
Содержание Jinsoku LC-40
Страница 3: ...01 01 Front View 03 Right View 02 Top View 04 Side View Product Structure...
Страница 4: ...02 Wire Connection Connect the laser engraver and the rotary roller module with the cable provided...
Страница 19: ...17 Roller Instruction in GRBL Firmware 2 12 Click Start to start engraving...
Страница 20: ...18 01 Vorderansicht 03 Ansicht von rechts 02 Ansicht von oben 04 Seitenansicht Ansicht des Produkts...
Страница 37: ...35 01 03 02 04...
Страница 38: ...36 USB...
Страница 39: ...37 PC 370mm 14 57in 390mm 15 39in 1 2 3 PC 4 5...
Страница 40: ...38 370mm 14 57in 390mm 15 39in 1 2 3 4 5...
Страница 42: ...40 GRBL LaserGRBL 1 LaserGRBL https lasergrbl com 2 1 COM Grbl 1 1f for help Laser Ready 6 5 6...
Страница 43: ...41 GRBL 2 2 Grbl Grbl 1 2 7 8 1 8 2...
Страница 44: ...42 GRBL 2 3 2 4 LaserGRBL 9 1 9 2 10 lines mm 10 X 5 0 Y 5 0 11 9 1 10 11 9 2...
Страница 45: ...43 GRBL 2 5 Framing 12 2 6 Start 12 13...
Страница 46: ...44 GRBL 15 16 LightBurn Lightburn USB Type B https lightburnsoftware com 2 1 15 16 2 2...
Страница 47: ...45 GRBL 17 18 2 3 LightBurn 17 2 4 Next 18...
Страница 48: ...46 GRBL 19 20 2 5 OK 19 2 6 OK LightBurn 20...
Страница 49: ...47 GRBL 2 7 Edit Device Settings 21 2 8 GCode 22 21 22...
Страница 50: ...48 GRBL 2 9 Start GCode G91 G01Y 5F500 OK Start Gcode...
Страница 51: ...49 GRBL 2 10 LightBurn...
Страница 52: ...50 GRBL 2 11...
Страница 53: ...51 GRBL 2 12...


