background image

User Manual

LED Monitor

5

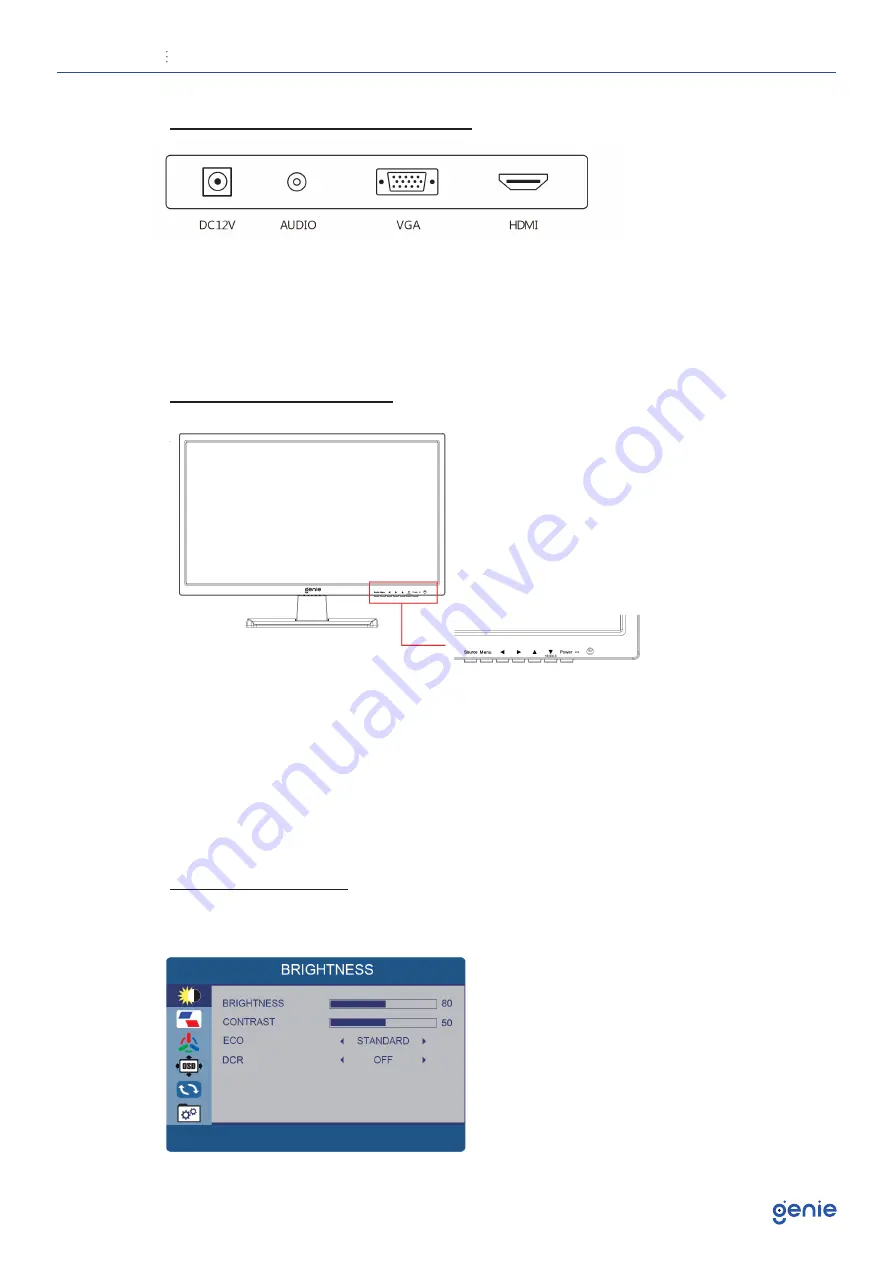
Interfaces, Controls and Settings

1. DC input port: Connect the supplied power supply to power the monitor

2. Audio Out: Used to connect compatible AUX devices

3. VGA: Used to connect a compatible VGA device

4. HDMI port: Used to connect a compatible device. Supports HDMI 1.4 & 2.0

Monitor Control Buttons

1.  Source: Select an input source

2.  Menu: Enter the MENU, save the adjustment of sub-menu and exit the OSD

3.  Left & Right ◄ (VOL) ◄: Change the value on selected menu

4.  Up & Down ◄ ◄: Switch a menu on OSD

5.  Power: Monitor power on / off

6.  LED Indicator: Blue color: monitor on, Red color : monitor standby

7.  IR Receiver

OSD Menu Controls

A. Brightness

Содержание EGM-19

Страница 1: ...ctions carefully before operating the unit and keep for further reference All the examples and pictures used here are for reference only The contents of this manual are subject to change without notic...

Страница 2: ...ce 1 x HDMI Input video input Interface Audio Input Interface Multilingual OSD menu for easy setting and optimization of the display Specifications Panel Type 18 5 LED Backlit Monitor Pixels 0 300 H x...

Страница 3: ...event accidental damage Do not touch the device with wet hands to prevent mechanical damage Do not use the device if it should fall or the external casing is damaged Contact the Bioaccess Sales Ltd su...

Страница 4: ...a table Make sure that the device is fastened firmly and that it is not resting on unstable supports or surfaces Dropping the device could result in injury or damage Adjust the brightness and contras...

Страница 5: ...vice 4 HDMI port Used to connect a compatible device Supports HDMI 1 4 2 0 Monitor Control Buttons 1 Source Select an input source 2 Menu Enter the MENU save the adjustment of sub menu and exit the OS...

Страница 6: ...CR It means Dynamic Contras Ratio provide enhanced contrast and sharpness ON OFF Image Setup H POSITION Move the screen picture horizontally 0 100 V POSITION Move the screen picture vertically 0 100 C...

Страница 7: ...ly 0 100 OSD V POS Move the menu position vertically 0 100 OSD TIMER Adjust the standing time of the menu 5 100 TRANSPARENCY Adjust the transparency of the menu 0 100 Option Funtion Value IMAGE AUTO A...

Страница 8: ...User Manual LED Monitor 8 Option Funtion Value SIGNAL SOURCE Select Input HDMI and VGA VOLUME Allows adjustment of the volume of the monitor from 0 100 F Miscellaneous...

Страница 9: ...Sales 44 0 1707 330541 Enquiries sales genieproducts co uk Website www genieproducts co uk...

Отзывы: