


Publication No. GEG-99054
Genicom
Mar 00
9-4
microLaser 210 User Guide
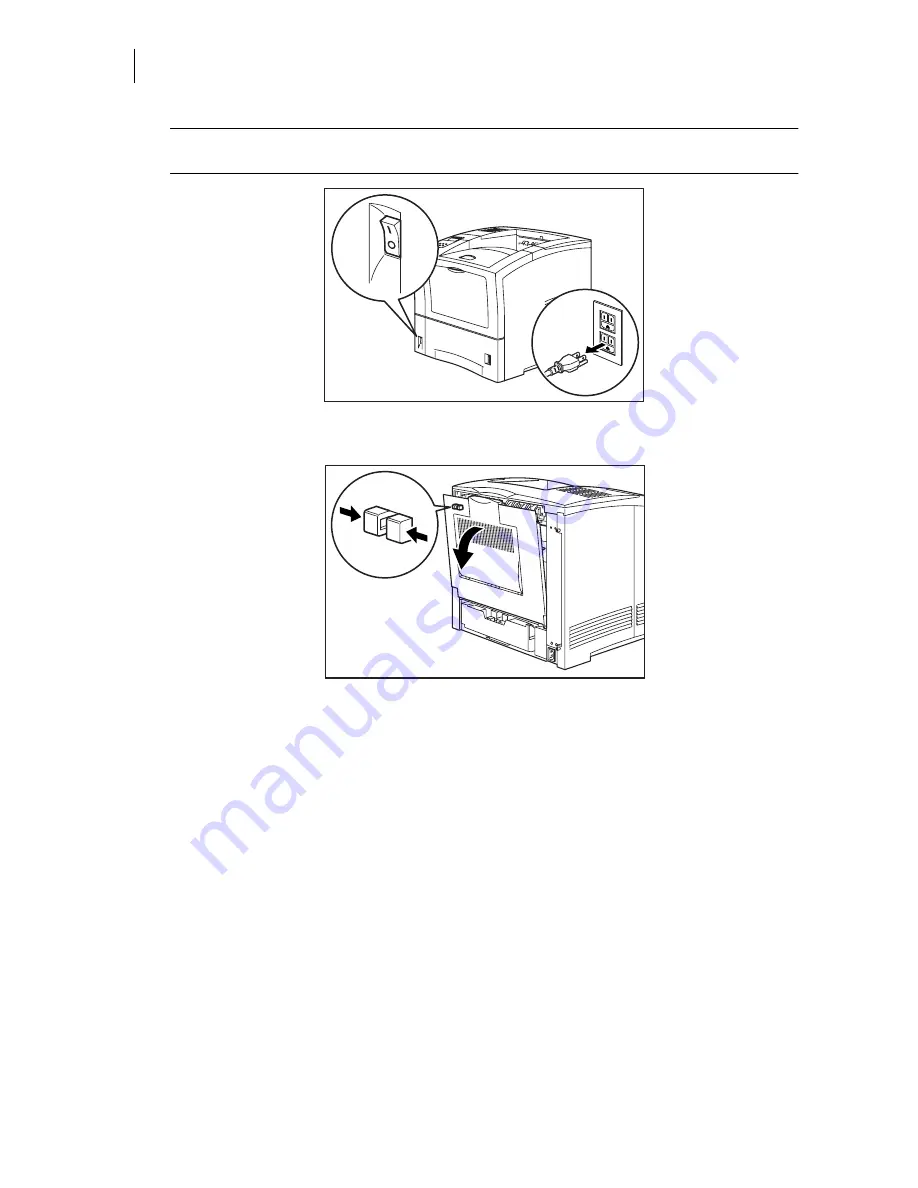
Installing the Offset Catch Tray
NOTE:
Installing the offset catch tray while the printer is on may damage the printer or the offset catch
tray.
3.
Squeeze the latch on the top left of the rear cover to release the cover, then open the rear cover
by pulling down on the top of the cover.
Содержание microLaser 210
Страница 1: ...Mar 00 Genicom Publication No GEG 99054 GENICOM microLaser 210 User Guide...
Страница 10: ...Publication No GEG 99054 Genicom Mar 00 x microLaser 210 User Guide...
Страница 16: ...Publication No GEG 99054 Genicom Mar 00 6 microLaser 210 User Guide About the Printer...
Страница 44: ...Publication No GEG 99054 Genicom Mar 00 2 18 microLaser 210 User Guide Loading the Front Tray...
Страница 62: ...Publication No GEG 99054 Genicom Mar 00 3 18 microLaser 210 User Guide Status Menu...
Страница 114: ...Publication No GEG 99054 Genicom Mar 00 5 30 microLaser 210 User Guide Warning Messages and Error Messages...
Страница 158: ...Publication No GEG 99054 Genicom Mar 00 7 30 microLaser 210 User Guide Moving the 550 Sheet Feeder...
Страница 172: ...Publication No GEG 99054 Genicom Mar 00 8 14 microLaser 210 User Guide...
Страница 190: ...Publication No GEG 99054 Genicom Mar 00 9 18 microLaser 210 User Guide Moving the Offset Catch Tray...
Страница 208: ...Publication No GEG 99054 Genicom Mar 00 A 8 microLaser 210 User Guide GENICOM Part Numbers...
Страница 212: ...Publication No GEG 99054 Genicom Mar 00 B 4 microLaser 210 User Guide Regulatory Compliance...


