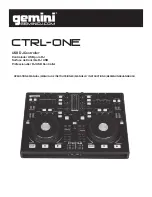
Gemini CTRL-ONE Скачать руководство пользователя страница 7

CTRL-ONE - EN

Compatability & Features

Compatibility & Features 

 Presentación • Introduction • Einleitung 

7


Cross-Platform USB Connectivity

The CTRL-ONE offers USB connectiviy to your PC/MAC in order for 

the unit to function. The USB drive on your computer must comply 

to USB 1.0, 1.1, or 2.0 specifications.  Wireless USB devices are not 

supported.


System Requirements

Clock Speed: 1.2 GHz or greater

Memory: 512 MB RAM or greater

Hard drive space: 0 MB for install, 400 MB free

OS:   Mac OS X or better


Windows XP, Vista, Windows 7 (32-bit or 64-bit)

   A Word About Compatability

The CTRL-ONE (and all Gemini products) are designed to interface 

as driverless USB devices. This means that the unit does not require 

proprietary driver software and can be accessed natively by a PC or 

Macintosh computer.

If you are having trouble, please find the compatability advisory sec-

tion of our website, and let us know!  In the vast majority of cases, 

support can be added for sub-standard units that deviate from typi-

cal specifications.


Cleaning the Unit

To clean the CTRL-ONE, use only a dry soft cloth and/or compressed air.  

If the unit is soiled with stubborn dirt, we suggest using a 2:1 solution of 

distilled water and 30% isopropyl alcohol.  Avoid using harsh cleaning 

chemicals such as benzene, paint thinner, bleach, or hydrochloric acid, 

which will damage the unit. 

   Operating Conditions

For  optimum  performance,  the  temperature  of  the  operating  environ-

ment should be b5º C to +35º C (+41º F - +95º F). Failure to 

maintain proper operating temperature may result in difficulty reading 

the display, thermal overload, or system-wide instability. Avoid exposing 

the unit to direct sunlight.  
When placing the unit in an installation, make sure that it is placed on a 

stable surface, as far away from vibrations as possible.  Even though the 

Gemini is impervious to vibration, the storage devices (specifically hard 

drive based ones) that are designed to be used in conjunction with it are 

typically not.  Also be sure not to place or use the player on heat generat-

ing sources, such as amplifiers or near spotlights.  

The  Gemini  CTRL-ONE  Professional  DJ  USB  controller  is  a 

powerful yet easy-to-use MIDI controller for use with DJ soft-

ware.

The CTRL-ONE gives performers the control and feel of a tradi-

tional mixer/console that can be integrated into a laptop-based 

setup.

   MIDI Control

The CTRL-ONE comes with a total of 46 buttons, 5 faders, and 

18 rotary knobs for use with DJ software.

   Virtual DJ LE Installation

STEP 1:

Place the installation CD into the CD-ROM drive. If you have 

activated the function “Automatic CD change recognition” on 

your computer, the CD menu will then start automatically. If 

not,  you  can  start  the  file  “install_virtualdj_v6.exe”  straight 

from the installation CD by double clicking on the file with the 

left mouse button. To start the installation, click on “INSTALL” 

in the CD menu.

STEP 2:

From there, the installation “WIZARD” will walk you through 

the necessary steps needed to finish the software installation.

STEP 3:

After installing, you should find an icon on your desktop for 

opening VirtualDJ.


For more information on features and operation of VIRTUAL DJ 

LE, visit: http://www.virtualdj.com

Содержание CTRL-ONE

Страница 1: ...USB DJ Controller Controlador USB para DJ Surface de Contrôle DJ USB Professioneller DJ USB Controller OPERATIONS MANUAL MANUAL DE INSTRUCCIONES MANUEL D INSTRUCTIONS BEDIENUNGSHANDBUCH CTRL ONE ...

Страница 2: ...ma de Control Solución de Problemas Especificaciones Registro del Producto FRENCH Mises en Garde Schémas Introduction Compatibilité Caractéristiques Connexions Contrôle du Système Dysfonctionnements Spécifications Techniques Carte d Enregistrement de Garantie GERMAN Warnung Abbildungen Einleitung Kompatibilität Eigenschaften Anschlüsse Handhabung Fehlerbeseitigung Technische Daten Registrierung Ta...

Страница 3: ...non respect de ces principes de base peut entraîner différents risques blessure choc électrique court circuit dommage risque d incendie LIRE LES INSTRUCTIONS Toutes les notifications techniques et de sécurité doivent être lues avant utilisa tion du produit CONSERVATION DU MANUEL D INSTRUCTIONS Le manuel d instructions doit être conservé à l abri pour un usage futur Veuillez vous y reporter en cas ...

Страница 4: ...RED IN CHINA MASTER VOLUME PARAMETER 2 PARAMETER 1 EFFECTS SELECTOR SYNC EFFECT ON PITCH MASTER TEMPO SAMPLER SELECTOR SAMPLER VOLUME SAMPLER PLAY 7 8 9 10 11 12 2 1 3 4 5 6 SAMPLE DISPLAY LOOP IN LOOP OUT 1 2 3 HOT CUE BPM SEARCH SCRATCH CUE GAIN 1 GAIN 1 HIGH MID LOW HIGH MID LOW KILL 12 KILL 12 KILL 12 KILL 12 KILL 12 KILL 12 TRACK FOLDER SEARCH PUSH LOAD A LOAD B FOLDER OUT 0 1 2 3 4 5 6 7 8 9...

Страница 5: ...tch Control Slide 8 EN 12 ES 16 FR 20 DE 6 Channel Volume Fader 8 EN 12 ES 16 FR 20 DE 18 Pitch Bend 8 EN 13 ES 16 FR 20 DE 7 VU Meter 8 EN 12 ES 16 FR 20 DE 19 BPM 8 EN 13 ES 17 FR 20 DE 8 Cross Fader 8 EN 12 ES 16 FR 20 DE 20 Master Tempo 9 EN 13 ES 17 FR 20 DE 9 3 Band EQ 8 EN 12 ES 16 FR 20 DE 21 Sync 9 EN 13 ES 17 FR 20 DE 10 Track Folder Search 8 EN 12 ES 16 FR 20 DE 22 Effects Selector 9 EN...

Страница 6: ...ur equipment at a safe level BEFORE your hearing adapts To establish a safe level Start your volume control at a low setting Slowly increase the sound until you can hear it comfortably and clearly and without distortion Once you have established a comfortable sound level set the dial and leave it there Taking a minute to do this now will help to prevent hearing damage or loss in the future After a...

Страница 7: ...intain proper operating temperature may result in difficulty reading the display thermal overload or system wide instability Avoid exposing the unit to direct sunlight When placing the unit in an installation make sure that it is placed on a stable surface as far away from vibrations as possible Even though the Gemini is impervious to vibration the storage devices specifically hard drive based one...

Страница 8: ...d the BPM button to turn on the BPM read out Once on you may TAP the button to the beat of the music Connections and System Controls Conexiones y Controles Sistema Connexions Fonctions Anschlüsse und Bedienelemente CTRL ONE EN Back Panel Controls 1 POWER SOURCE SELECTOR switch This switch alternates the unit between the OFF position and ON position When set to OFF the unit is powered off To turn t...

Страница 9: ...LOOP OUT Pressing the IN BUTTON again while the unit is playing will erase the previously saved loop while saving your new loop entry point Press OUT to exit the loop and save a new complete loop 26 LOOP ADJUST 1 8 LOOP ADJUST 16 Pressing the LOOP ADJUST buttons adjusts the length of the selected loop LOOP ADJUST 1 8 halfs the set loop s length LOOP ADJUST 16 dou bles the set loop s length 27 PARA...

Страница 10: ...u oído se adapte Para establecer un nivel seguro Empiece a establecer su control del volumen bajo Lentamente incremente el sonido hasta que escuche confortablemente y claro y sin distorsión Una vez haya establecido un nivel de sonido confortable Marque el dial y déjelo así Gastar un minuto para hacer esto le ayudará a prevenir daños o pérdida de oído en el futuro Después de todo queremos que oiga ...

Страница 11: ...rga térmica o inestabilidad de todo el sistema Evite exponer la unidad a la luz del sol directamente Cuando sitúe la unidad en una instalación asegúrese que la sitúa en una superficie estable lo más lejos posible de vibraciones Aunque el Gemini es impermeable a las vibraciones los dispositivos de almace namiento específicamente los discos duros que están diseñados para ser usados junto con él no s...

Страница 12: ...ESLIZANTE DE PITCH El pitch o velocidad del CD varia en mas o menos 6 12 24 dependiendo de la posición del CON TROL DESLIZANTE DE PITCH Pulsa el botón de PITCH para desactivar CTRL ONE SP 12 Controles en el Panel Trasero 1 POWER SOURCE SELECTOR SELECTOR DE FUENTE DE ALIMENTACION Este botón alterna la unidad en posición de apagado OFF y posición de encendido ON Cuando se establece en OFF la unidad ...

Страница 13: ...DE PITCH BEND au mentará automáticamente el pitch hasta un 16 o bajará el pitch hasta un 16 desde el pitch establecido existente Soltando los botones el pitch volverá al establecido como pitch original Puede usar esta función para que coincida el beat cuando mezcla de una canción a otra 19 TOUCH SENSOR BPM SENSOR TOQUE BPM Pulse y sostenga el botón SENSOR TOQUE BPM para activar la lectura de BPM U...

Страница 14: ...e cette tendance en réglant votre matériel à un niveau raisonnable AVANT que vos oreilles ne s habituent Commencez toujours avec un réglage de volume à faible niveau puis augmentez celui ci progressivement afin d atteindre le niveau audio désiré Veillez à ne pas atteindre un niveau de distorsion qui serait préjudiciable à la qual ité audio au fonctionnement correct de l amplificateur ainsi qu à vo...

Страница 15: ...lire l écran surcharge thermique ou instabilité du système Évitez d exposer l appareil directement au soleil Lors de l installation de l unité assurez vous que l appareil soit placé sur une surface stable aussi loin que possible des vibrations Même si l appareil Gemini est insensible aux vibrations les périphériques de stockage Disque dur en particulier conçus pour être utilisés avec l appareil ne...

Страница 16: ...ion du réglage de vitesse en cours Le fait de relâcher ces touches permet de revenir à la vitesse de lecture en cours Cette fonction permet de caler CTRL ONE FR 16 Contrôles Face Arrière 1 Commutateur ALIMENTATION POWER Ce commutateur permet de mettre l appareil sous tension ON ou hors tension OFF Pour mettre l appareil sous tension sélectionnez l une des deux sources d énergie possibles correspon...

Страница 17: ...t que vous souhaitez appliquer au morceau en cours de lecture 23 ACTIVATION DE L EFFET appuyez sur cette touche afin d activer l effet préalablement sélectionné via la touche EFFECTS SELECTOR 22 24 SAMPLER PLAY cette touche permet d activer la fonction SAMPLER ECHANTILLONNEUR de l appareil AFFICHEUR SAMPLER 24a l afficheur du SAMPLER con tient une rangée de LEDs numérotées de 1 à 12 s allumant en ...

Страница 18: ...e dem vor indem Sie Ihr Equipment auf einen sicheren Lautstärkepegel einstellen BEVOR Sie mit dem Hören beginnen So erreichen Sie einen sicheren Pegel Beginnen Sie klar und ohne Verzerrungen hören Wenn Sie einen angenehmen Pegel gefunden haben Belassen Sie die Regler in der gefundenen Position Nehmen Sie sich eine Minute Zeit dafür um Gehörschäden in der Zukunft zu verhindern denn wir wollen dass ...

Страница 19: ...licht auszusetzen Bei einer Festinstallation achten Sie bitte darauf dass das Gerät auf einer stabilen Oberfläche eingesetzt wird und von jeglichen Vibrationen getrennt wird Auch wenn das Gemini Gerät nicht anfällig für Störungen durch Vibrationen ist die Computerlaufwerke welche in dem Zusammen hang zum Einsatz kommen sind es Stellen Sie das Gerät auch nicht in der Nähe von Hitzequellen wie einem...

Страница 20: ...f SYNC stellt die Geschwindigkeit des jeweiligen Titels auf dasselbe Tempo wie im anderen Kanal ein 22 EFFEKTWAHLSCHALTER Mit dem EFFEKTWAHLSCHAL TER legen Sie fest welcher Effekt auf den jeweiligen Kanal gelegt werden soll CTRL ONE DE 20 Stromversorgung 1 WAHLSCHALTER SPANNUNGSQUELLE Wählen Sie hier eine der verfügbaren Spannungsquellen die zur Verfügung stehen und schalten Sie das Gerät hiermit ...

Страница 21: ...er Drehregler PARAMETER 1 stellt den Pa rameter 1 des gewählten Effektes ein 28 PARAMETER 2 Der Drehregler PARAMETER 2 stellt den Pa rameter 1 des gewählten Effektes ein 29 CROSSFADER KURVE Der Drehregler CROSS FADER SLOPE stellt die Flanke des mischenden Crossfaders ein Auf der rechten Position blendet der Crossfader erst nah am Rand den jeweils anderen Kanal aus auf der linken Einstellung werden...

Страница 22: ...harged for freight E Please allow 2 4 weeks for return of your product Under nor mal circumstances your product will spend no more than 10 work ing days at Gemini We are not responsible for shipping times Gemini Sound Products Worldwide Headquarters 1 Mayfield Ave Edison NJ 08837 USA Tel 732 346 0061 Fax 732 346 0065 INTHE UNITED KINGDOM In the event that you need service on your Gemini product un...

Страница 23: ...the appropriate address listed at the left side of this page First and Last Name Address Number and Street Apartment Number City and State or Province Country Zip Code or Postal Code Email Address Telephone Number Date of Birth Date of Purchase Purchase Price Excluding Tax City of Purchase Model Number Example CDT 05 Serial Number Located on the back of most units ...

Страница 24: ...3 Barcelona Spain Tel 349 3435 0814 Fax 3493 347 6961 GCI Technologies Corp 2010 All Rights Reserved IN THE USA IF YOU EXPERIENCE PROBLEMS WITH THIS UNIT CALL 1 732 346 0061 FOR GCI TECHNOLOGIES CUSTOMER SERVICE DO NOT ATTEMPT RETURN THIS EQUIPMENT TO YOUR DEALER Parts of the design of this product may be protected by worldwide patents Information in this manual is subject to change without notice...

Отзывы: