


Page 1
owners manual
gm-x
$#
53"
).
/54
4(25
-)$)
0%$!,3
,
2
).054
/54054
,
2
-
INTRODUCTION
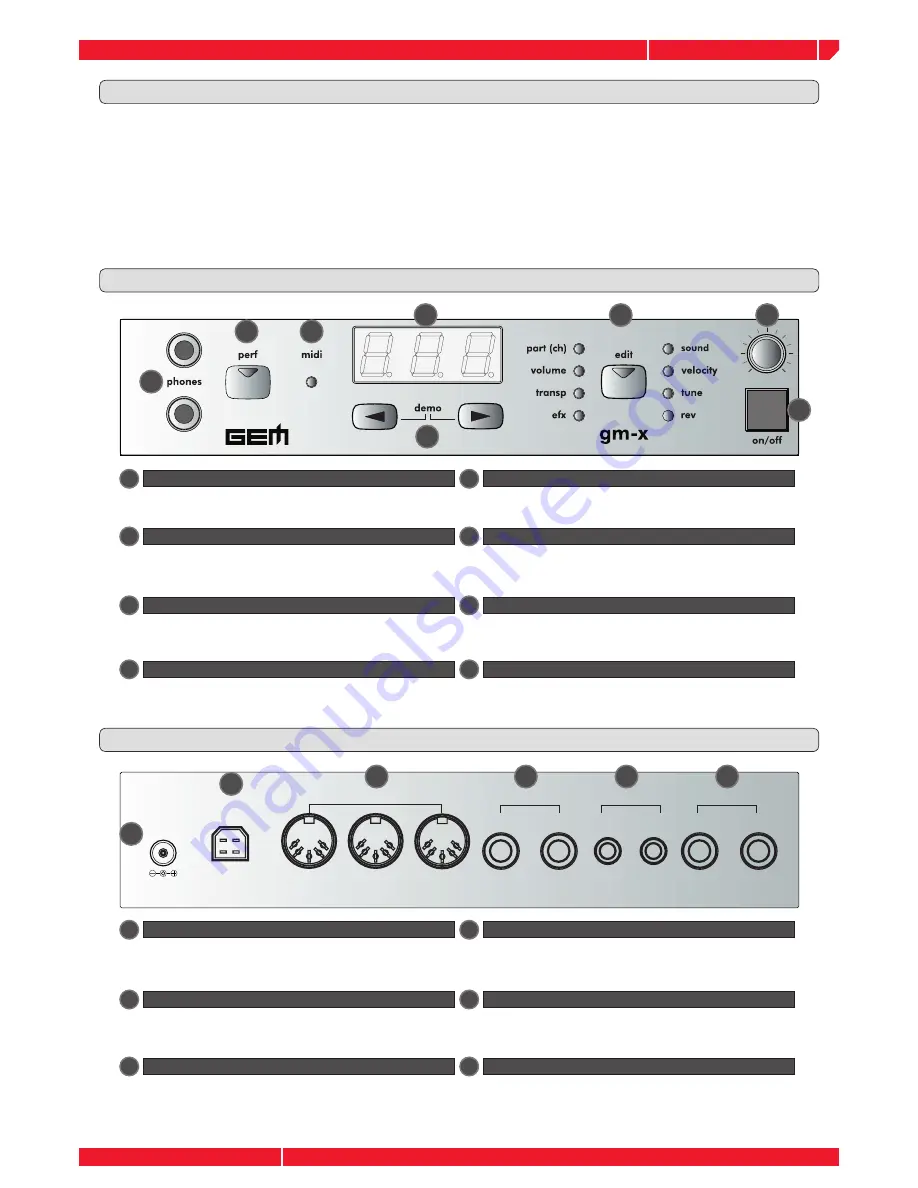
FRONT PANEL
1
1
2
3
4
These buttons allow you to modify the parameter
values. Both pressed at the same time will start the
demo sequence.
5
This is used for entering the edit mode and select the
editing parameters.
6
7
the
Volume
knob, sets the output level of the
instrument.
8
Turns the module on or off.
1
2
3
4
5
6
7
8
1
2
2
3
3
4
4
5
5
6
6
Two headphones may be connected to the module.
The
perf
button (PERFORMANCE), select the
performance mode. See the relative chapter, in this
manual.
This led monitors the midi data received at the midi
input of the module.
The
3 digit
display visualizes the values and the
parameters of the various editing levels.
display
midi
perf
phones
edit
volume
data entry/demo
on/off
REAR PANEL AND CONNECTIONS
12 D.C. in
USB
MIDI IN-THRU-OUT
PEDALS
INPUT
OUTPUT
Congratulations & thank you for purchasing the GEM gm-x Expander. Utilizing our pro-
prietary DRAKE technology, the gm-x produces a vast variety of sounds with exceptional
quality. The gm-x also incorporates an intuitive, yet easy to use operational interface that
will satisfy even the most demanding live or professional studio applications.
AC adapter input. In order to avoid possible damage
to the instrument, please only use the adaptor supplied
or specifi ed for this instrument.
USB connection to the PC. Use this connection with a
proper USB cable to connect the module to a PC. See
the relative chapter in this manual.
The three standard MIDI ports allows the connection of
the instrument to a MIDI controller, such as a Master
keyboard a Midi Accordion or a PC (equipped with
MIDI interface).
You may connect two types of pedals to the expander.
An expression pedal to Input #2 and a Gem Multipedal
unit to Input #1.
The INPUT RCA connectors allows you to plug an
external (Line) source to the instrument. Consult the
relative chapter of this user manual.
Connect the instrument to an external speaker system
or a Mixer.