background image

5

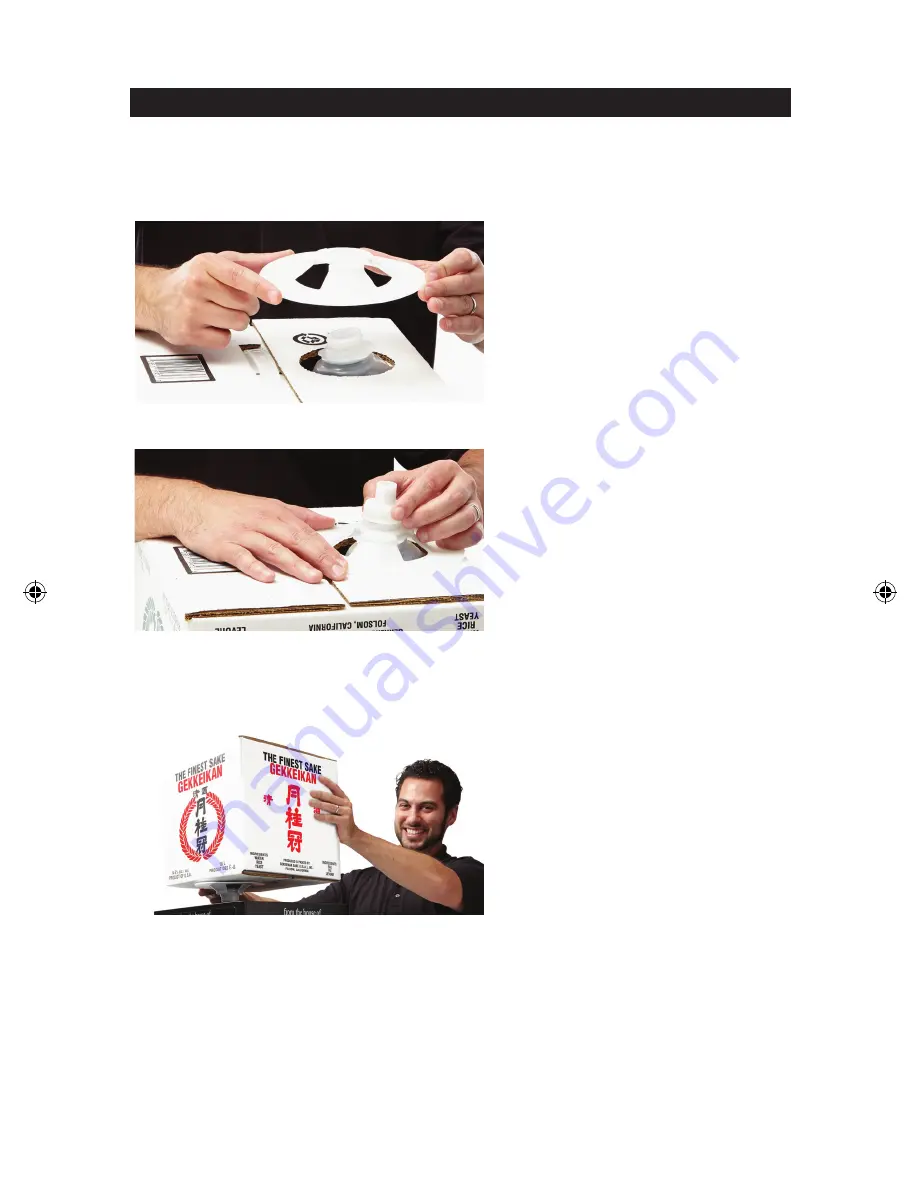
INSERTING THE 18L CUBE

1. Remove original 18L cube cap & freshness foil.

2. Place retaining collar on 18L cube neck.

3. Tightly screw on 18L cube adaptor over retaining collar.

4. Turn the 18L cube upside down on the Gekkeikan

®

 Sake Machine,

with 18L cube retaining ring and Sake Machine cap engaging the circular inlet.

(As depicted in the below illustration)

5. Plug in, and turn the rocker switches ON.

(The unit is ON when — symbol is depressed)

6. 18L cube is inserted correctly when the sake begins to drain from the bottle,

into the cooling & warming tanks. 

(Make sure the sake cube is seated flush with the top of the machine)

Gekkeikan Sake Machine Owner's Manual.indd   5

8/14/14   4:13 PM

Содержание GK Sake Unit

Страница 1: ...Gekkeikan Sake Machine Owner s Manual...

Страница 2: ...1 for more information on warranty repair and returns NOTICE The Gekkeikan Sake Machine is not intended for use by persons including children with reduced physical sensory or mental capabilities or la...

Страница 3: ...ches on all sides For Indoor Use Only Between 50 F 10 C and 90 F 32 C Get to know your Gekkeikan Sake Machine Operation Information General The Gekkeikan Sake Machine has a unique display refrigeratio...

Страница 4: ...CETS 4 Place the machine on a flat surface in a desired location with 4 inches of clearance on all sides 5 Before plugging in make sure the power switches in the back are in the OFF position The Warmi...

Страница 5: ...n the Gekkeikan Sake Machine with 18L cube retaining ring and Sake Machine cap engaging the circular inlet As depicted in the below illustration 5 Plug in and turn the rocker switches ON The unit is O...

Страница 6: ...a 90 degree angle activating pump 3 Allow pump to run for 2 to 3 minutes or until sake begins flowing 4 To STOP remove glassware from faucet stem and set at original position 45 degree angle or press...

Страница 7: ...e comes in contact with the faucet sensors the pump will turn off automatically 2 To engage manual mode insert glassware into desired faucet stem and gently push in glassware The faucet stem will now...

Страница 8: ...solution per the manufacturer s recommended dilution Flush cleaning solution through the system from BOTH the Warm Cold faucets as well as both drain ports Examples of an FDA approved solutions are Be...

Страница 9: ...ause injury or death Service should only be performed by qualified service personnel Before attempting to perform ANY maintenance UNPLUG unit Use extreme care during electrical circuit tests Live circ...

Отзывы: