background image

21

1

Keypad functions

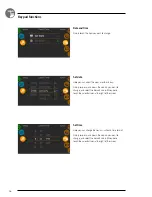
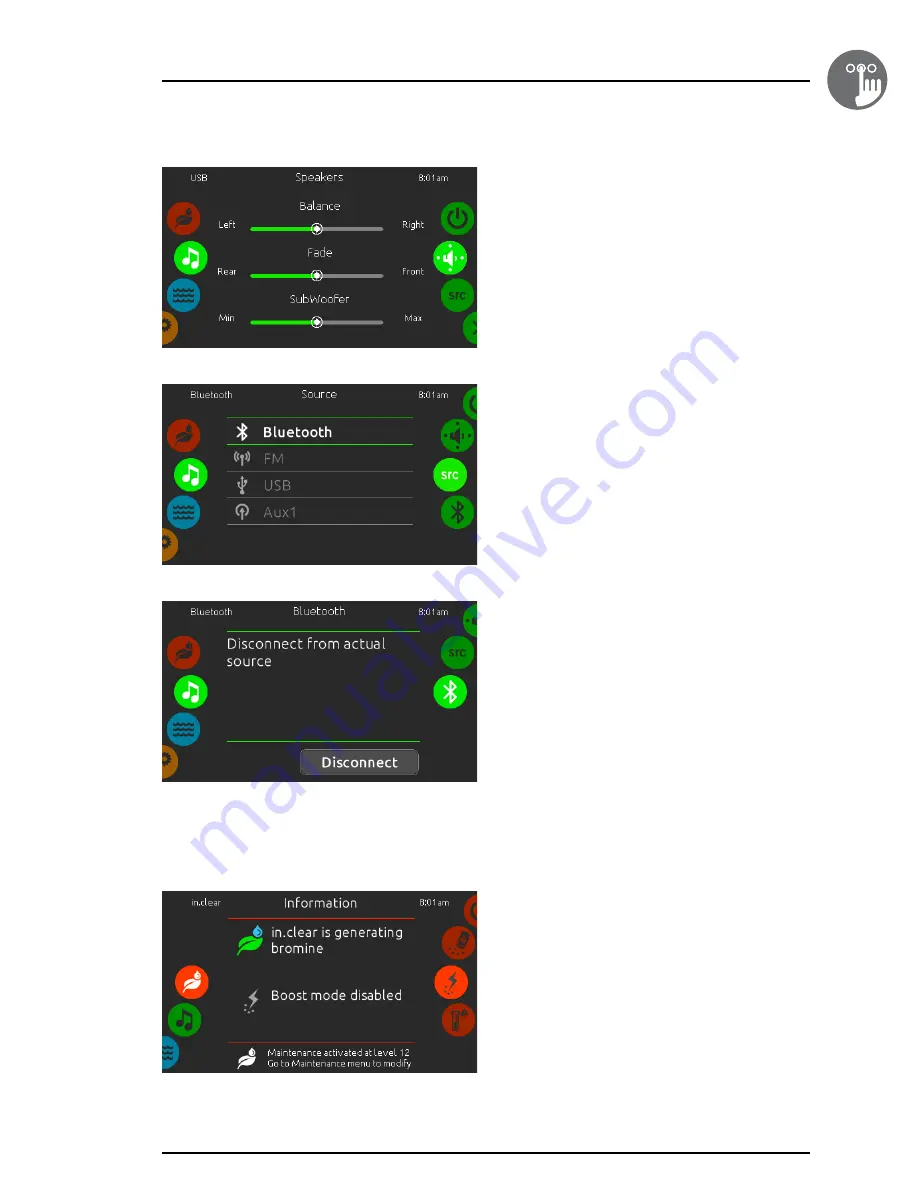
Speakers Settings

Move the sliders to adjust the Balance, Fader and 
subwoofer settings�

The Fader and Subwoofer sliders will only appear in the 
Speaker menu if the corresponding speakers are installed 
on the in�stream 2�

Source Menu

To change the audio source, simply tap on the desired one�

Note that only the sources installed on the in�stream 2 will 
be displayed in the source menu�

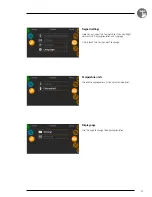
Disconnect Bluetooth

If a device with Bluetooth technology is connected to 
the in�stream 2, you can disconnect it by pressing the 
Disconnect button at the bottom of the screen�

Doing so will also prevent the in�stream 2 from 
automatically reconnecting to this specific device until it 
has been reconnected using the device itself�

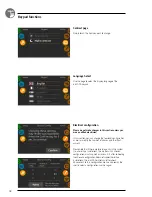
in.clear functions

This menu is available only if the in�clear is detected in the 
spa accessories�

The k1000 keypad can be used with the in�clear 
sanitation system�
 
The 

in.clear

 menu allows you to configure your 

maintenance settings and boost levels� The main 

in.clear 

menu shows the current status of the sanitation system, 
whether it's on, and if it's generating bromine or not�
 
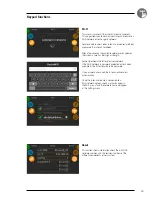
For more information about the in�clear, bromine levels, 
and other settings, please refer to the in�clear user manual�

Содержание in.k1000

Страница 1: ...es Canetons Qu bec Qc G2E 5W6 Canada 1 800 78 GECKO www geckoalliance com Printed in Canada 9919 101309 C Rev 02 2016 Groupe Gecko Alliance inc 2016 All trademarks or registered trademarks are the pro...

Страница 2: ...cessories 11 Notifications 11 Water temperature 12 Spa menu 12 Display page 12 Contrast page 13 Settings 13 Water care 14 Modifying schedules 15 Maintenance 15 Error Log 15 Date and time 16 Keypad set...

Страница 3: ...ION THAT IS POTENTIALLY DAMAGING AND OR DANGEROUS TO THE OPERATOR OR SURROUNDINGS THIS INCLUDES BUT IS NOT LIMITED TO FIRE FLOODING OR OTHER WATER DAMAGE DIELECTRIC BREAKDOWNS PRESENCE OF HIGH VOLTAGE...

Страница 4: ...r all off one touch activation key of last used settings interactive display icons and on screen reminders and messages make for a unique user interface Control and get direct feedback and seamless in...

Страница 5: ...4 1 Overview Side view 0 26 6 6 mm 1 69 43 mm Front view 7 49 190 mm 5 17 131 mm 3 5 89 mm MAX in k1000 dimensions...

Страница 6: ...ation and stick the template on the chosen location Cut out an opening according to the template see illustration Clean the installation surface and peel the adhesive gasket from the back of the keypa...

Страница 7: ...6 1 Installation Drilling template 3 19 90 mm 5 5 140 mm 0 19 5 mm...

Страница 8: ...7 1 Drilling template Installation 1 75 44 mm TYP 1 5 38 mm TYP 2 5 64 mm TYP...

Страница 9: ...0 should not be enclosed where water can gather but instead cut out Connecting in k1000 to the spa pack To connect the in k1000 keypad simply insert its in link connector into the appropriate keypad c...

Страница 10: ...nstallation Installation errors Upon connecting the in k1000 to the spa pack you may see one of two error messages Please follow the instructions in the message or contact your dealer for more informa...

Страница 11: ...screen The main screen gives you access to your accessories and water temperature At the bottom of the screen you will see any error or maintenance messages that are present in k1000 keypad layout al...

Страница 12: ...the in touch module is detected and connected to a Wi Fi network A red cross indicates that the in touch module is detected but isn t connected to a Wi Fi network An animated icon indicates that the...

Страница 13: ...the set value is higher than the current temperature Heating to xx x will be indicated under the value Normally there is a short delay before the heating starts during which Heating Suspended is indic...

Страница 14: ...Settings In the Settings page you can access the following WaterCare Maintenance Date Time Keypad Electrical Config Wi Fi About To select an item slide the right wheel until the desired icon is highl...

Страница 15: ...ion pump configured to run 24 hours the screen will show you the purge setting instead of filtration The purges are pre programmed for a fixed number of minutes therefore the duration will be set to N...

Страница 16: ...schedules will be repeated every week The time and duration are set in 30 minute increments Once you have set the schedule use the calendar icon to go back Ensure that you have selected the desired Wa...

Страница 17: ...e up and down the column you want to change and select the desired value When done touch the calendar icon at the right of the screen Set time Here you can change the hour minute and time format Simpl...

Страница 18: ...emperature Units Day Night contrast and Display orientation and language Simply touch the item you want to change Temperature units Choose the appropriate units to display temperatures Display page Us...

Страница 19: ...two spa packs in the system i e a SwimSpa installation the master unit s chosen configuration must support a slave unit If after re booting the chosen configuration does not support SwimSpa installat...

Страница 20: ...ther in touch connection methods please see the in touch techbook After a few seconds the available networks will appear on the screen as well as their signal strength Swipe Up or Down the list to sel...

Страница 21: ...ve audio source Note that only the functions that apply to the selected source will be available From this page you can also access the following in stream 2 on off speaker settings audio source selec...

Страница 22: ...t it by pressing the Disconnect button at the bottom of the screen Doing so will also prevent the in stream 2 from automatically reconnecting to this specific device until it has been reconnected usin...

Страница 23: ...e the wait icon is displayed on the gauge There are no settings to change on this page it is informative only Modify the Boost level The Boost level is used to set amount of boost required As a rule e...

Страница 24: ...Spa config slave unit is missing Hr Hardware error was detected Thermal fuse UPL The spa pack does not have valid software Please insert valid in stick to reprogram spa pack CFLO No Flow condition HIB...

Страница 25: ...ran ais 5 00 Espa ol 5 00 Polski 5 00 Nederlands 5 00 Deutsch 5 00 Norsk 5 00 Svenska 5 00 Magyar 5 00 Italiano 5 00 Portugu s 5 00 Electrical configuration 5 00 Wi Fi 5 00 About 5 00 Wipe screen 6 00...

Страница 26: ...rature 4 F 20 C to 149 F 65 C Storage temperature 22 F 30 C to 185 F 85 C Water ingress protection IPX5 Mechanical Weight 1 05 lbs 0 48 kg Dimensions W x H x D 7 49 x 5 17 x 1 93 190 mm x 1031 mm x 49...

Страница 27: ...es Canetons Qu bec Qc G2E 5W6 Canada 1 800 78 GECKO www geckoalliance com Printed in Canada 9919 101309 C Rev 02 2016 Groupe Gecko Alliance inc 2016 All trademarks or registered trademarks are the pro...

Отзывы: