background image

Содержание RB525DH1BB

Страница 1: ...Cooking Guide 17 Care and Cleaning Cleaning the Range Exterior 18 Cleaning the Range Interior 20 Cleaning the Glass Cooktop 21 Maintenance 23 Troubleshooting Tips 25 For a Spanish version of this manual visit our Website at GEApp iances com Para consu tar una version en espaho de este manual de instrucciones visite nuestro sitio de internet GEApp iances com Write the model and serial numbers here ...

Страница 2: ...nel can be removed for easy inspection If visual inspection is not possible slide the range forward confirm the anti tip bracket is securely attached to the floor or wall and slide the range back so the rear leveling leg is under the anti tip bracket If the range is pulled from the wall for any reason always repeat this procedure to verify the range is properly secured by the anti tip bracket Anti...

Страница 3: ...e units or any interior area of the oven allow sufficient time for cooling first Other surfaces of the appliance may become hot enough to cause burns Potentially hot surfaces include the cooktop areas facing the cooktop oven vent opening surfaces near the opening and crevices around the oven door Do not heat unopened food containers Pressure could build up and the container could burst causing an ...

Страница 4: ... oil may ignite resulting in fire that may spread to surrounding cabinets Use a deep fat thermometer whenever possible to monitor oil temperature To avoid oil spillover and fire use a minimum amount of oil when shallow pan frying and avoid cooking frozen foods with excessive amounts of ice Use proper pan size select cookware having flat bottoms large enough to cover the surface heating element The...

Страница 5: ...The glass surface of the cooktop will retain heat after the controls have been turned off Do not cook on a broken cooktop If glass cooktop should break cleaning solutions and spillovers may penetrate the broken cooktop and create a risk of electric shock Contact a qualified technician immediately Avoid scratching the glass cooktop The cooktop can be scratched with items such as knives sharp instru...

Страница 6: ... cooking utensils pizza or baking stones or any type of foil or liner on the oven floor These items can trap heat or melt resulting in damage to the product and risk of shock smoke or fire IA WARNING I SELF CLEANING OVEN SAFETY INSTRUCTIONS on some models The self cleaning feature operates the oven at temperatures high enough to burn away food soils in the oven Follow these instructions for safe o...

Страница 7: ... glass cooktop caused by hardened spills of sugary materials or melted plastic that are not cleaned according to the directions in the Owner s Manual Replacement of house fuses or resetting of circuit breakers Damage to the product caused by accident fire floods or acts of God Incidental or consequential damage caused by possible defects with this appliance Damage caused after delivery Product not...

Страница 8: ...n our Website with all the details including your phone number or write to General Manager Customer Relations GE Appliances Appliance Park Louisville KY 40225 GE offers a variety of accessories to improve your cooking and maintenance experiences To place an order visit us online at www GEApplianceParts com U S or www GEAppliances ca Canada or call 800 626 2002 U S 800 661 1616 Canada The following...

Страница 9: ...in either direction to the setting you want A surface ON indicator light will glow when any surface unit is on For glass cooktop surfaces A HOT COOKTOP indicator light will come on when the unit is hot to the touch stay on even after the unit is turned off stay on until the unit is cooled to approximately 150 F Off At both OFF and HI the control clicks into position You may hear slight clicking so...

Страница 10: ...g It is safe to place hot cookware on the glass surface even when the cooktop is cool Even after the surface units are turned off the glass cooktop retains enough heat to continue cooking To avoid overcooking remove pans from the surface units when the food is cooked Avoid placing anything on the surface unit until it has cooled completely Water stains mineral deposits are removable using the clea...

Страница 11: ...ly stain the cooktop if not removed immediately Stoneware not recommended Poor performance May scratch the surface Cast Iron not recommended unless designed specifically for glass cooktops Poor conductivity and slow to absorb heat Will scratch the cooktop surface Pans with rounded curved ridged or warped bottoms are not recommended NOTE Follow all cookware manufacturer s recommendations when using...

Страница 12: ...the pads to program the time in hours and minutes Press the Start pad The timer countdown is complete To turn the timer off press the Timer pad 8 Delay Time Delays when the oven will turn on Use this to set a time when you want the oven to start Press the Delay Time pad and use the pads to program the time of day for the oven to turn on then press Start Press the desired cooking mode and temperatu...

Страница 13: ...SHdn and SAb 12 hour auto shut off turns off the oven after 12 hours of continuous operations Sabbath mode disables the oven lights the oven light will not turn on when the door is opened all sounds the control will not beep when a button is pressed Broil Cook Time Timer Clock and Delay Time functions Sabbath mode can only be used with Bake This feature conforms to the Star K Jewish Sabbath requir...

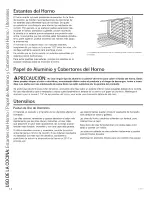
Страница 14: ...uct and risk of shock smoke or fire Damage from improper use of these items is not covered by the product warranty Foil may be used to catch spills by placing a sheet on a lower rack several inches below the food Do not use more foil than necessary and never entirely cover an oven rack with aluminum foil Keep foil at least 1 1 2 from oven walls to prevent poor heat circulation Cookware Cookware Gu...

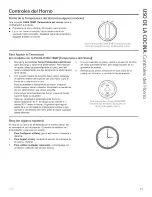
Страница 15: ...a click for each notch you move the knob To decrease the oven temperature move the top screw toward the left Each click will change the oven temperature approximately 10 F Range is plus or minus 60 F from the arrow We suggest that you make the adjustment one click from the original setting and check oven performance before making any additional adjustments 3 After the adjustment is made retighten ...

Страница 16: ... element increases smoking spattering and the possibility of fats igniting For best performance center food below the broil heating element Broiling on rack position 6 is not recommended Try broiling foods that you would normally grill Adjust rack positions to adjust the intensity of the heat to the food Place foods closer to the broil element when a seared surface and rare interior is desired Thi...

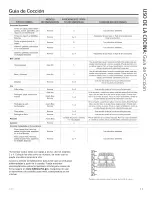
Страница 17: ...Lo 1 or 2 broiling For best performance when broiling center Bake food below the broil heating element If breaded or coated in sauce avoid Broil Hi modes Boneless chicken breasts Broil Lo 1 or 2 Broil skin side down first Watch food closely when Bake broiling For best performance when broiling center food below the broil heating element Whole turkey Bake 1 or 2 Use a low sided pan such as a broil ...

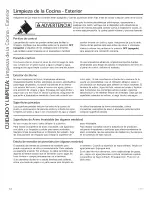
Страница 18: ... they are at room temperature and not in direct sunlight If stain on the door vent trim is persistent use a mild abrasive cleaner and a sponge scrubber for best results Spillage of marinades fruit juices tomato sauces and basting liquids containing acids may cause discoloration and should be wiped up immediately Let hot surfaces cool then clean and rinse Painted Surfaces Painted surfaces include t...

Страница 19: ...rface units Then lift out the drip pans For best results clean the drip pans by hand Place them in a covered container or a plastic bag with cup ammonia to loosen the soil Rinse with clean water and polish with a clean soft cloth The drip pans may also be cleaned in a dishwasher Clean the area under the drip pans often Built up soil especially grease may catch fire Do not cover the drip pans with ...

Страница 20: ...ault time press the Start pad immediately after pressing the Self Clean pad The oven will turn off automatically when the self clean cycle is complete and the self clean light will be off Slide the latch handle to the left as far is it will go and open the door Never force the latch handle Forcing the handle will damage the door lock mechanism After the oven has cooled down wipe any ash out of the...

Страница 21: ...ERAMA BRYTE Ceramic Cooktop Cleaner on the entire burned residue area 3 Using the included CERAMA BRYTE Cleaning Pad for Ceramic Cooktops rub the residue area applying pressure as needed 4 If any residue remains repeat the steps listed above as needed For additional protection after all residue has been removed polish the entire surface with CERAMA BRYTE Ceramic Cooktop Cleaner and a paper towel U...

Страница 22: ...from Sugary Spills and Melted Plastic Special care should be taken when removing hot substances to avoid permanent damage of the glass surface Sugary spillovers such as jellies fudge candy syrups or melted plastics can cause pitting of the surface of your cooktop not covered by the warranty unless the spill is removed while still hot Special care should be taken when removing hot substances Be sur...

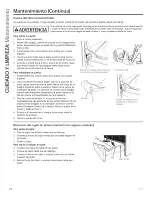
Страница 23: ...unterclockwise 1 4 turn until the tabs of the glass cover clear the grooves of the socket Wearing latex gloves may offer a better grip 2 Remove the bulb by turning it counter clockwise To replace 1 Replace bulb with a new 40 watt appliance bulb insert the bulb and turn it clockwise until it is tight 2 Place the tabs of the glass cover into the grooves of the socket Turn the glass cover clockwise 1...

Страница 24: ... the top 2 With the door at the same angle as the removal position rest the notch in the bottom of the left hinge arm on the bottom edge of the left hinge slot The notch in the hinge arm must be fully seated onto the bottom of the slot Repeat for the right side 3 Fully open the door If the door will not fully open the notches in the bottoms of the hinge arms are not seated correctly onto the botto...

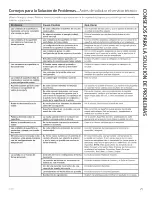
Страница 25: ...rse particles salt or sand procedures Make sure bottoms of cookware are were between the cookware and the clean before use and use cookware with smooth surface of the cooktop Cookware has bottoms been slid across the cooktop surface Areas of discoloration Food spillovers not cleaned before See the Cleaning the glass cooktop section on the cooktop next use Not surface on a model with a light This i...

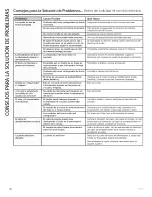
Страница 26: ... Sabbath Mode See the Special Features section Crackling or This is the sound of the metal This is normal popping sound heating and cooling during both the cooking and cleaning functions Why is my range making Your range cycles the heating This is normal a clicking noise when elements by turning relays on using my oven and off to maintain the oven temperature Clock and timer do not A fuse in your ...

Страница 27: ...fuse in your home may be blown or the circuit breaker tripped The clock is turned off Oven is in Sabbath Mode cycle Heavily soiled ovens may need to self clean again or for a longer period of time Close the oven door Press the Cancel Off pad Allow the oven to cool Press the Cancel Off pad Allow the oven to cool for one hour Put the oven back into operation Disconnect att power to the oven for at l...

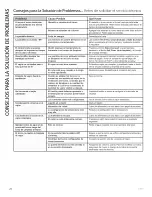
Страница 28: ... longer to preheat Remove items to reduce preheat time Adding more racks to the oven will cause the oven to take longer to preheat Remove some racks Reset the clock The Broil Hi L and Bake pads must be touched at the same time and held for 3 seconds Touch the Bake pad and desired temperature or the Self Clean pad and desired clean time Apply a small amount of vegetable oil to a paper towel and wip...

Страница 29: ...apel de Aluminio y Cobertores del Homo 14 Utensilios 14 Controles del Homo 15 Modos de Coccion 16 Guia de Coccion 17 Cuidado y Limpieza Limpieza de la Cocina Exterior 18 Limpieza de la Cocina Interior 20 Como limpiar la estufa de vidrio 21 Mantenimiento 23 Consejos para la SoluciOn de Problemas 25 Escriba los numeros de modelo y de serie aqui N de Modelo N de Serie Encontrara la etiqueta de califi...

Страница 30: ...to ya que la cocina no quedara bien sujeta al dispositivo anti volcaduras Para reducir et riesgo de volcar ta cocina esta debe sujetarse mediante un soporte anti volcaduras con una adecuada instalaci6n Ver las instrucciones de instalaci6n enviadas con et soporte para obtener detalles completos antes de iniciar la instalaci6n Para Cocinas Sin Apoyo y Deslizabless Para controlar si et soporte es ins...

Страница 31: ...enfden Otras superficies del aparato pueden calentarse Io suficiente como para provocar quemaduras Las superficies potencialmente calientes incluyen la estufa las teas orientadas hacia la estufa la abertura de ventilaci6n del homo las superficies cercanas a la abertura y las hendiduras ubicadas alrededor de la puerta del horn No caliente recipientes cerrados de alimentos Podria haber una acumulaci...

Страница 32: ...ia propagarse a los gabinetes cercanos Utilice un term6metro para grasa cuando sea posible para controlar la temperatura del aceite Para evitar el derrame de aceite y un incendio utilice una cantidad minima de aceite cuando fria en sartenes poco profundas y evite la cocci6n de alimentos congelados con una cantidad excesiva de hielo Utilice el tama_o de recipiente adecuado Elija recipientes con bas...

Страница 33: ...DIANTE m Z rl O 1 n O Z rm Oo rm C m Tenga cuidado al tocar la estufa La superficie de vidrio de la estufa retendr_ calor despu6s de que los controles se hayan apagado No cocine sobre una estufa rota Si la estufa se rompe las soluciones de limpieza y los derrames pueden penetrar en la estufa rota y crear un riesgo de descarga el6ctrica Comuniquese con un t6cnico calificado de inmediato Evite rayar...

Страница 34: ...ualquier otro tipo de aluminio o cobertor en la base del homo Estos items pueden atrapar el calor o derretirse ocasionando dados sobre el producto y el riesgo de descargas humo o incendios I INSTRUCCIONES DE SEGURIDAD DEL HORNO CON LIMPIEZA AUTOMATICA A ADVERTENCIA en algunos modelos La funci6n de limpieza autom_tica usa el homo en temperaturas Io suficientemente altas como para consumir la sucied...

Страница 35: ...cremas y pa_os recomendados Da_os a la estufa de vidrio provocados pot derrames endurecidos de materiales azucarados o plastico derretido que no se limpiaron de acuerdo con las instrucciones det Manual det Propietario Reemptazo de fusibtes de la casa o reinicio de disyuntores Da_os ocasionados sobre et producto por accidente incendio inundaciones o catastrofes naturates Da_os incidentales o consec...

Страница 36: ... traves de nuestro sitio web con todos los detaltes incluyendo su nQmero tetef6nico o escriba a General Manager Customer Relations GE Appliances Appliance Park Louisville KY 40225 _Busca Algo Mas iGE ofrece una variedad de accesorios para mejorar sus experiencias de coccion y mantenimiento Para realizar una orden visitenos a traves de Internet en www GEApplianceParts com EE UU o en www GEAppliance...

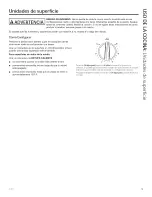
Страница 37: ...ci6n que desee Una luz indicadora de de superficie en ON Encendido britlar_ cuando una unidad superficial este encendida Para superficies de vidrio de la estufa Una luz indicadora de ESTUFA CALIENTE se encender_ cuando la unidad est6 caliente al tact permanecer_ encendida incluso luego de que la unidad este apagada permanecer_ encendida hasta que la unidad se enfrie a aproximadamente 150 F Lo _ 4 ...

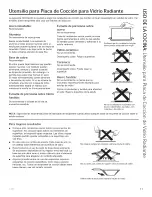
Страница 38: ...os calientes en la superficie de vidrio incluso cuando la estufa este fria Aunque las unidades de superficie se hayan apagado la estufa de vidrio retiene suficiente calor para continuar ta cocci6n Para evitar la sobrecocci6n quite tas ollas de tas unidades de superficie cuando los alimentos esten cocidos No coloque nada sobre la unidad de superflcie hasta que se haya enfriado por completo Las manc...

Страница 39: ...do No se recomienda a menos que se encuentre especificamente diseffado para estufas de vidrio Pobre conductividad y tentitud para absorber et calor Raya la superficie de la estufa Verifique que los recipientes tengan bases planas utilizando una regla Se recomienda si la base de la olla se encuentra revestida No se recomiendan recipientes con bases redondeadas curvadas con rebordes o torceduras NOT...

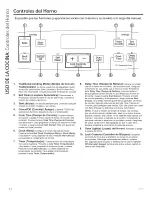
Страница 40: ...as para programar el tiempo en horas y minutos Presione la tecla Start Iniciar La cuenta regresiva del temporizador se complet6 Para apagar el temporizador presione la tecla Timer Temporizador 8 Delay Time Tiempo de Retraso Genera un tetras cuando el homo es encendido Use esta tecla para configurar el moment en que desea que el homo se inicie Presione la tecla Delay Time Tiempo de Retraso y use la...

Страница 41: ... horas de operaciones continuas Et modo sabatico desactiva tas luces det homo la tuz del Z homo no se encendera cuando la puerta sea abierta todos los sonidos el control no emitira un pitido cuando se presione _ un bot6n los modos de Asado Calentar Tiempo de Cocci6n T7 Temporizador Reloj y las funciones de Tiempo Retrasado C Et modo sabatico s61o puede set usado con ta funci6n Bake _ Homear Esta f...

Страница 42: ...s da_os pot uso inadecuado de estos items no estan cubiertos pot la garantia del producto Se podra usar aluminio para evitar derrames colocando una hoja sobre un estante inferior varias pulgadas debajo de ta comida No use mas atuminio que et necesario y nunca cubra totalmente et estante de un homo con papet de aluminio Mantenga et atuminio a por Io menos 1 1 2 de las paredes del homo para evitar u...

Страница 43: ...ic por cada nivet en que mueva la peritla Para reducir la temperatura det homo mueva et tornitto superior hacia la izquierda Cada clic cambiara la temperatura del homo en aproximadamente 10 F El rango es de m_s 60 F o menos 60 F desde la flecha Sugerimos que haga el ajuste de a un ctic desde la configuraci6n original y que controle et rendimiento det homo antes de hacer cualquier ajuste adicional ...

Страница 44: ...enta et humo salpicaduras y la posibitidad de que se incendien las grasas No se recomienda asar en el estante de la position 6 Intente asar las comidas que normalmente haria a ta parritla Ajuste tas posiciones de los estantes para ajustar ta intensidad det cator a la comida Coloque tas comidas mas cerca det etemento para asar cuando se desee una superficie mas cocinada y un interior poco cocido La...

Страница 45: ...aje 1 o 2 ci6n a la comida al asada Para un mejor rendimiento centre la Homear comida debajo del elemento catentador para asar Si se empan6 o cubri6 con salsa evite los modos Broil Hi Asar Pechugas de polio Asade Baje 1 o 2 Atto Ase del lado de tapiet hacia abajo primero Preste aten deshuesadas Homear ci6n a la comida al asada Para un mejor rendimiento centre la comida debajo del elemento calentad...

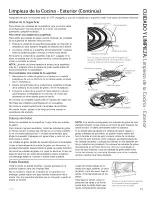
Страница 46: ...ana de ta puerta son persistentes use un timpiador abrasivo suave o una esponja con estropajo para obtener un mejor resultado Et derrame de adobo jugos de fruta salsas de tomate y liquidos para humedecer que contengan acidos pueden ocasionar descoloraci6n y se deberan timpiar de inmediato Deje que las superficies calientes se enfrien y luego limpie y enjuague Superficies pintadas Las superficies p...

Страница 47: ...cu Io Cubeta de goteo Lengueta de bloqueo Cubetas de Goteo Retire tas unidades de ta superficie Luego retire tas cubetas de goteo Para obtener mejores resultados timpie las cubetas de goteo en forma manual Cotoque tas mismas en un envase cubierto o en una bolsa plastica con de taza de amoniaco para aflojar ta suciedad Enjuague con agua limpia y pula con una tecla suave y limpia Las cubetas de gote...

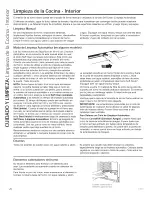
Страница 48: ... el nivet de suciedad en et homo sea muy alto se recomienda usar et tiempo de timpieza maximo de 5 horas Si desea usar el tiempo por omisi6n presione la tecta Start Iniciar inmediatamente tuego de presionar la tecta Self Clean Limpieza Automatica El homo se apagara de forma automatica cuando et ciclo de timpieza automatica sea comptetado Una vez que el homo se haya enfriado limpie cualquier ceniza...

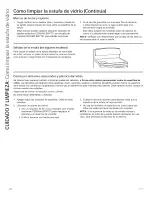
Страница 49: ...otas det limpiador de estufas ceramicas CERAMA BRYTE sobre toda et area de residuos pegados 3 Utilizando el patio de limpieza CERAMA BRYTE para estufas ceramicas incluido frote el area sucia aplicando presidn segQn sea necesario 4 Si quedan restos repita los pasos indicados con anterioridad 5 Para protecci6n adicional despu6s de haber quitado todos los restos pula toda ta superficie con timpiador ...

Страница 50: ...rrames azucarados y plastico derretido Se debera tener especial cuidado al etiminar sustancias calientes a fin de evitar daffos permanentes sobre la superficie de vidrio Los derrames azucarados como gelatinas dulce carameto jarabes o ptasticos derretidos pueden marcar ta superficie de la estufa no cubierto por ta garantia a menos que et derrame se quite mientras esta caliente Debe tenerse mucho cu...

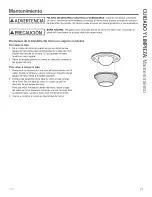
Страница 51: ...en tas ranuras de ta ficha Si usa guantes de tatex tendra un mejor agarre 2 Retire la lampara girando la misma en direcci6n contraria a las agujas det retoj Para volver a colocar la tapa 1 Reemplace la I_mpara por una para electrodom6stico de 40 watts Inserte la lampara y gire ta misma en direcci6n de las agujas det retoj hasta que quede ajustada 2 Coloque tas tengQetas de la tapa de vidrio en las...

Страница 52: ...abertura en la parte inferior del brazo de la bisagra izquierda sobre el extremo inferior de la ranura de la bisagra izquierda La abertura en el brazo de la bisagra debera estar totalmente apoyada en la parte inferior de la ranura Repita el procedimiento del lado derecho 3 Abra la puerta totalmente Si la puerta no se abre completamente las aberturas en las partes inferiores de los brazos de las bi...

Страница 53: ...ndiduras en la estufa Las unidades de superficie se encienden y apagan con mucha frecuencia Mi homo nuevo no cocina como el anterior 6Hay algSn problema con las configuraciones de temperatura La comida no se hornea de la estufa Se ha deslizado un recipiente a trav_s de la superficie de la estufa No se limpiaron los derrames de alimentos antes del uso siguiente Superficie caliente en un modelo con ...

Страница 54: ...nte Los controles del homo est_ln mal configurados El cable de energia puede estar obstruyendo el caj6n en la parte trasera inferior de la cocina El soporte de caj6n trasero se encuentra sobre el riel de la guia La puerta no est bien Qu_ Hacer Asegt_rese de seleccionar el modo correcto para asar Para acceder a sugerencias de ubicaci6n de estantes consulte la GuJa de Cocci6n AsegQrese de que el ute...

Страница 55: ...de tiempo mas prolongado Cierre la puerta del homo Presione la tecla Cancel Off Cancelar Apagar Deje que el homo se enfrie F y un n_mero o Tiene un c6digo de error de funci6n Presione la tecla Cancel Off Cancelar Apagar Permita letra titila en la pantalla que el homo se enfrie durante una hora Vuelva a poner el homo en funcionamiento Si el c6digo de funci6n se repite Desconecte totalmente la corri...

Страница 56: ... caj6n est muy cargado o la carga Reduzca el peso Redistribuya el contenido del caj6n no est equilibrada Emisi6n de vapor desde la Cuando se utilizan los horn s es Esto es normal ventilaci6n normal ver una emisi6n de vapor de la ventilaci6n del horn A medida que el n_mero de bandejas o la cantidad de alimentos a cocinar se incrementa la cantidad de vapor visible se elevar_ No funcionan el caj6n El...

Отзывы: