For The Period of:
GE Will Replace:
One Year
From the date of the
original purchase
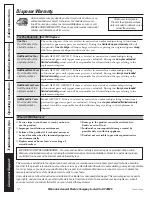
The entire disposer if there is a defect in materials or workmanship relating to functional
parts only (appearance parts are excluded). During this
limited one-year warranty
, GE will
also provide,
free of charge
, all labor charges related to replacing the original disposer
along
with the replacement disposer within the fi rst year.
Additional One Year
From the date of the
original purchase
Models GFC520V, GFC525V: If there is a defect in materials or workmanship relating
to functional parts only (appearance parts are excluded). During the
one-year extended
limited warranty
period, you will be responsible for all installation charges relating to the
replacement disposer.
Additional Two Years
From the date of the
original purchase
Models GFC530V, GFC535V: If there is a defect in materials or workmanship relating
to functional parts only (appearance parts are excluded). During this
two-year extended
limited warranty
period, you will be responsible for all installation charges relating to the
replacement disposer.
Additional Four Years
from the date of the
original purchase
Models GFC720V, GFB760V: If there is a defect in materials or workmanship relating
to functional parts only (appearance parts are excluded). During this
four-year extended
limited warranty
period, you will be responsible for all installation charges relating to the
replacement disposer.
Additional Six Years
From the date of the
original purchase
Model GFC1020V: If there is a defect in materials or workmanship relating to functional
parts only (appearance parts are excluded). During this
six-year extended limited warranty
period, you will be responsible for all installation charges relating to the replacement
disposer.
What GE Will Not Cover”
Q
Service trips to your home to teach you how to
use the product.
Q
Improper installation or maintenance.
Q
Failure of the product if it is abused, misused,
or used for other than the intended purpose or
used commercially.
Q
Replacement of house fuses or resetting of
circuit breakers.
Q
Damage to the product caused by accident, fi re,
fl oods or acts of God.
Q
Incidental or consequential damage caused by
possible defects with this appliance.
Q
Product not accessible to provide required service.
Staple your receipt here.
Proof of the original purchase
date is needed to obtain service
under the warranty.
All warranty service provided by our Factory Service Centers, or an
authorized Customer Care® technician. To schedule service on-
line, 24 hours a day, contact us at www.GEAppliances.com, or call
800-GE-CARES (800-432-2737). Please have serial number and model
number available when call for service.
This warranty is extended to the original purchaser and any succeeding owner for products purchased for home use within
the USA. If the product is located in an area where service by a GE Authorized Servicer is not available, you may be responsible
for a trip charge or you may be required to bring the product to an Authorized GE Service location for service. In Alaska the
warranty excludes the cost of shipping or service calls to your home.
Some states do not allow the exclusion or limitation of incidental or consequential damages. This warranty gives you specifi c
legal rights, and you may also have other rights which vary from state to state. To know what your legal rights are, consult
your local or state consumer affairs offi ce or your state’s Attorney General.
Warrantor: General Electric Company. Louisville, KY 40225
12
Printed in China
Disposer Warranty.
EXCLUSION OF IMPLIED WARRANTIES – Your sole and exclusive remedy is product repair as provided in the Limited
Warranty. Any implied warranties, including the implied warranties of merchantability or fi tness for a particular purpose,
are limited to one year or the shortest period allowed by law.
Installation Instr
uctions
Oper
ating Instr
uctions
Tr
oubleshooting tips
Consumer Suppor
t
Saf
ety Instr
uctions
Содержание GFC320V
Страница 4: ...Part Number PM3X215...
Страница 5: ......
Страница 6: ......
Страница 7: ......
Страница 10: ...Installation Instructions Operating Instructions Troubleshooting tips Consumer Support Safety Instructions...
Страница 11: ...Installation Instructions Operating Instructions Troubleshooting tips Consumer Support Safety Instructions...
Страница 14: ...Instalaci n Operaci n Solucionar problemas Servicio al consumidor Seguridad...
Страница 16: ...Parte No PM3X215...
Страница 17: ......
Страница 18: ......
Страница 19: ......
Страница 21: ...Instalaci n Operaci n Solucionar problemas Servicio al consumidor Seguridad...
Страница 22: ...Instalaci n Operaci n Solucionar problemas Servicio al consumidor Seguridad...
Страница 23: ...Instalaci n Operaci n Solucionar problemas Servicio al consumidor Seguridad...


