background image

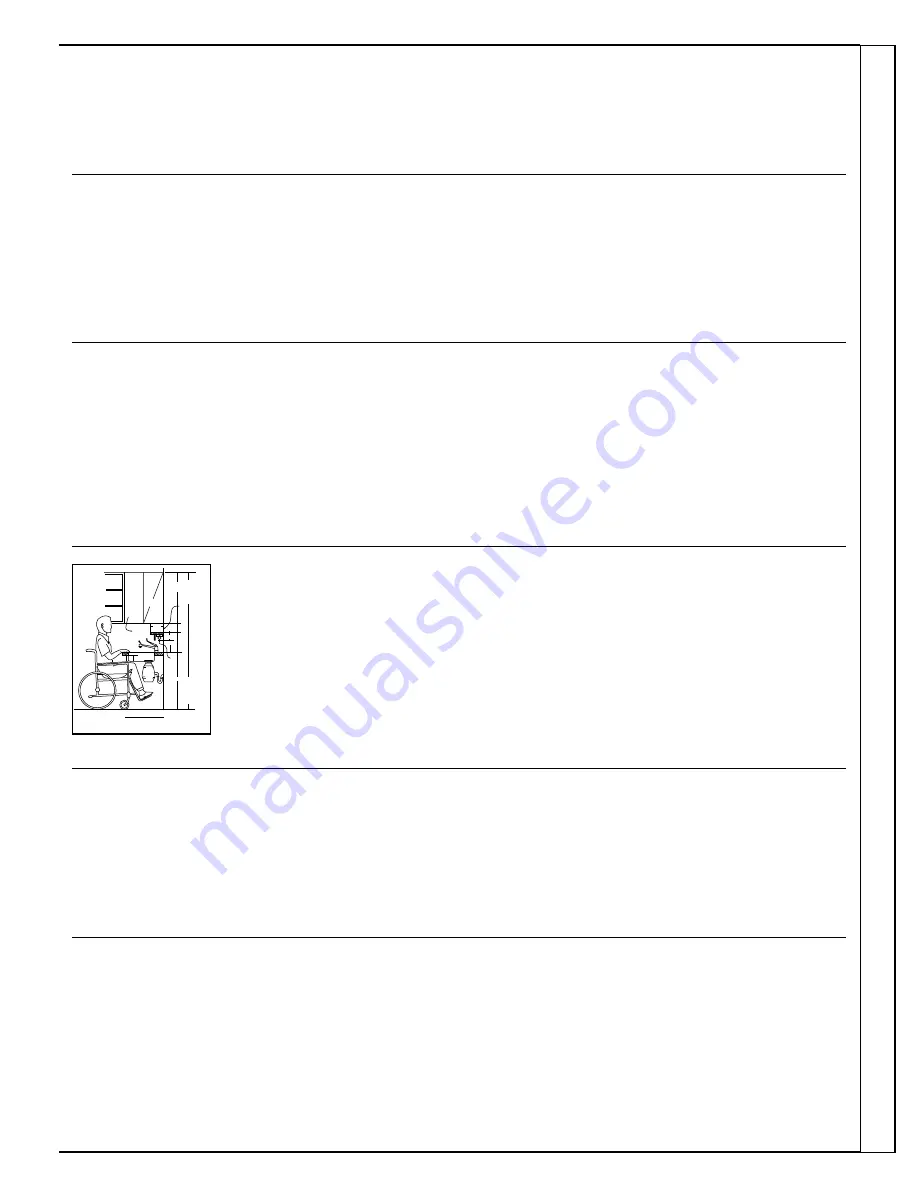
Upon request, GE will provide
Braille controls for a variety of GE
appliances, and a brochure to
assist in planning a barrier-free
kitchen for persons with limited
mobility. To obtain these items,
free of charge, call 800.626.2000. 

Consumers with impaired hearing or speech who have
access to a TDD or a conventional teletypewriter may
call 800-TDD-GEAC (800-833-4322) to request
information or service.

We’ll Be There

With the purchase of your new GE appliance, receive the assurance that if you ever need
information or assistance from GE, we’ll be there. All you have to do is call—toll-free!

In-Home Repair Service

800-GE-CARES (800-432-2737)

A GE consumer service professional will provide expert repair service,
scheduled at a time that’s convenient for you. Many GE Consumer Service
company-operated locations offer you service today or tomorrow, or at your
convenience (7:00 a.m. to 7:00 p.m. weekdays, 9:00 a.m. to 2:00 p.m. Saturdays).
Our factory-trained technicians know your appliance inside and out—so most
repairs can be handled in just one visit.

GE Answer Center®

800.626.2000

Whatever your question about any GE major appliance, GE Answer Center

®

information service is available to help. Your call—and your question— will be
answered promptly and courteously. And you can call any time. GE Answer
Center

®

service is open 24 hours a day, 7 days a week.

Service Contracts

800-626-2224

You can have the secure feeling that GE Consumer Service will still be there
after your warranty expires. Purchase a GE contract while your warranty is still
in effect and you’ll receive a substantial discount. With a multiple-year contract,
you’re assured of future service at today’s prices.

Parts and Accessories

800-626-2002

Individuals qualified to service their own appliances 

can have parts or accessories sent directly to their home.
The GE parts system provides access to over 47,000
parts…and all GE Genuine Renewal Parts are fully
warranted. VISA, MasterCard and Discover cards 
are accepted.

User maintenance instructions contained in this guide
cover procedures intended to be performed by any user.
Other servicing generally should be referred to qualified
service personnel. Caution must be exercised, since
improper servicing may cause unsafe operation.

For Customers With Special Needs…

800.626.2000

SINGLE CONTROL
FAUCET

TBXTOLITE
ON WALL

6’  10"

5"

8"

6"

5"

7"

1’ 0"

R SHALLOW DEPTH SINKS (6") WITH REAR DRAIN.
    SINK SHOULD ALSO BE UNDERCOATED

2’  10"

3’  

1/8

"

SCALE 1’

=

1"

SECTION A-A

FLUORESCENT
FIXTURE
THIS LIGHT CAN
BE INSTALLED
IN BOTTOM OF
WALL CABINETS

2’  6"

Consumer Services

Содержание Self-Cleaning Electric Range

Страница 1: ...Tips 9 Control Settings 8 Cooktop Comparison 8 Cookware Tips 9 Care and Cleaning 26 29 Anti Tip Device 26 Cooktop 27 29 Lift Off Oven Door 28 Oven Light 28 Self Cleaning Instructions 22 25 Surface Un...

Страница 2: ...Immediately contact the dealer or builder that sold you the range Save time and money Before you request service Check the Problem Solver in the back of this guide It lists causes of minor operating...

Страница 3: ...all and floor by installing the Anti Tip device supplied To check if the device is installed and engaged properly remove the kick panel or storage drawer and inspect the rear leveling leg Make sure it...

Страница 4: ...at to an internal temperature of at least 170 F This assures that in the remote possibility that trichina may be present in the meat it will be killed and the meat will be safe to eat Oven Stand away...

Страница 5: ...d toward the center of the range without extending over nearby surface units Always turn the surface units off before removing cookware To avoid the possibility of a burn or electric shock always be c...

Страница 6: ...6 5 4 1 6 7 8 8 14 13 12 11 10 9 8 15 17 18 19 21 22 16 8 2 3 23 Broiler Pan and Grid not included on all models Drip Wells Support Rods Some models have lift up cooktops for easier cleaning appearan...

Страница 7: ...ed Light 13 Oven Temperature Knob 10 11 17 18 20 22 25 27 Explained Feature Index Not all models have all features on page 14 Surface Unit On Indicator Light 8 15 Cooktop Lift Up Cooktop 3 5 8 10 on s...

Страница 8: ...e after they are over a drip pan turned off Radiant Electric coils Heat travels to the glass surface and then to the cookware so pans must be flat on the Glass Cooktop under a glass bottom for good co...

Страница 9: ...emperatures even under pressure are not harmful to the cooktop surfaces surrounding the surface units HOWEVER DO NOT USE LARGE DIAMETER CANNERS OR OTHER LARGE DIAMETER POTS FOR FRYING OR BOILING FOODS...

Страница 10: ...ht Glows when the oven reaches your selected temperature 7 LATCH DOOR Light Glows when the oven is in the Self Clean cycle After the Self Clean Cycle the light will flash Unlatch the door and turn the...

Страница 11: ...r Outage Oven Temperature Knob On some models after a power outage the oven will automatically resume its setting once the power is restored For models with a CLOCK pad when the power is restored the...

Страница 12: ...he feature press and hold both the increase and the decrease minute pads for about 4 seconds The display will change from time of day to show on 12 Shelf Positions The oven has 4 shelf supports as ide...

Страница 13: ...sted shelf positions B will be used more than C Type of Food Shelf Position Angel food cake A Biscuits or muffins B or C Cookies or cupcakes B or C Brownies B or C Layer cakes B or C Bundt or pound ca...

Страница 14: ...oil This will disturb the heat circulation and result in poor baking A smaller sheet of foil may be used to catch a spillover by placing it on a lower shelf several inches below the food Pies Cakes Fo...

Страница 15: ...ok Time the oven will turn off automatically 1 Press the COOK TIME ON OFF pad 2 Press the HOUR and MIN pads until the desired length of baking time appears in the display 3 Turn the Oven Temperature k...

Страница 16: ...after controls are off NOTE The low temperature zone of this range between WARM and 200 F is available to keep hot cooked foods warm Food kept in the oven longer than two hours at these low temperatur...

Страница 17: ...ctory setting a minus sign and the offset temperature will appear in the display 3 Wait several seconds for the control to automatically set and return to its previous setting NOTE This adjustment wil...

Страница 18: ...if desired remove the roast from the oven sooner at 5 to 10 F less than the temperature in the Roasting Guide Remember that food will continue to cook in the hot oven and therefore should be removed w...

Страница 19: ...22 140 150 sirloin tip rump or top round Medium 35 39 22 29 150 160 Well Done 40 45 30 35 170 185 Lamb leg or bone in shoulder 325 Rare 21 25 20 23 140 150 Medium 25 30 24 28 150 160 Well Done 30 35 2...

Страница 20: ...self yet the proper temperature is maintained in the oven 5 Turn the Oven Temperature knob to BROIL Make sure you turn the knob all the way to the BROIL position 6 When broiling is finished turn the O...

Страница 21: ...e 11 2 inch thick C 10 7 8 Slash fat Medium 2 to 21 2 lbs C 15 14 16 Well Done C 25 20 25 Chicken 1 whole A 35 10 15 Reduce time about 5 to 10 minutes 2 to 21 2 lbs per side for cut up chicken Brush s...

Страница 22: ...with a vinegar and water solution This will help prevent a brown residue from forming when the oven is heated Buff these areas with a dry cloth Do not clean the gasket Never use a commercial oven clea...

Страница 23: ...e HOUR and MIN pads to change the total clean time Both the OVEN ON light and the LATCH DOOR light will flash when the clean time is finished After using the clean cycle the door latch and the Oven Te...

Страница 24: ...the START TIME ON OFF pad 5 Press the HOUR pad until 9 00 appears in the display The timer is now set to start cleaning in 2 hours at 9 00 The Self Clean Cycle will be set to automatically begin at 9...

Страница 25: ...t excessive soil might also cause a strong odor when cleaning Q What causes the hair like lines on the enameled surface of my oven A This is a normal condition resulting from heating and cooling durin...

Страница 26: ...aning the surface units must be removed first Lift the surface unit about 1 inch above the drip pan and pull it out Do not lift the surface unit more than 1 inch If you do it may not lie flat on the d...

Страница 27: ...cloth Rub control panel lightly CAUTION Do not use abrasives of any kind on the control panel The lettering on models with touch pads is sensitive to abrasives and pressure The control knobs may be re...

Страница 28: ...aced NOTE The gasket is designed with a gap at the bottom to allow for proper air circulation Outside of the door Use soap and water to thoroughly clean the top sides and front of the oven door Rinse...

Страница 29: ...Drawer or Kick Panel to Clean Under the Range The area under the range can be reached easily for cleaning by removing the bottom drawer on some models To remove pull the drawer out all the way tilt u...

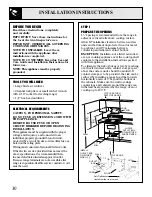
Страница 30: ...hat projects horizontally a min of 5 beyond the bottom of the cabinets Make sure the wall coverings countertops and cabinets around the range can withstand heat generated by the range oven or cooktop...

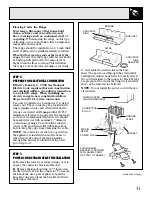
Страница 31: ...R CORD GROUND STRAP BRACKET STEP 2 PREPARE FOR ELECTRICAL CONNECTION Effective January 1 1996 the National Electric Code requires that new construction not existing utilize a 4 conductor connection to...

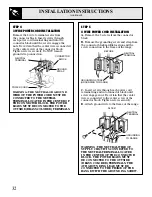
Страница 32: ...STEP 5 4 WIRE POWER CORD INSTALLATION A Remove the 3 screws from the connector block B Remove the grounding screw and strap from the connector block middle location and the screw connection to the fr...

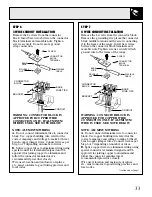
Страница 33: ...he grounding strap from the connector block middle location and the screw connecting it to the frame of the range Insert bare wires between the connector block terminals and movable nuts Tighten screw...

Страница 34: ...eling feet are located at each corner of the base of the range Remove the storage drawer or kick panel depending on your model and using channel locks rotate the leveling feet in and out as required t...

Страница 35: ...ective Tighten or replace DOES NOT WORK Switch operating oven light is broken Call for service FOOD DOES NOT The Oven Temperature knob not set at BROIL Make sure you turn the knob BROIL PROPERLY all t...

Страница 36: ...t moved all the way to the right OVEN DOOR Turn the Oven Temperature knob to OFF Allow the oven to cool ACCIDENTALLY LOCKED Never force the door latch handle DURING COOKING OVEN DOOR WILL Oven must co...

Страница 37: ...NOTES 37 The Problem Solver...

Страница 38: ...38 NOTES...

Страница 39: ...ur call and your question will be answered promptly and courteously And you can call any time GE Answer Center service is open 24 hours a day 7 days a week Service Contracts 800 626 2224 You can have...

Страница 40: ...ion If you have an installation problem contact your dealer or installer You are responsible for providing adequate electrical gas exhausting and other connecting facilities as described in the Instal...

Отзывы: