6
Using your thermostat.
Hold and Temporary Override
■
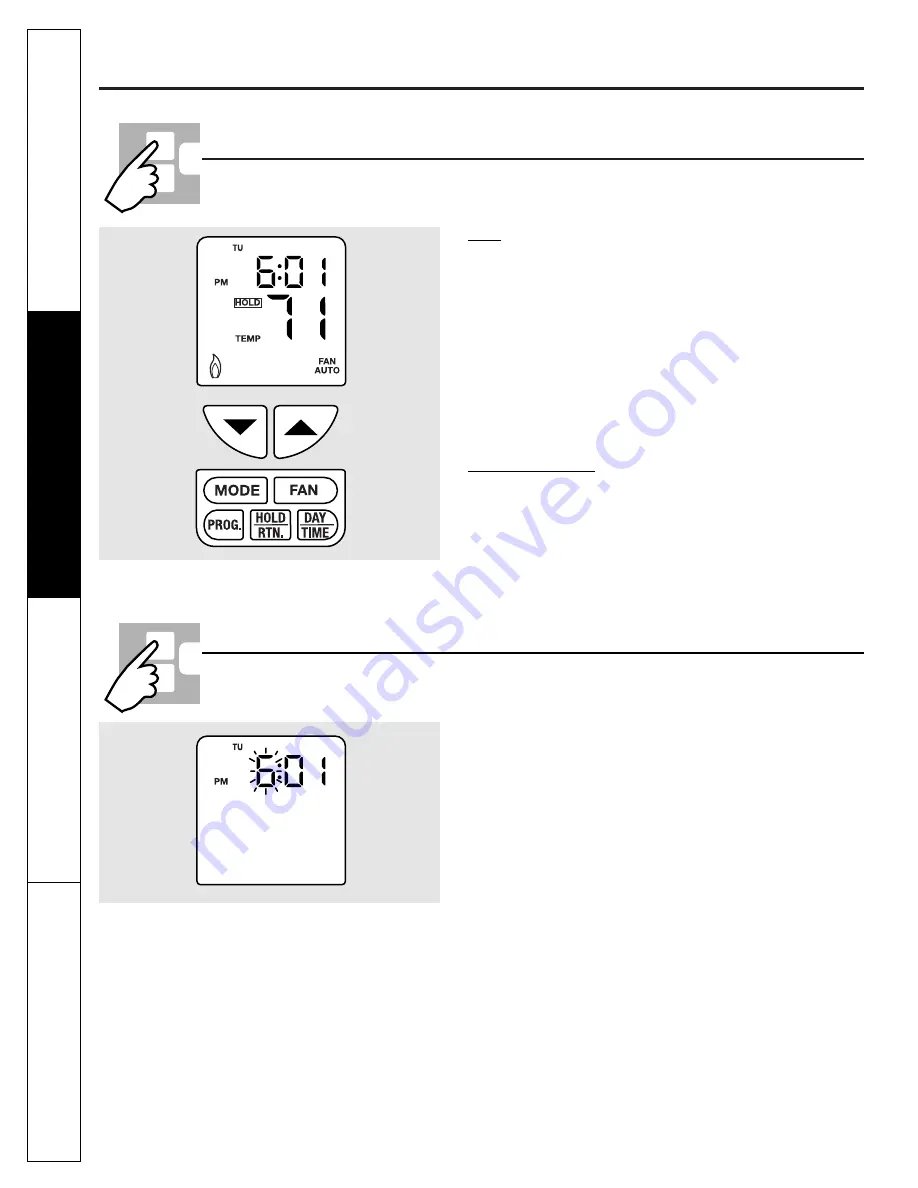
Hold
is the permanent bypass of program temperature
setpoints. Manual release is required to return to active
program mode.
■
Press
HOLD/RETURN
in
NORMAL
mode for hold. The current
setpoint temperature will be used. The
HOLD
icon will be
displayed and the program numbers will be cleared.
■
The
HOLD
temperature setpoint can be changed by following
the directions for changing the normal temperature in the
previous section.
■
To release the hold, press
HOLD/RETURN
again in
NORMAL
mode to return to programmed operation. The
HOLD
icon
will disappear.
■
Temporary override
is the temporary change of the setpoint
temperature until the next program time. Refer to the previous
section on changing temperature setpoints for information on
adjusting the temperature.
■
To release temporary override before the next setpoint comes,
press
HOLD/RETURN
twice in
NORMAL
mode (the first press will
change to hold and the second press will release the hold and
temporary override).
Figure 10: ‘HOLD’ Display
Day/Time Setting Mode
■
In
NORMAL
mode, press
DAY/TIME
to enter the
DAY/TIME
SETTING
mode. The LCD will be cleared except for the time and
day of week indicator.
■
When the hour is flashing, press
▲
(increase setting) or
▼
(decrease setting) to adjust hour.
■
Press
DAY/TIME
again. Minutes will be flashing. Press
▲
or
▼
to
adjust minutes.
■
Press
DAY/TIME
again. The day will be flashing. Press
▲
or
▼
to
adjust day.
■
Press
DAY/TIME
again. The thermostat will return to
NORMAL
mode.
■
When adjusting the day or time, press and hold
▲
or
▼
for
2 seconds for fast advance. During fast advance, the data will
stop flashing.
■
At any time you may press the
HOLD/RETURN
button or wait 5
seconds to return to
NORMAL
mode.
■
The clock seconds will be reset to zero whenever time is
changed. The clock seconds will not be affected if only the
day is changed.
■
The time display will be frozen in
DAY/TIME
setting mode.
However, the internal clock is still running. If nothing is
changed, then the frozen time will be replaced by the internal
clock when you return back to the
NORMAL
mode.
Figure 11: Changing Time and Date Display
Troubleshooting T
ips
Operating Instructions
Safety Instructions
Installation Instructions
Содержание RAK147P1
Страница 16: ...16 Notes Troubleshooting Tips Operating Instructions Safety Instructions Installation Instructions ...
Страница 18: ...18 Troubleshooting Tips Operating Instructions Safety Instructions Installation Instructions Notes ...
Страница 19: ...19 Notes Troubleshooting Tips Operating Instructions Safety Instructions Installation Instructions ...


