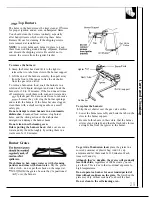
background image

ven Shelves

Arrange the oven
shelf or shelves in

the desired locations

while the oven is
cool. The correct
shelf position
depends on the kind
of food and the
browning desired.
As a general rule,
place-most foods in the middle of the oven, on either
shelf positions B or C. See the chart for suggested

shelf positions.

Preheating

Preheat the oven if the recipe calls for it. Preheat
means bringing the oven up to the specified

nperature before putting the food in the oven.

 preheat, set the oven at the correct 

selecting a higher temperature does not shorten
preheat time.

Type of Food

Shelf Position

Angel food cake

A

Biscuits or muffins

B or C

Cookies or cupcakes

B or C

Brownies

B or C

Layer cakes

B or C

 or pound cakes

A or B

Pies or 

 shells

B or C

Frozen pies

A (on cookie sheet)

Casseroles

B or C

Roasting

A or B

Preheating is necessary for good results when baking
cakes, cookies, pastry and breads. For most casseroles
and roasts, preheating is not necessary. For ovens
without a preheat indicator light or tone, preheat

10 minutes. After the oven is preheated, place the

food in the oven as quickly as possible to prevent
heat from escaping.

Baking Pans

Use the proper baking pan. The type of finish on the

pan determines the amount of browning that will occur.

● 

Dark, rough or dull pans absorb heat resulting in a

browner, crisper crust. Use this type for pies.

● 

Shiny, bright and smooth pans reflect heat, resulting

in a lighter, more delicate browning. Cakes and
cookies require this type of pan.

● 

Glass baking dishes also absorb heat. When baking

in glass baking dishes, the temperature may need to

be reduced by 

Pan Placement

For even cooking and proper browning, there must be
enough room for air circulation in the oven. Baking
results will be better if baking pans are centered as
much as possible rather than being placed to the front
or to the back of the oven.

Pans should not touch each other or the walls of the
oven. Allow   to   

 space between pans as well

as from the back of the oven, the door and the sides.
If you use two shelves, stagger the pans so one is not
directly above the other.

(continued next 

15

Содержание JGSP20

Страница 1: ... Surface Cooking 8 10 ControlSettings 9710 Cooktop Comparison 8 Super Burner 9 ID Care and Cleaning 26 30 Cooktop 2 7 Door Removal 28 Removable Oven Bottom 30 Self Cleaning Instructions 23 25 B Problem Solver 33 34 Thermostat Adjustment Do It Yourself 18 More questions call GE Answer Center 800 626 2000 mPreparation Anti Tip Device 2 3 31 Flooring and Leveling 6 Minor Adjustments 32 Removal of Pac...

Страница 2: ... not followed exactly a fire or explosion may result causing property damage personal injury or death Do not store or use gasoline or other flammable vapors and liquids in the vicinity of this or any other appliance WHAT TO DO IF YOU SMELL GAS Do not try to light any appliance Do not touch any electrical switch do not use any phone in your building Immediately cali your gas supplier from a neighbo...

Страница 3: ...g it to prevent fire or smoke damage should the packaging material ignite Locate the range out of kitchen trafilc path and out of drafty locations to prevent pilot outage and poor air circulation Be sure your range is correctly adjusted by a qualified service technician or installer for the type of gas natural or LP that is to be used Your range can be converted for use with either type of gas See...

Страница 4: ...our range Always keep dish towels dish cloths potholders and other linens a safe distance from your range Always keep wooden and plastic utensils and canned food a safe distance away from your range Do not leave paper products cooking utensils or food in the oven when not in use Do not store flammable materials in an oven a range storage drawer or near a cooktop Do not store or use combustible mat...

Страница 5: ... all plastics away from the surface burners Do not leave any items on the cooktop The hot air from the vent may ignite flammable items and will increase pressure in closed containers which may cause them to burst To avoid the possibility of a burn always be certain that the controls for all surface burners are at the off position and all grates are cool before attempting to remove them When flamin...

Страница 6: ...mpt to repair or replace any part of your range unless it is specifically recommended in this guide All other servicing should be referred to a qualified technician SAVE THESE INSTRUCTIONS FLOORING AND LEVELING Flooring under the Range Your range like so many other household items The range should be installed on a l 4 inch thick is heavy and can settle into soft floor coverings sheet of plywood o...

Страница 7: ...Easily removed for cleaning 17 Storage Drawer or Kick Panel 18 Broiler Pan and Rack Do not clean in the self cleaning oven Feature Index 1 Model and Serial Numbers 2 Oven Door Gasket 3 Removable Oven Bottom 2 23 28 30 14 13 30 13 4 Oven Shelves with Stop Locks 5 13 15 23 27 5 Automatic Oven Door Latch 24 25 6 Surface Burner Controls 7 Lift Up Cooktop 8 Oven Vent 9 26 27 5 14 2 3 31 4 26 9 Anti Tip...

Страница 8: ... you turn the control off cooking stops right away Heat travels to the glass surface and then to the cookware so pans must be flat on the bottom for good cooking results The glass cooktop stays hot enough to continue cooking after it is turned off Remove the pan from the surface unit if you want cooking to stop Pans must be made of ferrous metals metal that attracts a magnet Heat is produced by a ...

Страница 9: ... the right than any one of the other three Use it for canning or front and right rear burners large pans To Light a Surface Burner Push the control knob in and turn it lunterclockwise to LITE You will hear a little clicking noise the sound of the electric spark igniting the burner After the burner ignites turn the knob to adjust the tlame size After Lighting a Burner Check to be sure the burner yo...

Страница 10: ... oven use only and those for surface cooking saucepans coffee and teapots Glass conducts heat very slowly Heatproof Glass Ceramic Can be used for either surface or oven cooking It conducts heat very slowly and cools very slowly Check cookware manufacturer s directions to be sure it can be used on gas cooktops Stainless Steel This metal alone has poor heating properties and is usually combined with...

Страница 11: ...utes To set the timer first press the TIMER ON OFF pad Then press the INCREASE or DECREASE pad to change the time To cancel the timer press and hold the TIMER ON OFF pad until the word TIMER disappears from the display 8 9 CLOCK To set the clock first press the CLOCK pad Then press the INCREASE or DECREASE pad to change the time of day STOP TIME Use this pad along with the COOK TIME or CLEAN pad t...

Страница 12: ...ed press the INCREASE or Press and hold the TIMER ON OFF pad until the DECREASE pad until the desired time is reached word TIMER disappears from the display If TIMER is not displayed press the TIMER ON OFF pad first then follow the instructions above to set the timer End of Cycle Tones The end of cycle tone is 3 short beeps followed by To return the end of cycle tone to the repeating beeps 1 beep ...

Страница 13: ...ON DO NOT MAKE ANY ATTEMPT TO ERATE THE ELECTRIC IGNITION OVEN JRING AN ELECTRICAL POWER OUTAGE Neither the oven nor the broiler can be lit during an electrical power outage Gas will not flow unless the glow bar is hot If the oven is in use when a power outage occurs the oven burner shuts off and cannot be re lit until power is restored Oven Shelves The shelves are designed with stop locks so that...

Страница 14: ...our oven temperature is controlled very accurately NOTE When the oven gets hot the top and outside using an oven control system We recommend that surfaces of the range get hot too you operate the range for a number of weeks to become familiar with your new oven s performance If you think an adjustment is necessary see the Adjust the Oven Thermostat section It gives easy Do Zt Yow selj_instructions...

Страница 15: ...necessary For ovens without a preheat indicator light or tone preheat 10 minutes After the oven is preheated place the food in the oven as quickly as possible to prevent heat from escaping Baking Pans Use the proper baking pan The type of finish on the pan determines the amount of browning that will occur Dark rough or dull pans absorb heat resulting in a browner crisper crust Use this type for pi...

Страница 16: ...et A cake baked in a pan larger than the recipe for baking since the shiny foil pan reflects heat away recommends will usually be crisper thinner and drier from the pie crust the cookie sheet helps retain it than it should be If baked in a pan smaller than recommended it may be undercooked and batter may overflow Check the recipe to make sure the pan size used is the one recommended Aluminum Foil ...

Страница 17: ...until the desired temperature is displayed An attention tone will occur if step 3 is not done The oven will start automatically The word ON and 100 will be displayed The Cook Time will begin to count down As the oven heats up the display will show the changing temperature When the oven reaches the temperature you set a tone will sound The oven will continue to cook for the programmed amount of tim...

Страница 18: ...tinue cooking after the controls are off NOTE The low temperature zone of this range between 150 F and 200 F is available to keep hot cooked foods warm Food kept in the oven longer than two hours at these low temperatures may spoil Foods that spoil easily such as milk eggs fish stuffings poultry and pork should not be allowed to sit for more than one hour before or after cooking Room temperature p...

Страница 19: ... is necessary _ 2 Check the weight of v A the meat and place i fat side up or poultry breast side up on the roasting rack in a shallow pan The melting fat will baste the meat Select a pan as close to the size of the meat as oossible The broiler pan with rack is a good pan or this 3 press the BAKE pad II BAKE 4 Press the INCREASE or u DECREASE pad until the desired temperature is displayed v The ov...

Страница 20: ... 5 pounds more time for larger roasts Type Meat Tender cuts rib high quality sirloin tip rump or top round Lamb leg or bone in shoulder Veal shoulder leg or loin Pork loin rib or shoulder Ham precooked Poultry Chicken or Duck Chicken pieces Turkey __6Rr_ Temperature 325 325 325 325 325 325 350 325 Doneness Rare Medium Well Done Rare Medium Well Done Well Done Well Done To Warm Well Done Well Done ...

Страница 21: ...cleaning NOTE A fan may automatically turn on and off to cool internal parts This is normal and the fan may continue to run even after the oven is turned off Jse of Aluminum Foil You can use aluminum foil to line your broiler pan and broiler rack However you must mold the foil tightly to the rack and cut slits in it just like the rack Without the slits the foil will prevent fat and meat juices fro...

Страница 22: ...rk Chops Well Done Lamb Chops Medium Well Done Medium Well Done Wieners and similar precooked sausages bratwurst Qua ityand or Shelf Thickness Positiom I 1 2 lb about 8 c thin slices 1 inch thick 1 to 1X lbs 1X inch thick 2 to 2X lbs B B B B B B 1 whole 2 to 2 A lbs split lengthwise A I 6 to 8 oz each l lb fillets 1 4 to B 1 2 inch thick First Side Time Minutes 5 8 9 9 12 13 13 10 15 25 28 30 2 3 ...

Страница 23: ...vinegar and water solution This will help prevent a brown residue from forming when the oven is heated Buff these areas with a dry cloth Do not clean the gasket Do not use abrasives or oven cleaners Clean the top sides and outside front of the oven door with soap and water Make sure the oven light bulb cover is in place Do not rub or clean the door gasket the fiberglass material of the gasket has ...

Страница 24: ...nd you want the oven to begin self cleaning at 9 00 after you re c1 6 Press the STOP TIME pad 6 10 00 STOP appears in the display and STOP TIME TIME flashes The control automatically sets the Stop Time by adding the Clean Time to the time of day In this example the time of day is 7 00 and the Clean Time is 3 hours Adding 3 hours to the time of day equals 10 00 7 Change the Stop Time from 10 00 to ...

Страница 25: ...cleaning A This is caused by excessive soil Press the CLEAIUOFF pad Open the windows to rid the room of smoke Wait until the oven has cooled and the word LOCK is off in the display Wipe up the excess soil and reset the clean cycle Q Is the crackling or popping sound I hear during cleaning normal A Yes This is the sound of the metal heating and cooling during both the cooking and cleaning functions...

Страница 26: ...negar and hot water works well The control knobs may be removed for easier cleaning Before removing the knobs for cleaning please note that the knobs on the left side and the knobs on the right side are in the proper OFF position When replacing the knobs check the OFF position to insure proper alignment To remove a knob pull it straight off the stem If a knob is difficult to remove place a thin cl...

Страница 27: ...cooktop while it is hot use a dry paper towel to wipe it up right away When the surface has cooled wash with soap and water or cleansing powders Rinse well For other spills such as fat smatterings wash with soap and water or cleansing powders after the surface has cooled Rinse well Polish with a dry cloth Oven Shelves Clean the shelves with an abrasive cleanser or steel wool After cleaning rinse t...

Страница 28: ...ition the slots in the bottom of the door squarely over the hinges Then lower the door slowly and evenly over both hinges at the same time If hinges snap back against the oven frame pull them back out TO CLEAN THE DOOR Inside of the door Because the area inside the gasket is cleaned during the self clean cycle you do not need to clean this by hand Any soap left on the liner causes additional stain...

Страница 29: ...n automatic dishwasher Loosened food soil can clog burner holes and the strong action of the dishwasher detergent can damage the burner heads Do not clean in self cleaning oven Before putting the burners back shake out excess water and dry them thoroughly by setting them in a warm oven for 30 minutes Lighter r Flas r Air Shu Ports support To replace the burners 1 Slip the air shutter over the gas ...

Страница 30: ...Put in a new 40 watt appliance bulb NOTE A 40 watt appliance bulb is smaller than a standard 40 watt household bulb Install the light cover Replace the 3 screws and tighten making sure the cover fits flush with oven wall Reconnect electrical power to the range Removable Oven Bottom The oven bottom can be removed y to clean large spills and to enable you Lock to reach the oven Unlock burner The ove...

Страница 31: ...res or plumbing in the area which the screw could penetrate Attach the stability chain in a location which will allow the chain to be in line with the bracket side to aide as much as possible when attached to the unit Test to see if the chain is securely fastened by tugging on the chain o II k chain Long Screw Wall Plate Washer YA 3 Temporarily attach the loose end of the chain to the rear of the ...

Страница 32: ...ce the flames wili resettle Visually check the color of the flames every six months If they look like illustration A on the Problem Solver in this guide call for service Surface Burner Air Adjustment Shutters An air adjustment shutter for each surface burner With not regulates the flow of air to the flame enough air you When the right amount of air flows into the won t see any burner the flame wil...

Страница 33: ...holes on side of burner may be clogged Remove and clean them Burners not seated properly on burner supports Reinstall them m A Yellow flames B Yellow tips on inner Call for service cones Norm l for LP gas C Soft blue flames Normal for natural gas If burner flames look like A call for service Normal burner flames should look like B or C depending on the type of gas you use With LP gas some yellow t...

Страница 34: ... Control Clock and Timer section Oven controls not set properly Heavily soiled ovens require 3 to 4 hour clean time Heavy spillovers should be cleaned up before starting clean cycle Stop Time must be more than 3 hours later than Start Time Oven temperature is too high to set self clean operation Allow the range to cool to room temperature and reset controls Bulb may be loose or burned out Electric...

Страница 35: ...red hearing or speech who have Braille controls for a variety of access to a TDD or a conventional teletypewriter may GE appliances and a brochure to call 800 TDD GF AC 800 833 4322 to request assist in planning a barrier free information or service kitchen for persons with limited mobility To obtain these items free of charge call 800 626 2000 Service Contrac13 801162 2224 You can have the secure...

Страница 36: ... Care material Failure of the product if it is used If you then have any questions for other than its intended about operating the product purpose or used commercially please contact your dealer or our Consumer Affairs office at the address below or call toll free GE Answer Cente 800 626 2000 consumer information service Damage to product caused by accident fire floods or acts of God WARRANTOR IS ...

Отзывы: