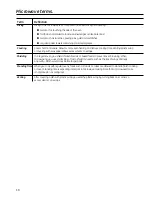
background image


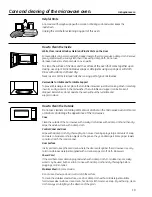
Care and cleaning of the microwave oven.


GEAppliances.ca

19

Helpful Hints

An  occasional thorough wiping with a solution of baking soda and water keeps the  

inside fresh .

Unplug the cord before cleaning any part of this oven.

How to Clean the Inside

Walls, Floor, Inside Window, Metal and Plastic Parts on the Door
Some spatters can be removed with a paper towel; others may require a damp cloth . Remove 

greasy spatters with a sudsy cloth, then rinse with a damp cloth . do not use  

abrasive cleaners or sharp utensils on oven walls . 

To clean the surface of the door and the surface of the oven that come together upon 

closing, use only mild, nonabrasive soaps or detergents using a sponge or soft cloth. 

rinse with a damp cloth and dry.
never use a commercial oven cleaner on any part of your microwave.

Removable Turntable and Turntable Support 
To prevent breakage, do not place the turntable into water just after cooking. Wash it carefully 

in warm, sudsy water or in the dishwasher . The turntable and support can be broken if 

dropped . Remember, do not operate the oven without the turntable and  

support in place .

How to Clean the Outside

do not use cleaners containing ammonia or alcohol on the microwave oven. Ammonia 

or alcohol can damage the appearance of the microwave.

Case
Clean the outside of the microwave with a sudsy cloth . Rinse with a damp cloth and then dry . 

Wipe the window clean with a damp cloth . 
Control Panel and Door
Wipe with a damp cloth . dry thoroughly . do not use cleaning sprays, large amounts of soap 

and water, abrasives or sharp objects on the panel—they can damage it. Some paper towels 

can also scratch the control panel .
Door Surface
it is important to keep the area clean where the door seals against the microwave . use only 

mild, non-abrasive detergents applied with a clean sponge or soft cloth. Rinse well.
Power Cord
if the cord becomes soiled, unplug and wash with a damp cloth . For stubborn spots, sudsy 

water may be used, but be certain to rinse with a damp cloth and dry thoroughly before 

plugging cord into outlet .
Stainless Steel

 (on some models)

do not use a steel-wood pad; it will scratch the surface.

To clean the stainless steel surface, use a hot, damp cloth with a mild detergent suitable  

for stainless steel surfaces . use a clean, hot, damp cloth to remove soap . dry with a dry, clean 

cloth . Always scrub lightly in the direction of the grain .

Содержание JES1140

Страница 1: ...icrowave Terms 18 Oven Features 7 8 Other Features 16 17 Power Levels 9 Time Features 10 12 Care and Cleaning 19 Troubleshooting Tips 20 Things That Are Normal 20 Consumer Support Service Telephone Nu...

Страница 2: ...or plug in water n Do not let power cord hang over edge of table or counter n To reduce the risk of fire in the oven cavity Do not overcook food Carefully attend appliance when paper plastic or other...

Страница 3: ...venly Be careful to prevent scalding when warming formula The container may feel cooler than the formula really is Always test the formula before feeding the baby n Don t defrost frozen beverages in n...

Страница 4: ...er use n Paper towels waxed paper and plastic wrap can be used to cover dishes in order to retain moisture and prevent spattering Be sure to vent plastic wrap so steam can escape n Cookware may become...

Страница 5: ...apter and leads to eventual failure of the adapter ground terminal You should have the 2 prong wall receptacle replaced with a 3 prong grounding receptacle by a qualified electrician before using the...

Страница 6: ...extension cord must be a grounding type 3 wire cord and it must be plugged into a 3 slot outlet 3 The extension cord should be arranged so that it will not drape over the countertop or tabletop where...

Страница 7: ...ouch Control Panel Display Door Latch Release Press latch release to open door Removable Turntable Turntable and support must be in place when using the oven The turntable may be removed for cleaning...

Страница 8: ...85 g BEVERAGE Starts immediately 8 oz 12 oz 16 oz or Press once twice 4 oz 236 mL 355 mL three or four times 473 mL or 118 mL REHEAT Enter food code Press once see Cooking Guide TIME COOK Enter Cookin...

Страница 9: ...stirring or rotating of the food Some foods may have better flavor texture or appearance if one of the lower settings is used Use a lower power level when cooking foods that have a tendency to boil ov...

Страница 10: ...ting down each time the pad is pressed Each touch will add 30 seconds up to 99 minutes and 99 seconds The oven will start immediately when pressed Express Cook 0 1 4 2 5 3 7 8 9 6 Start Pause Time Coo...

Страница 11: ...ng to check the food Close the door and press START to resume cooking Express Cook 0 1 4 2 5 3 7 8 9 6 Enter Code Food Choice Available Serving Selection Ounces per serving 1 Rice 1 4 4 oz 118 mL per...

Страница 12: ...er in the cavity until giblets can be removed Turkey breast 3 to 8 min Place unwrapped breast in microwave safe dish breast side down After first half 4 to 6 lbs 1 8 to 2 7 kg per lb 454 g of time tur...

Страница 13: ...ounces 85 to 100 g Reheat 1 Press Reheat pad 2 Enter the food code See Cooking Guide for Reheat feature below for codes 3Enter the number of servings 1 4 Then the microwave will start immediately You...

Страница 14: ...rage feature may be very hot Remove the container with care Beverage Pizza Ounces per Serving 4 ounces 118 mL 8 ounces 237 mL 12 ounces 355 mL 16 ounces 473 mL 1 2 Pizza on some models To use the Pizz...

Страница 15: ...poultry and fish 1 Press AUTO DEFROST DEFROST Use the number pad to select 1 to 6 pounds 454 g to 2 7 kg 2 Press START Time Defrost is explained in the About the time features section There is a hand...

Страница 16: ...e door or clearing the display Press START PAUSE again to restart the oven Clear Off Child Lock Out You may lock the control panel to prevent the microwave from being accidentally started or used by c...

Страница 17: ...tes as a minute timer n It can be used as a hold setting after defrosting How to Use as a Minute Timer The Timer operates without microwave energy 1Press TIMER 2 Enter the amount of time you want to c...

Страница 18: ...ows excess steam to escape Shielding In a regular oven you shield chicken breasts or baked foods to prevent over browning When microwaving you use small strips of foil to shield thin parts such as the...

Страница 19: ...and support in place How to Clean the Outside Do not use cleaners containing ammonia or alcohol on the microwave oven Ammonia or alcohol can damage the appearance of the microwave Case Clean the outs...

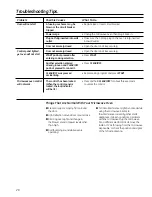
Страница 20: ...t cooking program and press START accidentally Microwave oven control The control has been locked Press and hold CLEAR OFF for about three seconds will not work When the control panel is to unlock the...

Страница 21: ...21 Notes GEAppliances ca...

Страница 22: ...22 Notes...

Страница 23: ...ginal purchaser and any succeeding owner for products purchased for use in Canada Some provinces do not allow the exclusion or limitation of incendental or consequential damages so the above limitatio...

Страница 24: ...phone call away Product Satisfaction If you are not satisfied with the service you receive from Mabe follow these steps First contact the people who serviced your appliance Next if you are still not p...

Отзывы: