


GE M
EDICAL
S
YSTEMS
D
IRECTION
2392751-100, R
EVISION
3
V
IVID
™ 4 S
ERVICE
M
ANUAL
Chapter 8 - Replacement Procedures
8-59
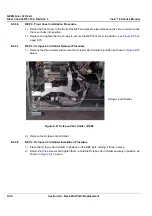
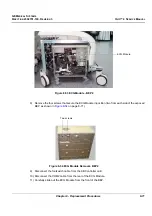
6) The battery is fastened with velcro strips to the inner wall of the BEP. Remove the battery by pulling
it away from the velcro.
Figure 8-49 Plug & Scan Battery Removed
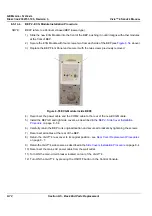
8-5-5-4
Plug & Scan Battery Installation Procedure
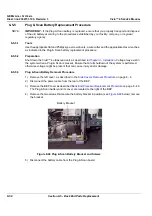
Note:
When replacing the battery, first pull off and remove the top layer from the two velcro
fastening strips on the rear of the battery, as shown below. These strips are not required
because two similar strips from the old battery are already found on the inner wall of the BEP.
Figure 8-50 Removing Plug & Scan Velcro Strips
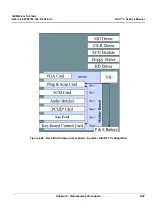
1) Place the battery inside the battery bracket. Ensure that the cable is positioned at the lower end and
that the rear of the battery (with the two velcro strips) faces the inner wall of the BEP.
2) Mount the battery and bracket in its original location in the BEP, tightening the screws (two or three
as shown in
on page 8-58) to secure it firmly in position.
3) Reconnect the battery cable to the Plug & Scan board.
4) Mount the BEP side cover as described in
BEP2 - Side Cover Installation Procedure
5) Reconnect the power cable to the rear of the BEP.
6) Return the left cover, as described in the
Side Covers Installation Procedure
Note:
Perform a complete functional check of the Plug & Scan (see
.


