


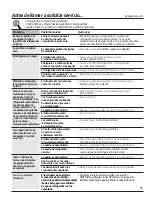


Problema
Posibles causas
Qué hacer
La luz del compartimiento No hay corriente en el toma
5HHPSODFHHOIXVLEOHRYXHOYDDLQLFLDUHOLQWHUUXSWRU
del refrigerador no
corriente.
funciona
Bombilla quemada o suelta.
&RQVXOWHODVHFFLyQ
Cómo reemplazar la bombilla.
Aire caliente de la parte
Motor de enfriamiento normal
de abajo del refrigerador del flujo del aire. En el proceso
de refrigeración, es normal
que salga calor de la parte
inferior del refrigerador. Algunas
cubiertas de piso son sensibles y
se decolorarán ante estas
temperaturas normales y seguras.
Congelamiento de
Los alimentos están muy
0XHYDORVDOLPHQWRVOHMRVGHOYHQWLODGRUFHUFDGHORV
alimentos en el
cercanos al ventilador en la
controles).
refrigerador
parte posterior del refrigerador.
El control del refrigerador
0XHYDHOFRQWUROGHOUHIULJHUDGRUDXQDWHPSHUDWXUD
está en un nivel demasiado frío. menos fría un incremento a la vez.
Brillo color naranja
El calentador de descongelación
(VWRHVQRUPDO
en el congelador está
encendido.
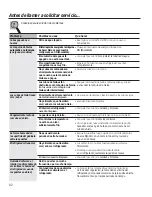
Los compartimientos
Los compartimientos de la
7UDWHGHLQVWDODUORVFRPSDUWLPLHQWRV
en
de la puerta no encajan
puerta del congelador son
ambas puertas.
de tamaño diferente a los
compartimientos de la puerta
del
refrigerador.
Los controles
Algunos modelos no tienen
6LSXHGHYHUQ~PHURVEODQFRVHQHOFRQWURO
no encienden
controles luminosos.
el modelo no tiene controles luminosos.
/X]GHOUHIULJHUDGRUTXHPDGD
&RQVXOWHODVHFFLyQ
Cómo reemplazar las bombillas.
o suelta.
El agua tiene un
El dispensador de agua no
'LVSHQVHHODJXDKDVWDTXHWRGRHOVLVWHPDGHODJXDVH
sabor/olor malo
se uso por mucho tiempo.
llene de nuevo.
El agua en el primer
Eso es normal con un
(VSHUHKRUDVSDUDTXHVHHQIUtHHOUHIULJHUDGRU
vaso está tibia
refrigerador recién instalado.
El dispensador de agua no
'LVSHQVHHODJXDKDVWDTXHWRGRHOVLVWHPDGHODJXDVH
se uso por mucho tiempo.
llene de nuevo.
El sistema de agua se ha
(VSHUHDOJXQDVKRUDVSDUDTXHVHHQIULpHODJXD
desaguado.
No sale agua y el
Está tapada la línea de agua
/ODPHDXQSORPHUR
dispositivo para hacer
o la llave de paso.
hielo no funciona
GEAppliances.com
93
Содержание GTZ21GCESS
Страница 62: ...62 Notes...


