background image

EN

EN

Troubleshooting Tips

Remote Control

Is the unit plugged into a working AC outlet?

Try plugging it into one that you know will
work.

Is the unit on?

Press

 RADIO ON / BAND 

or

 PLAY PAUSE

to turn the unit on.

Have you selected the correct function when
pressing on the buttons?

For example, if the unit is in CD mode and
you try tuning to a particular radio frequency,
the remote control is not going to look like
it’s working.  In such cases, press 

RADIO ON /

BAND

 to select radio or 

PLAY PAUSE

 to

select CD function first, then press on the
buttons.

Are the batteries weak?

Try replacing old batteries with some fresh
ones.

Are you pointing the remote control directly
at the unit while pressing the buttons?

You should be, because the remote control
sensor at the unit is right at the center of the
display.

Are you too far from the unit when using the
remote control?

The remote control sensor can only sense
signals (from the remote control) within a
limited distance.  So move closer towards the
unit.

Are there any obstacles between the remote
control and the unit?

If there are, move all objects standing in the
way between the remote control and the
unit.

16

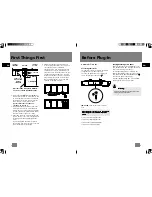
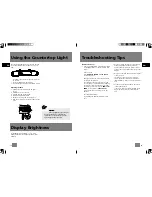
Using the Countertop Light

15

Display Brightness

The countertop light switch is located on the side
of the unit, and has three settings: HI, LO, and
OFF.

Replacing the Bulb

1. Unplug the unit cord from the AC power

outlet.

2. Unlatch the cover to open it.
3. Unscrew and remove the bulb.
4. Install the replacement bulb.
5. Swing the cover up and snap it in place.
6. Plug the cord into the AC outlet, and reset the

clock.

•   For dimmer light, move the light switch to the

LO position.

•   For more illumination, switch to HI.
•   To turn the light off, place Light switch to OFF.

Caution:

Caution:

Caution:

Caution:

Caution:

Use only appliance-type bulb with a

maximum of 40-watt or equivalent for
replacement. To prevent hazard, do not
operate light without the cover.

In standby mode, press 

VOL -

 or 

+

 to select

display brightness level (bright (normal) / dim /
dimmer)

DISC  PLAYER

OFF RADIO

Hz

kHz

er

OFF

MINUTE

SET

HOUR

TIMER  ON/SET

STOP

REPEAT

TRACK
SEARCH

SHUFFLE

PLAY/PAUSE

CD

Содержание GES050

Страница 1: ...PORTER Thomson Inc P O Box 1976 Indianapolis IN 46206 1976 2006 Thomson Inc Trademark s Registered Marque s Deposée s Marca s Registrada s 5636 6750 EN E www ge electronics com Printed In China Impreso en China IMPORTADOR Comercializadora Thomson de México S A de C V Álvaro Obregón No 151 Piso 13 Col Roma Delegación Cuauhtémoc C P 06700 México D F Telefono 52 55 11 020360 RFC CTM 980723 KS5 EN E ...

Страница 2: ...ent or relocate the receiving antenna Increase the separation between the equipment and the receiver Connect the equipment into an outlet on a circuit different from that to which the receiver is connected Consult the dealer or an experienced radio TV technician for help Also the Federal Communications Commission has prepared a helpful booklet How To Identify and Resolve Radio TV Interference Prob...

Страница 3: ... con el borde delantero del cabinete FRONT FRENTE Cut out on solid black line Corte sobre la línea sólida negra Cut out on solid black line Corte sobre la línea sólida negra Fold guidelines for cabinet with overhang Líneas de guía para ser dobladas en la parte sobresaliente de los gabinetes Cut out on solid black line Corte sobre la línea sólida negra Cut out on solid black line Corte sobre la lín...

Страница 4: ... the INSIDE of the cabinet if a countersink attachment for your drill is available This will eliminate the use of washers and allow the screw heads to be flush with the floor of your cabinet If you cannot countersink the holes use the supplied washers 3 Remove Template and clean drill shavings from inside and underside of cabinet 4 If your cabinet does not have an overhang go to Step 5 If your cab...

Страница 5: ... LONGER THAN CABINET OVERHANG 3 8 MINIMUM 3 4 MAXIMUM CABINET OVERHANG CABINET BOTTOM WASHER SPACERS SELECTED SCREWS WHICH MEET MINIMUM BUT DO NOT EXCEED MAXIMUM LENGHT 5 Insert screws FROM INSIDE THE CABINET The washers must be used on metal cabinets and on wood cabinets if you did not countersink the drilled holes Position washers flat side down and place screws into the holes If your cabinet do...

Страница 6: ...rrupted for more than 2 seconds You need to reset the clock time to stop the display from blink Installing Back up Battery 1 The compartment door is located at the side of the Spacemaker Rotate the lock in the direction of the arrow until it is released Remove the compartment door 2 Before inserting the batteries observe the polarities that is and of the batteries then relate the polarities to the...

Страница 7: ...attery compartment lid open by pushing it in the direction shown by the arrow on the back of the remote control 2 Before inserting the batteries observe the polarities that is and of the batteries then relate the polarities to the engraved diagram inside the battery compartment Now insert the batteries 3 After installation of the batteries replace and fit the lid to cover the batteries You should ...

Страница 8: ...rease volume level Selecting Radio TV Band Press RADIO ON BAND to select between FM AM and TV band Tuning to a Station Channel Press to tune down radio frequency or select the previous TV channel Press to tune up radio frequency or select the next TV channel Automatic Station Channel Search Press and hold or for more than 1 second and release to start automatic station channel search in the direct...

Страница 9: ...ory location to the selected station P will flash with the next available memory location light on the display If you wish to assign another memory location or overwrite a previously set memory press PRESET MEMO RECALL on remote control repeatedly to select the memory location 3 Press SET again to confirm selection Memory Recall Press PRESET MEMO RECALL on remote control repeatedly to recall prese...

Страница 10: ... limited distance So move closer towards the unit Are there any obstacles between the remote control and the unit If there are move all objects standing in the way between the remote control and the unit 16 Using the Countertop Light 15 Display Brightness The countertop light switch is located on the side of the unit and has three settings HI LO and OFF Replacing the Bulb 1 Unplug the unit cord fr...

Страница 11: ...ens care Cleaning the Exterior Prior to cleaning the exterior be sure to unplug the power cord from the AC power outlet Wipe the exterior with a soft clean and slightly water dampened cloth Precautions Never open the cabinet under any circumstances Any repairs or internal adjustments should be made only by a trained technician Warning Never operate this product with the cabinet removed The CD play...

Отзывы: