background image

Installation

Instructions

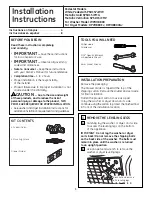
KIT CONTENTS

4 Support Pads

4 Mounting Screws

Drawer Divider

1

TOOLS YOU WILL NEED

Phillips Head 
Screwdriver

9/16

Open End Wrench 

or Adjustable Wrench

8 mm Socket Wrench

REMOVE THE LEVELING LEGS

Carefully lay the washer or dryer on its side 
to access the leveling legs on the bottom 
of the appliance.

IMPORTANT: Do not lay the washer or dryer 
on its back! Do not remove the shipping bolts 
on the back side of the washer. The bolts must
remain in place until the washer is returned 
to an upright position.

Use an open-end wrench to remove the
washer or dryer leveling legs.

B

A

1

INSTALLATION PREPARATION

Remove the packaging.
The Drawer divider is taped at the top of the
shipping carton. Remove the divider and set aside
for final installation.
Flatten the product carton to use as a pad 
to lay the washer or dryer down on its side.
Continue using the carton to protect the finished floor
in front of the installation location.

Back out and remove 
all 4 leveling legs

Instructions en français :  . . . . . . . . . . . . . . . .4
Instrucciones en español:   . . . . . . . . . . . . . . .8

Pedestal Models
White Pedestal SPSD157JWW
Metallic Gold SPSD157JMG
Metallic Vermillion SPSD157JMV
For Washer Model: WPDH8800
For Dryer Models: DPVH880EJ, DPVH8800GJ

BEFORE YOU BEGIN

Read these instructions completely 
and carefully.

IMPORTANT 

Save these instructions

for local inspector’s use.

IMPORTANT 

Observe all governing

codes and ordinances.

• Note to Consumer – 

Keep these instructions 

with your Owner’s Manual for future reference.

• Completion time – 

1 to 2 hours

Proper installation is the responsibility 
of the installer. 

Product failure due to improper installation is not
covered under the Warranty.

CAUTION 

— Due to the size and weight 

of these products, and to reduce the risk of 
personal injury or damage to the product, TWO
PEOPLE ARE REQUIRED FOR PROPER INSTALLATION.

See washer and dryer installation instructions for
additional installation requirements and guidelines.

Содержание DPVH8800GJ

Страница 1: ...ontinue using the carton to protect the finished floor in front of the installation location Back out and remove all 4 leveling legs Instructions en français 4 Instrucciones en español 8 Pedestal Models White Pedestal SPSD157JWW Metallic Gold SPSD157JMG Metallic Vermillion SPSD157JMV For Washer Model WPDH8800 For Dryer Models DPVH880EJ DPVH8800GJ BEFORE YOU BEGIN Read these instructions completely...

Страница 2: ...the unit until it is aligned front to back Use an 8 mm socket wrench to securely tighten the screws C B A 3 PREPARE THE PEDESTAL Pull the drawer out as far as it will go Remove screws from drawer slides Slide drawer out of the base and set aside FOR DRYERS ONLY Locate the 4 support pads from the parts package Each pad has 2 protrusions that fit into the holes on top of the pedestal Press the rubbe...

Страница 3: ...touching the floor Push and pull on the back right and then the back left of your washer or dryer D C B A 4 REMOVE SHIPPING SCREWS Remove the 4 shipping screws on the back side of the unit 6 REINSTALL THE DRAWER Check to be sure the slides are closed Slide the drawer into the opening Align the drawer supports to the slides on each side Reinstall the original screws into each drawer slide Tighten b...

Страница 4: ...ou de dommages au produit IL FAUT DEUX PERSONNES POUR UNE BONNE INSTALLATION Reportez vous aux instructions d installation de la laveuse et de la sécheuse pour les directives et exigences supplémentaires d installation OUTILS DONT VOUS AUREZ BESOIN Tournevis Phillips Clé ouverte de 9 16 po ou clé réglable Clé à douille de 8 mm PRÉPARATION DE L INSTALLATION Retirez l emballage Le séparateur de tiro...

Страница 5: ...tel qu indiqué REMARQUE les coussinets de support doivent être installés seulement sur la sécheuse N INSTALLEZ PAS CES COUSSINETS SUR LE PIÉDESTAL DE LA LAVEUSE C B A 2 RETIREZ LES PATTES DE NIVELLEMENT Déposez avec soin la laveuse ou la sécheuse sur le côté pour accéder aux pattes de nivellement au bas de l appareil IMPORTANT ne déposez pas la laveuse ou la sécheuse sur le dos Ne retirez pas les ...

Страница 6: ...re les vibrations assurez vous que les quatres pattes de nivellement en caoutchouc sont fermement en contact avec le plancher Poussez et tirez sur la droite arrière puis sur la gauche arrière de votre laveuse D C B A 4 Instructions d installation 6 INSTALLEZ LE PIÉDESTAL À LA LAVEUSE OU LA SÉCHEUSE Placez le piédestal contre le bas de l appareil Vérifiez pour vous assurer que le devant du tiroir e...

Страница 7: ... tiroir Glissez le séparateur de tiroir dans les fentes au centre du tiroir Le tiroir devrait alors glisser en douceur lorsque vous le poussez pour le fermer D C B A 5 7 Instructions d installation RETIREZ LES VIS D EXPÉDITION Retirez les 4 vis d expédition à l arrière de l appareil 6 FINALISEZ L INSTALLATION Reportez vous aux instructions d installation de la laveuse ou de la sécheuse pour termin...

Страница 8: ... o daños al producto SE REQUIEREN DOS PERSONAS PARA SU CORRECTA INSTALACIÓN Consulte las instrucciones de instalación de la lavadora y la secadora para ver los requisitos y pautas de instalación adicionales HERRAMIENTAS NECESARIAS Destornillador con cabeza Phillips Llave de extremo o ajustable de 9 16 Llave de cubo de 8 mm PREPARACIÓN PARA LA INSTALACIÓN Retire el envoltorio El divisor de cajón es...

Страница 9: ...tra NOTA Las planchuelas de soporte deben instalarse en la secadora únicamente NO INSTALE LAS PLANCHUELAS EN EL PEDESTAL PARA LA LAVADORA C B A 2 RETIRE LAS PATAS NIVELADORAS Apoye cuidadosamente la lavadora o secadora de lado para tener acceso a las patas niveladoras que se encuentran en la parte inferior del artefacto IMPORTANTE No apoye la lavadora o secadora sobre su parte posterior No retire ...

Страница 10: ... apretadas Para reducir la vibración asegúrese de que las cuatro patas niveladoras de goma estén tocando el suelo firmemente Presione y tire en la parte trasera derecha y luego en la parte trasera izquierda de su lavadora D C B A 4 INSTALE EL PEDESTAL EN LA LAVADORA O SECADORA Coloque el pedestal contra la parte inferior de la unidad Verifique que el frente del cajón quede hacia el frente de la un...

Страница 11: ...e cada lado Vuelva a instalar los tornillos originales en cada una de las correderas del cajón Apriete ambos tornillos Abra el cajón por completo Deslice el divisor de cajón a través de las muescas que se encuentran en el centro del cajón Cierre el cajón y pruebe que se deslice suavemente D C B A 5 FINALICE LA INSTALACIÓN Consulte las Instrucciones de instalación de la lavadora o secadora para com...

Страница 12: ...12 Printed in China Imprimé en Chine Impreso en China 49 90344 175D1807P612 12 07 JR ...

Отзывы: