


21
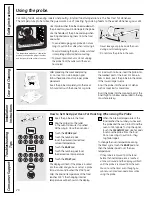
Using the convection oven.
ge.com
The convection oven fan shuts off when the oven door is opened. DO NOT leave the door open for long periods of time
while using convection cooking.
To help you understand the difference
between convection bake and roast and
traditional bake and roast, here are some
general guidelines.
Convection Bake
■
Preheat the oven. See the Using
the Oven– Preheating and Pan Placement
section.
■
Ideal for foods cooked on multiple racks.
■
Good for large quantities of baked foods.
■
Good results with cookies, biscuits,
brownies, cupcakes, cream puffs,
sweet rolls, angel food cake and bread.
The convection fan circulates the heated
air evenly over and around the food.
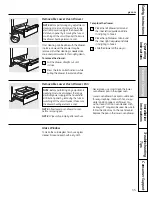
Convection Roast
■
Good for large tender cuts of meat,
uncovered.
The convection fan circulates the heated air
evenly over and around the food. Meat and
poultry are browned on all sides as if they
were cooked on a rotisserie. Heated air will
be circulated over, under and around the
food being roasted. The heated air seals in
juices quickly for a moist and tender product
while, at the same time, creating a rich
golden brown exterior.
Roasts or poultry should be cooked on rack
position (A).
When you are convection roasting, it is
important that you use a broiler pan and grid
for best convection roasting results. The pan
is used to catch grease spills and the grid is
used to prevent grease spatters.
■
Place the rack in rack position (A).
In a convection oven, a fan circulates
hot air over, under and around the food.
This circulating hot air is evenly
distributed throughout the oven cavity.
As a result, foods are evenly cooked
and browned—often in less time than
with regular heat.
NOTE:
To maximize cooking evenness,
the fan is designed to rotate in both
directions with a pause in between.
This is normal.
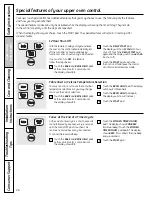
Auto Recipe
™
Conversion
You can use your favorite recipes
in the convection oven.
When using CONVECTION BAKE,
the oven will automatically convert
the oven temperature from regular
baking to Convection Bake temperatures.
Using the number pads, enter
the temperature recommended
in the recipe.
Touch the
START
pad.
The display will show the temperature
you entered from your recipe. The
oven will automatically convert it to
the convection cooking temperature.
Touch the
CLEAR/OFF
pad when
baking is finished.
■
Use pan size recommended in the recipe.
■
Some package instructions for frozen
casseroles, main dishes or baked goods
have been developed using commercial
convection ovens. For best results in
this oven, preheat the oven and use
the temperature, for regular baking,
on the package.
Operating
Instructions
Car
e
and
Cleaning
Installation
Instructions
Tr
oubleshooting
Tips
Safety
Instructions
Consumer
S
uppor
t


