background image


R e m o v i n g   t h e   p r i n t .   D a v i d   v s .   G o l i a t h  

After


the


print


finishes


you


can


immediately


pop


it


off


(unless


it’s


very


small


in


which


case


you


may


want


to


let


it


cool


for


a


few


minutes).


If


the


first


layer


printed


correctly


you


should


see


no


curling


and


the


print


should


be


easy


to


remove.


USING


EXTREME


CAUTION


take


the


supplied


scraper


and


gently


tap


at


the


edges


of


the


print.


We


have


found


this


tapping


action


is


much


safer


and


much


easier


to


remove


a


model


rather


than


pure


brute


force


and


it


is


also


better


for


the


print


bed.


Look


for


corners


of


the


model


and


tap


them


with


the


scraper


flat


on


the


bed.


After


several


taps


the


print


should


pop


off


the


bed.


If


the


print


has


a


large


surface


area


on


the


print


bed


it


may


be


harder


to


remove


and


you


may


have


to


slide


the


scraper


below


the


model.


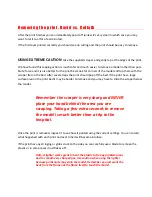
Remember


the


scraper


is


very


sharp


and


NEVER


place


your


hand


behind


the


area


you


are


scraping.


Taking


a


few


extra


seconds


to


remove


the


model


is


much


better


than


a


trip


to


the


hospital.


Once


the


print


is


removed,


inspect


it


to


see


how


it


printed


using


the


current


settings.


You


can


record


what


happened


with


each


print


and


over


time


it


will


become


intuitive.


If


the


print


has


any


stringing


or


globs


stuck


to


the


side


you


can


carefully


use


a


blade


to


remove


the


plastic


or


in


some


cases


it


just


flakes


off.


Note:


A


lighter


works


great


to


heat


the


plastic


to


fix


any


problem


areas


and


to


smooth


very


sharp


edges.


Use


caution


when


using


the


lighter


because


particulate


may


stain


the


model.


Remember


you


just


want


the


heat


from


the


flame


not


the


flame


itself


to


touch


the


model.


Содержание gMax 1.5

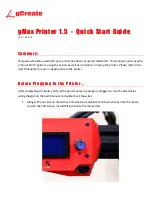
Страница 1: ...the printer Please refer to the User Manual for a more in depth guide to the printer Before Plugging In the Printer After completing the build verify all the printer wires are properly plugged in Use...

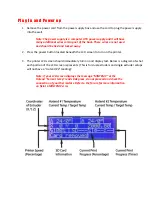
Страница 2: ...power button located beneath the LCD screen to turn on the printer 3 The printer LCD screen should immediately turn on and display text Below is a diagram of what each portion of the LCD screen repres...

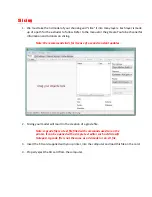
Страница 3: ...r for its ease of use and constant updates 2 Slicing your model will result in the creation of a gcode file Note A gcode file is a text file filled with commands used to run the printer It can be open...

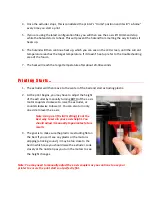
Страница 4: ...insert into the extruder These are swing arms are made of carbon fiber 4 Pinch the extruder arm above the spring and insert filament into to hole at top 5 Slide filament in until you see it enter the...

Страница 5: ...knob this is your accept button and scroll down to Print from SD and push in the knob again 4 Select the file you wish to print and push the knob Your first Print 1 First you will see the extruder mov...

Страница 6: ...er of the bed and start extruding plastic 2 As the print begins you may have to adjust the height of the extruder by manually turning BOTH of the z axis motor couplers clockwise to raise the extruder...

Страница 7: ...ightly above print bed allowing filament to be evenly spread onto the surface The filament should be a clean continuous line throughout the whole print Solution Nothing Keep an eye on the print and le...

Страница 8: ...ckets This is especially true for new spools of filament Adjust Minimum Z Axis Height You should also adjust the z axis endstop screw to set the new zero point The zero point is the lowest point the e...

Страница 9: ...face area on the print bed it may be harder to remove and you may have to slide the scraper below the model Remember the scraper is very sharp and NEVER place your hand behind the area you are scrapin...

Отзывы: