34 Using Your Gateway Solo 3150 Notebook
5.
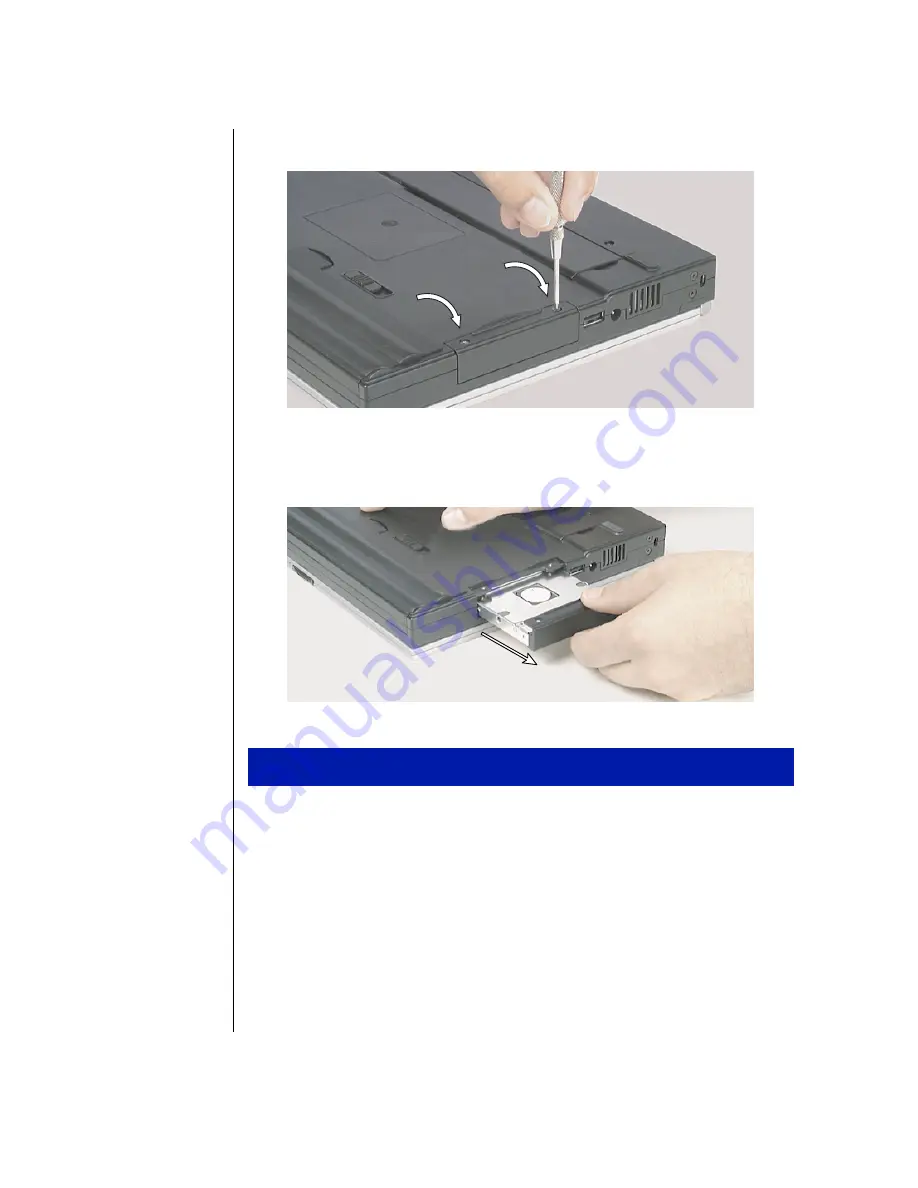
Remove the two screws that secure the hard disk drive.
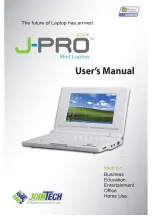
6.
Pull the drive straight out.
1.
Make sure the power is turned off, the AC power is disconnected, and
the battery is removed.
2.
Slide the new drive firmly into the bay, then secure the drive with the
two screws.
3.
Turn the notebook over, connect the AC adapter, and insert the battery.
4.
Start up the system. If this is a first-time installation, follow the
information that accompanied the drive to prepare it for use.
To replace the hard disk drive
Содержание Solo 3150
Страница 4: ...iv Using Your Gateway Solo 3150 Notebook ...
Страница 6: ...2 Using Your Gateway Solo 3150 Notebook Keyboard and LCD panel A B C D C ...
Страница 12: ...8 Using Your Gateway Solo 3150 Notebook Bottom C B A D ...
Страница 14: ...10 Using Your Gateway Solo 3150 Notebook ...
Страница 20: ...16 Using Your Gateway Solo 3150 Notebook ...
Страница 50: ...46 Using Your Gateway Solo 3150 Notebook ...
Страница 60: ...56 Using Your Gateway Solo 3150 Notebook ...
Страница 68: ...64 Using Your Gateway Solo 3150 Notebook ...
Страница 69: ...Appendix A Accessories ...
Страница 71: ...Appendix B Using the BIOS Setup Program ...
Страница 74: ...70 Using Your Gateway Solo 3150 Notebook ...
Страница 75: ...Appendix C Contacting Gateway ...
Страница 77: ...73 ...


