background image

CHAPTER

3

: Setting Up and Getting Started

18

Connecting the dial-up modem

Your notebook has a built-in 56K modem that you can use to 
connect to a standard telephone line.

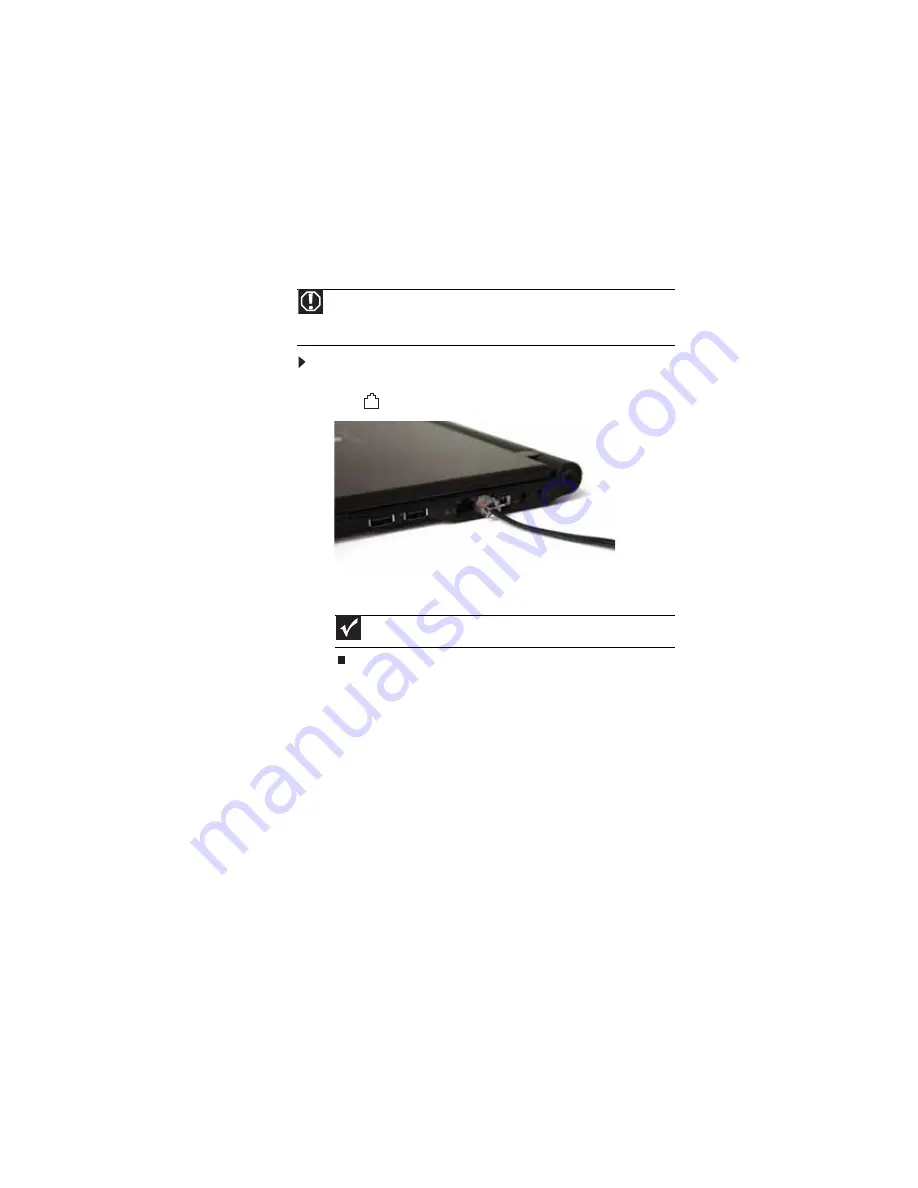
To connect the modem:


1

Insert one end of the modem cable into the modem 
jack

on your notebook.

2

Insert the other end of the modem cable into a 
telephone wall jack. 

Warning

To reduce the risk of fire, use only No. 26 AWG or larger (for example, 

No. 24 AWG) UL-listed or CSA-certified telecommunication line cord for your 
dialup modem connection.

Important

The modem will not work with digital or PBX telephone lines.

Содержание NX100X - Core Solo 1.06 GHz

Страница 1: ...NOTEBOOK REFERENCEGUIDE...

Страница 2: ......

Страница 3: ...d comfortably 14 Reducing eye strain 14 Setting up your computer desk and chair 15 Sitting at your notebook 15 Avoiding discomfort and injury from repetitive strain 15 Connecting the AC adapter 16 Pro...

Страница 4: ...ce 39 Connecting a USB device 39 Connecting an IEEE 1394 device 40 Viewing the display on a projector or monitor 41 Adjusting the display properties 42 Using the projector or monitor for a presentatio...

Страница 5: ...ebook screen 66 Maintaining the battery 66 Storing batteries 67 Cleaning CDs or DVDs 68 Recovering your system 68 Recovering pre installed software and drivers 69 Using Microsoft System Restore 75 Rec...

Страница 6: ...01 Memory card reader 102 Modem cable or DSL 102 Modem dial up 102 Mouse 106 Networks wired 107 Networks wireless 108 Passwords 110 PC Cards 111 Pointing device 111 Power 111 Printer 112 Sound 113 Sta...

Страница 7: ...CHAPTER1 1 About This Reference About this guide Accessing your online User Guide Gateway contact information Microsoft Certificate of Authenticity For more information...

Страница 8: ...User Guide In addition to this guide your online User Guide has been included on your hard drive Your User Guide is an in depth easy to read manual that includes information on the following topics H...

Страница 9: ...label found on the bottom of your notebook includes the product key code for your operating system For more information For more information about your notebook visit Gateway s Support page at www gat...

Страница 10: ...CHAPTER 1 About This Reference 4...

Страница 11: ...CHAPTER2 5 Checking Out Your Notebook Front Left Right Bottom Keyboard area...

Страница 12: ...ep mode LED off Notebook is off Battery charge indicator LED blue Battery is fully charged LED purple Battery is charging LED blinking red Battery charge is very low LED solid red Battery is malfuncti...

Страница 13: ...tors designed for your Gateway notebook Ventilation fan Helps cool internal components Warning Do not work with the notebook resting on your lap If the air vents are blocked the notebook may become ho...

Страница 14: ...Memory card reader Insert a memory card from a digital camera MP3 player PDA or cellular telephone into the memory card reader For more information see Using the memory card reader on page 36 The mem...

Страница 15: ...odem cable into this jack For more information see Connecting the dial up modem on page 18 IEEE 1394 port Plug an IEEE 1394 also known as Firewire or i Link device such as a digital camcorder or MP3 p...

Страница 16: ...nes or amplified speakers are not plugged in Memory bay Install a memory module into this bay For more information see Adding or replacing memory modules on page 83 Battery latch Slide to release the...

Страница 17: ...nto these slots If these slots are blocked your notebook may overheat resulting in unexpected shutdown or permanent damage to the notebook Caution Provide adequate space around your notebook so air ve...

Страница 18: ...page 55 Keyboard Provides all the features of a full sized computer keyboard For more information see Using the keyboard on page 24 Touchpad Provides all the functionality of a mouse For more informat...

Страница 19: ...apter Connecting the dial up modem Connecting to a broadband modem or network Starting your notebook Turning off your notebook Restarting rebooting your notebook Using the status indicators Using the...

Страница 20: ...book on a rigid hard surface and make sure that you keep the ventilation openings on the sides clear Reducing eye strain Sunlight or bright indoor lighting should not reflect on the screen or shine di...

Страница 21: ...r shoulders relax while you type Adjust the chair height adjust the forward tilt of the seat or use a footrest to distribute your weight evenly on the chair and relieve pressure on the back of your th...

Страница 22: ...that can cause serious injury or death Contact Gateway about returning defective AC adapters Caution Make sure that you use the AC adapter that came with your notebook or one of the same type purchas...

Страница 23: ...ity coming into your notebook can increase to levels far above normal levels and cause data loss or system damage Protect your notebook and peripheral devices by connecting them to a surge protector w...

Страница 24: ...m 1 Insert one end of the modem cable into the modem jack on your notebook 2 Insert the other end of the modem cable into a telephone wall jack Warning To reduce the risk of fire use only No 26 AWG or...

Страница 25: ...se to connect to a cable or DSL modem or to a wired Ethernet network To connect to a cable or DSL modem or to a wired Ethernet network 1 Insert one end of the network cable into the network jack on yo...

Страница 26: ...e information on using Windows see Using Windows and Customizing Windows in your online User Guide Warning Do not work with the notebook resting on your lap If the air vents are blocked the notebook m...

Страница 27: ...state is much faster than turning on your notebook after it has been turned completely off Hibernate mode is an alternative to Sleep mode In Hibernate mode your notebook is turned completely off When...

Страница 28: ...r The Windows Task Manager dialog box opens 3 Click the program that is not responding 4 Click End Task 5 Click X in the top right corner of the Windows Task Manager dialog box To restart your noteboo...

Страница 29: ...on you may need to press FN F1 to toggle the status indicators on Indicator Icon Description Wireless network optional LED on Wireless IEEE 802 11 radio is turned on LED off Wireless IEEE 802 11 radio...

Страница 30: ...ly charged LED purple Battery is charging LED blinking red Battery charge is very low LED solid red Battery is malfunctioning Num lock LED on Numeric keypad is turned on LED off Numeric keypad is turn...

Страница 31: ...more information see System key combinations on page 26 Numeric keypad Use these keys to type numbers when the numeric keypad is turned on Press FN to turn on the numeric keypad FN key Press the FN k...

Страница 32: ...uire wireless devices to be turned off while traveling in an airplane IEEE 802 11 communication devices are examples of devices that provide wireless communication Enter Sleep mode or Hybrid Sleep mod...

Страница 33: ...e in bright sunlight Press a second time to decrease the brightness below the normal lowest brightness setting Use this feature in dim lighting situations Press a third time to return the display to t...

Страница 34: ...buttons below the touchpad to select objects Tip You can attach a mouse to the notebook or optional port replicator using a USB port You do not need to shut down the notebook to connect a USB mouse T...

Страница 35: ...of space and need to move the pointer farther lift your finger move it to the middle of the touchpad then continue moving your finger Select an object on the screen Position the pointer over the objec...

Страница 36: ...ty Center The Windows Mobility Center window opens Slide the Brightness control to the desired screen brightness Move an object on the screen Position the pointer over the object Press the left button...

Страница 37: ...binations on page 26 OR Click Start All Programs Accessories then click Windows Mobility Center The Windows Mobility Center window opens Slide the Volume control to the desired volume level To adjust...

Страница 38: ...ere with equipment on commercial aircraft Current aviation regulations require wireless devices to be turned off while traveling in an airplane IEEE 802 11 communication devices are examples of device...

Страница 39: ...ck Turn wireless on or Turn wireless off Bluetooth radio Your notebook may have a Bluetooth radio for communicating with another Bluetooth device such as a printer scanner camera MP3 player headphone...

Страница 40: ...CHAPTER 3 Setting Up and Getting Started 34...

Страница 41: ...and Accessories Using the memory card reader Adding and removing a PC Card Using an optional port replicator Installing a printer or other peripheral device Viewing the display on a projector or moni...

Страница 42: ...slot with the label facing up and the arrow on the label pointing towards the notebook Using a memory card To access a file on a memory card 1 Click Start then click Computer 2 Double click the drive...

Страница 43: ...tation for further information To insert a PC Card Push the card firmly into the PC Card slot label side up until the outer edge of the card is flush with the side of your notebook To remove a PC Card...

Страница 44: ...ch devices directly to your notebook a port replicator lets you make all of those connections at one time When you travel with your notebook you merely disconnect from the port replicator instead of u...

Страница 45: ...o install any software the device needs After doing this you can disconnect and reconnect the device at any time Connecting a USB device Your notebook has USB ports for connecting devices such as a CD...

Страница 46: ...r IEEE 1394 device 2 Connect the other end of the cable to the IEEE 1394 port on your notebook Tip For the location of the USB ports on your notebook see Right on page 9 For the location of the USB po...

Страница 47: ...ug the projector s or monitor s power cord into an AC power source and turn it on Windows recognizes the new hardware and the New Display Detected dialog box opens 5 Select the options for the project...

Страница 48: ...ll Programs Accessories then click Windows Mobility Center The Windows Mobility Center window opens 2 Click Change display settings The Display Settings dialog box opens 3 Click monitor 2 4 Adjust pro...

Страница 49: ...7 Click OK Using the projector or monitor for a presentation You can configure your notebook so the settings are correct each time you give a presentation To use a projector or external monitor for a...

Страница 50: ...light power receptacle Batteries If you run your notebook on battery power for extended periods you may want to buy an additional battery so you can swap batteries when necessary See Changing the batt...

Страница 51: ...ort replicator with your notebook Printers You can attach almost any type of printer to your notebook The most common types are inkjet and laser printers which print in color or black and white Inkjet...

Страница 52: ...CHAPTER 4 Using Drives and Accessories 46...

Страница 53: ...CHAPTER5 47 Managing Power Monitoring the battery charge Recharging the battery Changing the battery Recalibrating the battery Getting the most from your battery Changing notebook power settings...

Страница 54: ...ny unsaved work To monitor the battery charge Move the mouse pointer over the power cord icon or battery icon in the taskbar A message appears showing the remaining battery time and the current power...

Страница 55: ...ook 5 Slide a recharged battery into the notebook until it snaps into place Warning Danger of explosion if battery is incorrectly replaced Replace only with a battery specifically manufactured for you...

Страница 56: ...d let the battery charge completely 2 Disconnect the AC power and restart your notebook 3 Completely discharge the battery 4 After the battery is completely drained reconnect your notebook to AC power...

Страница 57: ...artially charged lithium ion battery does not cause harm because there is no memory Conserving battery power To conserve power while using the battery to power your notebook Turn off wireless networki...

Страница 58: ...ly take electrical adapters Save the battery for times when you cannot use a power adapter If you plan on taking your AC power adapter also take a single plug surge protector If you will have access t...

Страница 59: ...n when you activated Hybrid Sleep mode If the notebook does not experience a power outage while in Hybrid Sleep mode it restarts using the information in current memory thus reducing startup time You...

Страница 60: ...can select one of the defined power plans or create a custom power plan Three power plans are pre defined for you Balanced This is the default power plan which balances performance and battery life Po...

Страница 61: ...nges Changing advanced settings Advanced power settings let you assign different power saving modes to the power button and Sleep system key You can also select which power saving mode is activated wh...

Страница 62: ...are using The Change settings for the plan window opens 2 Click Change advanced power settings The Power Options dialog box opens 3 Click the in front of Sleep then click the in front of Allow hybrid...

Страница 63: ...CHAPTER6 57 Traveling with Your Notebook Packing your notebook Traveling by air Dial up modem Radio frequency wireless connections Files Security Power Additional tips...

Страница 64: ...urity asks you to start your notebook Have your notebook hand inspected or sent through the X ray scanner but never carry it through the metal detector Turn off you notebook for takeoff and landing Tu...

Страница 65: ...ces are examples of devices which use wireless to communicate Files Copy your working files from your desktop computer to your notebook before you travel If you need to access your desktop computer fi...

Страница 66: ...password is set using the BIOS utility To create a startup password 1 Restart your notebook As soon as you see a startup screen press F2 The BIOS Setup utility opens 2 Open the Security menu highligh...

Страница 67: ...the best performance from your notebook avoid using the battery whenever possible monitor the battery charge and use the most efficient power management settings For information on conserving battery...

Страница 68: ...redit card company to learn about emergency travel assistance if your notebook is lost or damaged Take your recovery discs in case you need to install an additional driver or software Tip You can crea...

Страница 69: ...CHAPTER7 63 Maintaining Your Notebook Caring for your notebook Cleaning your notebook Maintaining the battery Cleaning CDs or DVDs Recovering your system...

Страница 70: ...ittle and easy to break in cold temperatures and can melt or warp in high temperatures Damage due to either extreme is not covered by your warranty As a general rule your notebook is safest at tempera...

Страница 71: ...d abrasive or solvent cleaners because they can damage the finish on components Your notebook is cooled by air circulated through the vents on the case so keep the vents free of dust With your noteboo...

Страница 72: ...equently because it cannot hold a full charge Do not expose the battery to high heat or freezing temperatures Hot batteries discharge very quickly and cold ones cannot create as much power Short batte...

Страница 73: ...ion battery use one exclusively and keep the other cool by placing it in the refrigerator Make sure that it is wrapped protectively and that nothing will be dropped on it Do not freeze the battery Do...

Страница 74: ...are drivers To recover software and drivers that were pre installed at the factory see Recovering pre installed software and drivers on page 69 For instructions on reinstalling software and drivers th...

Страница 75: ...software and device drivers that were pre installed at the factory If you need to recover software that did not come pre installed on your system you need to follow that software s installation instr...

Страница 76: ...t have an external recordable disc drive to perform this procedure To create discs for recovering pre installed software and drivers 1 Click Start All Programs Gateway Recovery Center then click Gatew...

Страница 77: ...l the discs as they are completed 6 If multiple discs are required insert the additional blank disks when prompted 7 When the process is finished the Congratulations window opens 8 Click Finish 9 Remo...

Страница 78: ...nstalled click Programs then click Application recovery OR To recover device drivers that were pre installed click Hardware then click Device driver recovery Important If you have recently reinstalled...

Страница 79: ...If a recovery disc does not offer the software or driver you need to recover try another disc To recover software and drivers using recovery discs 1 Insert a software and driver recovery disc into an...

Страница 80: ...oftware you want to recover OR To recover pre installed device drivers click Device driver recovery then click the type of driver you want to recover 3 Click Next 4 If the software or driver is not sh...

Страница 81: ...al restore point each day and also each time you install software or device drivers You can also create a restore point manually For instructions see Manually creating a restore point on page 77 To re...

Страница 82: ...estore then click Next The Choose a restore point dialog box opens 3 Click the restore point you want click Next then click Finish A confirmation message box appears 4 Click Yes Your system is restore...

Страница 83: ...ackup and Restore Center opens 2 On the left side of the window click Create a restore point or change settings then click Next The System Properties dialog box opens to the System Protection tab 3 Cl...

Страница 84: ...up repeatedly press F8 until the Recovery Options screen opens If Windows starts to load instead restart the notebook and try again 3 Press the arrow keys on your keyboard to select Repair Your Compu...

Страница 85: ...using the Windows DVD If you install a new hard drive or completely re format your original hard drive you must recover your system using the Windows Vista operating system DVD You also need to recov...

Страница 86: ...e arrow keys to select the drive containing the Windows DVD then press ENTER and follow the on screen instructions 5 After Windows is completely re installed use the software and driver recovery discs...

Страница 87: ...CHAPTER8 81 Upgrading Your Notebook Preventing static electricity discharge Adding or replacing memory modules Replacing the hard drive kit...

Страница 88: ...on Always hold components by their edges Avoid touching the edge connectors Never slide components over any surface Wear a grounding wrist strap available at most electronics stores and attach it to a...

Страница 89: ...e 82 2 Turn off your notebook 3 Disconnect from the optional port replicator 4 Disconnect the AC adapter modem cable and network cable if they are connected to the notebook 5 Disconnect all peripheral...

Страница 90: ...en the captive memory bay cover screw this screw cannot be removed then remove the cover 8 Gently press outward on the clip at each end of the memory module until the module tilts upward 9 Pull the me...

Страница 91: ...lines up with the tab in the memory bay 11 Gently push the module down until it clicks in place 12 Replace the memory bay cover then tighten the captive screw 13 Insert the battery then turn your note...

Страница 92: ...rive For more information see Backing up files in your online User Guide 3 Follow the guidelines under Preventing static electricity discharge on page 82 4 Turn off your notebook 5 Disconnect from the...

Страница 93: ...hard drive is attached to the back of the cover 11 Remove the screws on the side of the hard drive that secure the hard drive to the hard drive cover 12 Remove the metal shield covering the old drive...

Страница 94: ...OR Connect the power adapter modem cable network cable and external DVD drive 19 Turn on your notebook open the external DVD drive insert the Windows DVD close the DVD drive then restart your noteboo...

Страница 95: ...CHAPTER9 89 Troubleshooting Safety guidelines First steps Troubleshooting Telephone support...

Страница 96: ...onnected to your notebook and an AC outlet and that the AC outlet is supplying power Make sure that the power cord is firmly connected to the AC power adapter If you use a power strip or surge protect...

Страница 97: ...he installation procedures you performed and make sure that you followed each instruction If an error occurs in a program see the program s printed documentation or the online help Troubleshooting Tro...

Страница 98: ...ed try using the diskette again For instructions on running Error checking see Checking the hard drive for errors in your online User Guide You see a Non system disk NTLDR is missing or Disk error err...

Страница 99: ...numerous or dense on your display contact Gateway Customer Care to identify whether a repair or replacement is justified based on the number of pixels affected The display is blank Adjust the brightn...

Страница 100: ...tions on how to adjust the volume control in Windows see Adjusting the volume on page 31 Make sure that Mute controls are turned off If you are using the built in speakers make sure that nothing is pl...

Страница 101: ...c by inserting an opened paper clip into the manual eject hole Ethernet Ethernet troubleshooting is covered under Networks wired on page 107 File management A file was accidentally deleted Recover the...

Страница 102: ...am For instructions on fixing hard drive problems see Checking the hard drive for errors in your online User Guide The hard drive cannot be accessed or you see a General failure reading drive C error...

Страница 103: ...e and are unable to browse the Internet This problem can occur when you have typed a URL Web address incorrectly you have lost your Internet connection or your ISP is having technical difficulties Dou...

Страница 104: ...key to loosen a key that might be stuck then restart your notebook You are pressing a letter key and a number appears on the screen The numeric keypad is turned on For more information about using you...

Страница 105: ...h a VGA input is the best choice Type of connection used You can connect the Media Center computer video output to a TV However the connection type has an affect on the video quality The Media Center...

Страница 106: ...t TVs use this interlaced method to display the picture on the screen a standard interlaced analog TV will most likely flicker when displaying thin lines and small text An interlaced video display dev...

Страница 107: ...mputer or on a non Media Center computer that has a DVD player and DVD decoder software such as PowerDVD The non Media Center computer must also have Windows Vista or Windows XP with Service Pack SP 1...

Страница 108: ...modem jack For the location of your network jack see Right on page 9 See the documentation that came with your modem for additional troubleshooting information Modem dial up Your modem does not dial...

Страница 109: ...ck the dialing properties 1 Click Start then click Control Panel The Control Panel window opens 2 Click Hardware and Sound 3 Click the Phone and Modem Options The Phone and Modem Options dialog box op...

Страница 110: ...ith the modem at a lower connection speed If reducing the connect speed lets you connect call your telephone service The telephone line may be too noisy You cannot connect to the Internet The ISP may...

Страница 111: ...To run modem diagnostics 1 Close all open programs 2 Click Start then click Control Panel The Control Panel window opens 3 Click Hardware and Sound 4 Click Phone and Modem Options The Phone and Modem...

Страница 112: ...ound 3 Click Phone and Modem Options The Phone and Modem Options dialog box opens 4 Click the Modems tab 5 Click the modem you want to adjust then click Properties The Modem Properties dialog box open...

Страница 113: ...rent IP addresses For home networks IP addresses should be 192 168 N N where N is a number you assign between 0 and 254 The first N should be the same for all computers on your network and the second...

Страница 114: ...ur notebook to your home network workgroup to access shared files or printers on your home network You may however be able to access the Internet through your home network Every home network is unique...

Страница 115: ...mputer if other computers with the same network name are within range of your computer You are in a wireless network you can see the network but cannot communicate send files print or get to the Web I...

Страница 116: ...k For more information see Naming the computers and workgroup in your online User Guide If your notebook was previously connected directly to your cable or DSL modem and your ISP requires you to use a...

Страница 117: ...onnecting the AC power adapter see Connecting the AC adapter on page 16 If your notebook is plugged into a surge protector make sure that the surge protector is connected securely to an electrical out...

Страница 118: ...fline button that you may need to press so the printer can start printing Press the button to put the printer online Check the port and cable for bent or broken pins If the printer you want to print t...

Страница 119: ...for adding additional memory You see a Printer is out of paper error message After adding paper make sure that the printer is online Most printers have an online offline button that you need to press...

Страница 120: ...uchpad or pointing device For instructions on how to adjust the touchpad or pointing device settings see Changing mouse touchpad or pointing device settings in your online User Guide The pointer moves...

Страница 121: ...ou have how to questions about using a program see Online Help Printed documentation The Microsoft Windows documentation The software publisher s Web site See the troubleshooting section of this chapt...

Страница 122: ...CHAPTER 9 Troubleshooting 116...

Страница 123: ...APPENDIX A 117 Legal Information Important safety information Regulatory compliance statements Environmental information Notices...

Страница 124: ...rd will fit only into a grounding type outlet This is a safety feature If you are unable to insert the plug into an outlet contact an electrician to install the appropriate outlet If you use an extens...

Страница 125: ...ile operating a wireless device Warning Radio frequency wireless communication can interfere with equipment on commercial aircraft Current aviation regulations require wireless devices to be turned of...

Страница 126: ...ese devices outdoors is prohibited Some circumstances require restrictions on wireless devices United States of America Federal Communications Commission FCC Intentional emitter per FCC Part 15 Low po...

Страница 127: ...ception However there is no guarantee that interference will not occur in a particular installation If this equipment does cause interference to radio and television reception which can be determined...

Страница 128: ...hone company may make changes inits facilities equipment operations or procedures that could affect the operation of this equipment If this happens the telephone company will provide advance notice in...

Страница 129: ...d including interference that may cause undesired operation of the device Unintentional emitter per ICES 003 This digital apparatus does not exceed the Class B limits for radio noise emissions from di...

Страница 130: ...nt should be made by an authorized Canadian maintenance facility designated by the supplier Any repairs or alterations made by the user to this equipment or equipment malfunctions may give the telecom...

Страница 131: ...nvironment by following these simple steps When your electrical or electronic equipment is no longer useful to you take it back to your local or regional waste collection administration for recycling...

Страница 132: ...ssibility of such damages In the interest of continued product development Gateway reserves the right to make improvements in this manual and the products it describes at any time without notices or o...

Страница 133: ...arging 16 48 conserving power 51 icons 48 installing 49 latch 10 locating 10 managing power 51 monitoring charge 48 purchasing 44 recalibrating 50 recharging 16 48 release latch 10 replacing 49 bays b...

Страница 134: ...l diskette drive 9 39 external speakers 9 Firewire 9 39 flash drive 9 39 headphone 9 i Link 9 39 IEEE 1394 9 39 keyboard 9 microphone 9 modem dial up 9 18 monitor VGA 7 41 mouse 9 network 9 19 port re...

Страница 135: ...ial number 3 Support 3 H hard drive bay 10 indicator 23 installing 86 purchasing 44 replacing 86 troubleshooting 96 headphone jack 9 Hibernate mode 52 hot swapping 37 39 Hybrid Sleep mode 26 53 system...

Страница 136: ...leshooting 92 LCD CRT system key 26 line protector 58 line tester 58 lock cable 60 Kensington cable 9 M maintenance cleaning 65 68 Media Center troubleshooting 99 memory bay 10 installing 83 purchasin...

Страница 137: ...mory cards 36 peripheral devices 39 Plug and Play devices IEEE 1394 support for 39 USB support for 39 pointer identifying 28 moving 29 port replicator docking port 7 using 45 power AC adapter 16 52 ad...

Страница 138: ...118 guidelines for troubleshooting 90 posture 15 reducing eye strain 14 setting up computer 15 static electricity 82 scanner installing 39 USB port 9 screen resolution 42 troubleshooting 92 114 scree...

Страница 139: ...r 28 29 moving screen objects 30 opening files folders and programs 29 opening shortcut menu 29 right clicking 29 scroll zone 28 selecting screen objects 29 travel tips 57 troubleshooting audio 113 di...

Страница 140: ...g 40 volume adjusting 27 31 adjusting modem 106 controls 31 muting 27 31 system keys 27 troubleshooting 113 W waking up notebook 21 Windows key 25 Product Key Code 3 wired Ethernet troubleshooting 107...

Страница 141: ......

Страница 142: ...MAN CYCLOPS REF GDE V R2 8 07...

Отзывы: