Chapter 1
13
Using the Keyboard
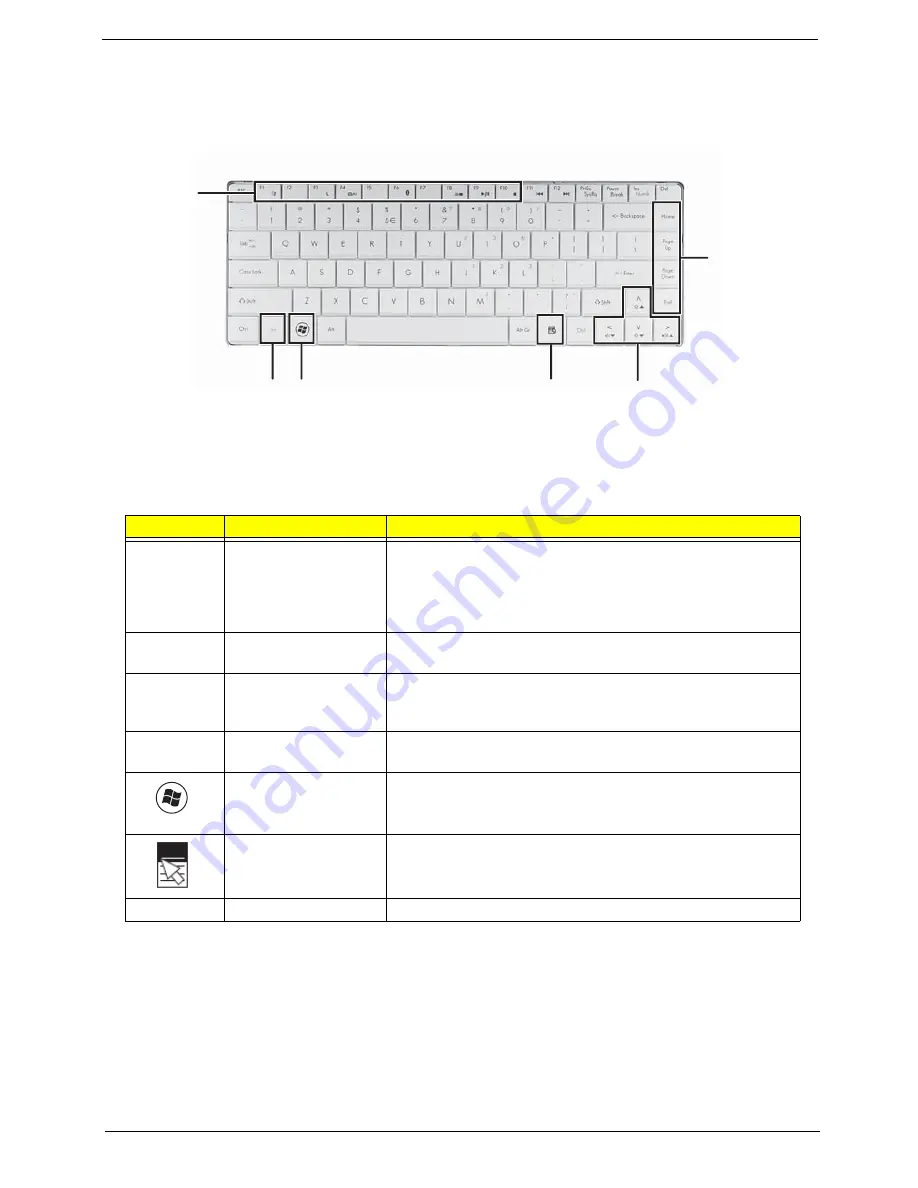
Your Gateway NV42 has a close-to-full-sized keyboard and an embedded numeric keypad, separate cursor,
lock, function and special keys.
Key Types
The keyboard has several different types of keys. Some keys perform specific actions when pressed alone
and other actions when pressed in combination with another key.
Icon
Key Type
Description
Function keys
Press these keys labeled F1 to F12 to perform actions in
programs. For example, pressing F1 may open help. Each
program uses different function keys for different purposes.
See the program documentation to find out more about the
function key actions.
System keys
Press these colored keys in combination with the Fn key to
perform specific actions. See “System Keys” on page 15.
Navigation keys
Press these keys to move the cursor to the beginning of a line,
to the end of a line, up the page, down the page, to the
beginning of a document, or to the end of a document.
Fn key
Press the Fn key in combination with a colored system key to
perform a specific action.
Windows key
Press this key to open the Windows Start menu. This key
can also be used in combination with other keys to open
utilities. See “Windows Keys” on page 14.
Application key
Press this key for quick access to shortcut menus and help
assistants in Windows.
Arrow keys
Press these keys to move the cursor up, down, right, or left.
Function
keys/
System
keys
F
N
key Windows key
Application key Arrow keys
Navigation
keys
Содержание NV42 Series
Страница 6: ...VI ...
Страница 10: ...X Table of Contents ...
Страница 34: ...24 Chapter 1 ...
Страница 51: ...Chapter 2 41 ...
Страница 52: ...42 Chapter 2 ...
Страница 76: ...66 Chapter 3 7 Lift the Upper Cover clear of the computer as shown ...
Страница 78: ...68 Chapter 3 ...
Страница 80: ...70 Chapter 3 7 Lift the Speaker Modules clear of the Upper Cover ...
Страница 85: ...Chapter 3 75 5 Disconnect the Bluetooth cable from the module ...
Страница 87: ...Chapter 3 77 4 Turn the USB Board over and disconnect the USB cable from the board ...
Страница 98: ...88 Chapter 3 4 Remove the LCD Panel rear edge first Place it on a clean surface ...
Страница 144: ...134 Chapter 3 ...
Страница 175: ...Chapter 6 165 ...
Страница 178: ...Appendix A 168 ...
Страница 196: ...186 Appendix C ...
Страница 200: ...190 ...


