CHAPTER 3: Maintaining and Upgrading Your Notebook
www.gateway.com
36
Tips & Tricks
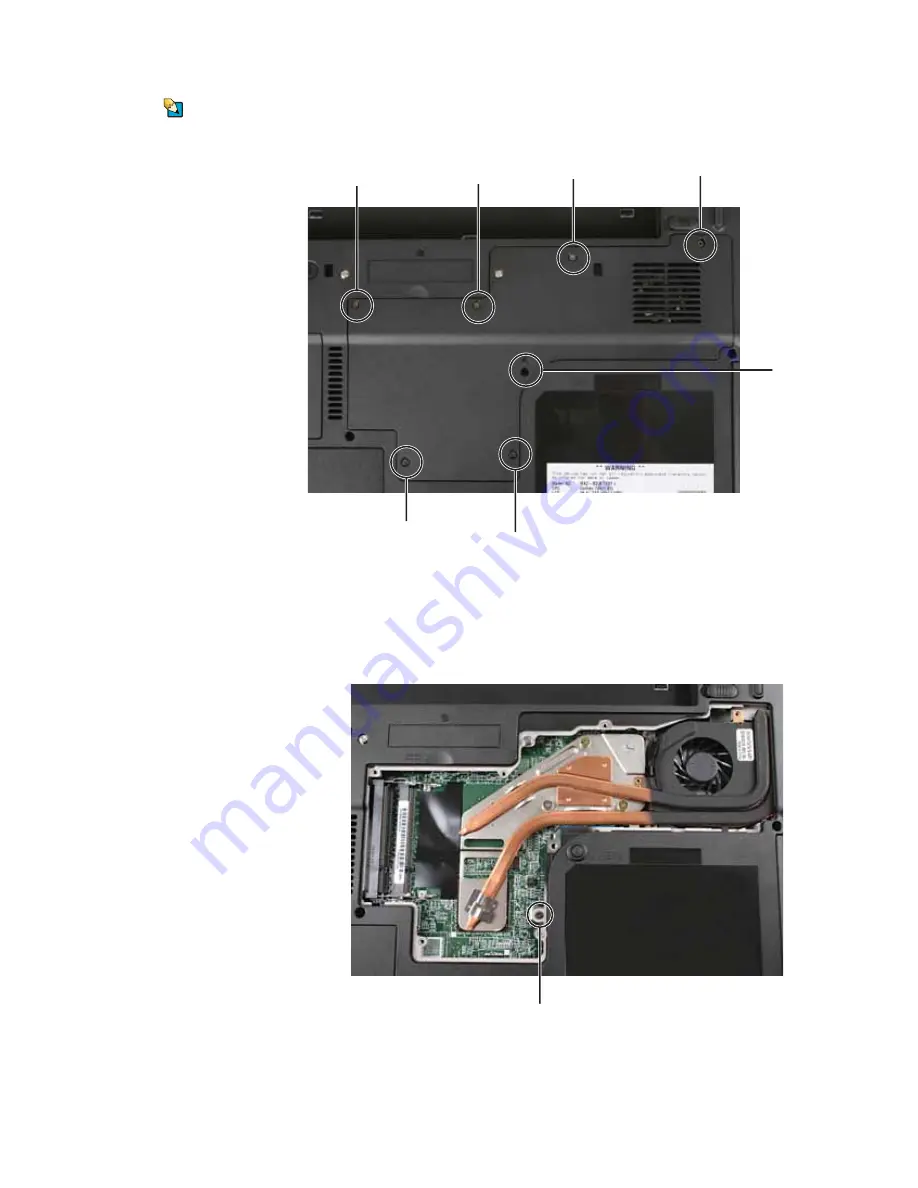
The keyboard screw hole is marked with
a
K
. Depending on your model, not all
screws may be captive.
7
Remove the keyboard screw shown in the following picture, then loosen
the remaining six captive screws (these screws cannot be removed).
8
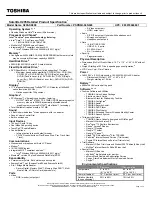
Use the thumb notch to lift the memory bay cover, then remove it. Be
careful not to break off the tabs located on the end of the cover opposite
of the thumb notch.
9
With a small Phillips screwdriver, remove the DVD drive screw, then put it
in a safe place.
10
Turn your notebook over so the top is facing up.
Screw
Screw
Keyboard
screw
Screw
Screw
Screw
Screw
Screw
Содержание MX6633
Страница 1: ...HARDWARE REFERENCE Gateway Notebook...
Страница 2: ......
Страница 8: ...CHAPTER 1 About this reference www gateway com 4...
Страница 62: ...APPENDIX A Safety Regulatory and Legal Information www gateway com 58...
Страница 66: ...Index www gateway com 62...
Страница 67: ......
Страница 68: ...MAN BLADE E K8 C HW REF R1 2 06...


