CHAPTER 5: Upgrading Your Computer
66
4
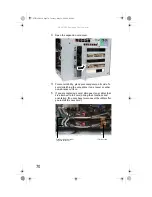
Loosen the four screws that secure the heat sink to the
system board, then remove the heat sink. (The screws
cannot be completely removed.)
5
Release the processor by pushing down on the lever,
then lifting the lever completely up.
Caution
The heat sink has Thermal Interface Material (TIM) located on the
bottom of it. Use caution when you remove the old heat sink or unpack
the new heat sink so you do not damage the TIM.
Screws
Screws
8513162.book Page 66 Tuesday, May 20, 2008 4:09 PM
Содержание FX542X
Страница 1: ...REFERENCE GUIDE 8513162 book Page a Tuesday May 20 2008 4 09 PM...
Страница 2: ...8513162 book Page b Tuesday May 20 2008 4 09 PM...
Страница 10: ...CHAPTER 1 About This Reference 4 8513162 book Page 4 Tuesday May 20 2008 4 09 PM...
Страница 11: ...CHAPTER2 5 Checking Out Your Computer Front Back 8513162 book Page 5 Tuesday May 20 2008 4 09 PM...
Страница 18: ...CHAPTER 2 Checking Out Your Computer 12 8513162 book Page 12 Tuesday May 20 2008 4 09 PM...
Страница 86: ...CHAPTER 5 Upgrading Your Computer 80 8513162 book Page 80 Tuesday May 20 2008 4 09 PM...
Страница 104: ...CHAPTER 6 Maintaining Your Computer 98 8513162 book Page 98 Tuesday May 20 2008 4 09 PM...
Страница 142: ...APPENDIX A Legal Notices 136 8513162 book Page 136 Tuesday May 20 2008 4 09 PM...
Страница 152: ...146 Index 8513162 book Page 146 Tuesday May 20 2008 4 09 PM...
Страница 153: ...8513162 book Page 147 Tuesday May 20 2008 4 09 PM...
Страница 154: ...MAN BTX FX EREC HW REF GDE R0 5 08 8513162 book Page 148 Tuesday May 20 2008 4 09 PM...


