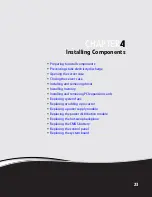
CHAPTER 4: Installing Components
30
To remove and install a hot-swap hard drive:
1
Unlock the bezel (if necessary) and remove it by pulling it from the chassis.
2
Pull the drive release lever out. The drive release lever opens.
3
Pull the drive carrier straight out of the server.
4
If you are replacing a hard drive, remove the four screws that secure the old hard drive
to the drive tray, then remove the drive from the tray. If you are installing a new drive,
remove the dummy hard drive from the drive tray.
5
Using the four screws you removed, install the new hard drive into the drive tray.
6
Make sure that the tray’s release lever is open, then slide the new drive fully into the empty
hot-swap drive bay.
7
Push the lever back into place to secure the hard drive in the bay.
8
Reinstall the bezel, if required, by snapping it into place on the front of the chassis.
Caution
Before you remove a failed drive, use the appropriate software and utilities
installed on the server to stop all activity on the failed drive. Instructions for using
the software are provided by the software manufacturer. Failure to do so may
destroy the data on the drive.
Содержание E-9722R
Страница 1: ... E 9722R Server USERGUIDE ...
Страница 2: ......
Страница 6: ...Contents iv ...
Страница 16: ...CHAPTER 1 Checking Out Your Gateway Server 10 ...
Страница 28: ...CHAPTER 3 Maintaining Your Server 22 ...
Страница 58: ...CHAPTER 4 Installing Components 52 ...
Страница 66: ...CHAPTER 5 Using the BIOS Setup Utility 60 ...
Страница 84: ...CHAPTER 6 Troubleshooting 78 ...
Страница 92: ...APPENDIX A Server Specifications 86 ...
Страница 93: ...APPENDIXB 87 BIOS Settings ...
Страница 101: ...APPENDIXC 95 Legal Information ...
Страница 106: ...APPENDIX C Legal Information 100 ...
Страница 110: ...Contents 104 ...
Страница 111: ......
Страница 112: ...A MAN E 9722R USR R0 02 07 ...


