


Intraplex
®
IP Link 100e
Quick Start Guide v1.0
Page
4
of
8
6. (
If other cards are installed
) For
those customers with an Orban
processor or Exgine card installed
you will not see empty standoffs.
Remove the two screws shown in
Figure 5
that hold the top card onto
the standoffs below. Install the
supplied standoffs in place of the
screws that were removed. Keep
the screws as they can be used in
future steps.
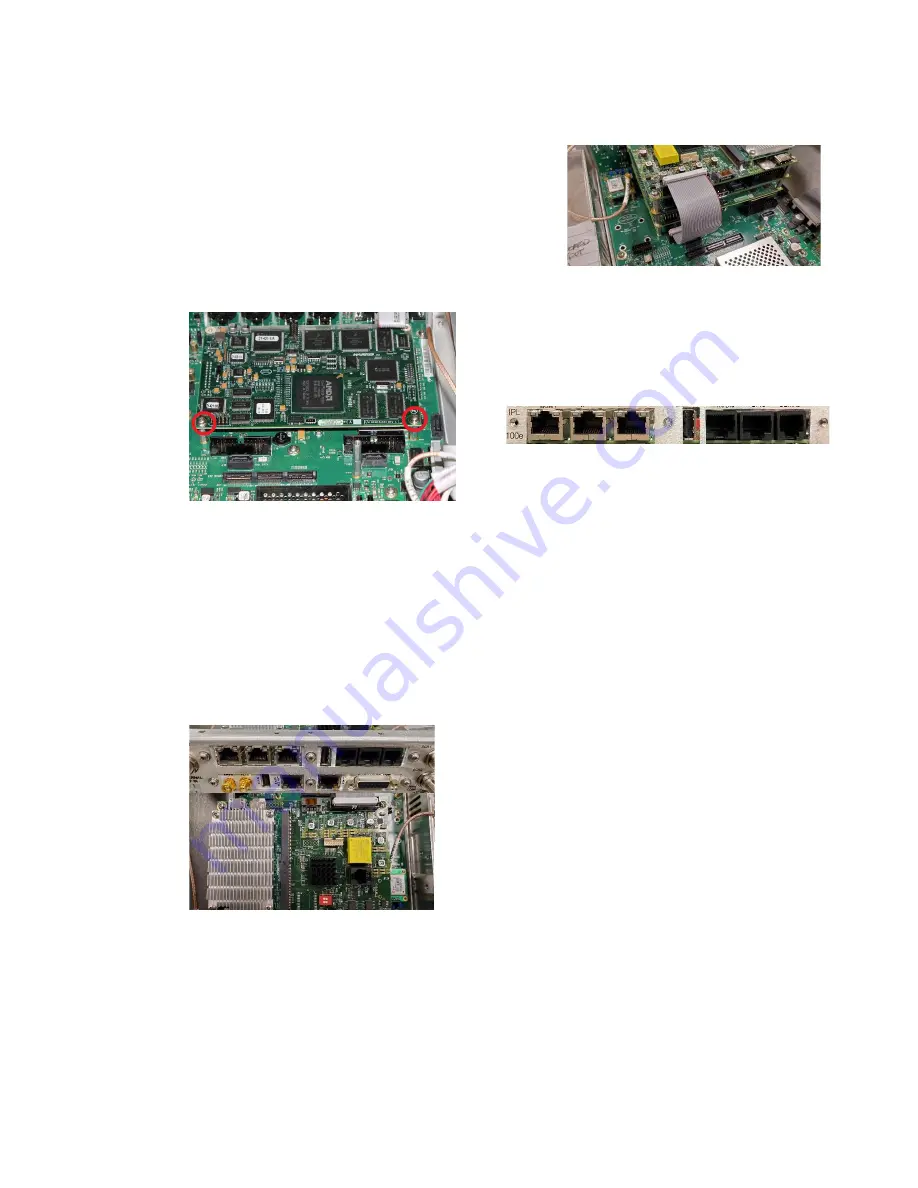
Figure 5. Install Standoffs With
Other Cards
7. Set the 100e card on top of the new
standoffs. The screws should line up
on top of the posts as well as the
three holes that previously held up
the rear close-up plate. Start all
screws by fingers first and do not
tighten. Once all screws are started,
tighten them down (
Figure 6
).
Figure 6. Install 100e
8.
Install supplied cables as shown
below (
Figure 7
).
Figure 7. Install Cables
9. Replace top cover and screw it
down.
B)
Set Up Network Connection
Figure 8. 100e Back Panel Connections
Connect your IP Link 100e MGMT
interface to the desired network. See the
above picture to identify the interfaces
(
Figure 8
). Network interfaces can be
configured from the Flexiva web
interface once 100e has been installed
in Flexiva. Alternatively, you can
connect to the MGMT interface on the
default IP (192.168.1.1) and do the
network setup once you are in the 100e
web interface.
C)
Access 100e
1. Access the software by typing in the
system’s IP through Chrome or
Firefox on a computer that is
connected to the same network as
the IP Link 100e.
2. The login page will be displayed
whenever IP Link 100e is first
accessed.
D)
First Login
The IP Link 100e has a default
administrator account with the ability to
create and manage accounts, view log
and configuration files, and upload
feature keys. To configure user
accounts, you will first need to change
the default admin password and create
an engineer account.
MGMT WAN1 WAN2 USB Audio GPIO Serial


